Articles in Vegetables

Autumn and winter are wonderful seasons to enjoy family celebrations and the crackling glow of fireplaces. But for those of us who rely on farmers markets and a farm-to-table cycle, those cold weather months are not as much fun as summer.
With storm clouds outside, staring into the refrigerator looking for inspiration, I yearn for the produce of summer: leafy greens, corn and full-bodied tomatoes. But there is a way to enjoy the sweet-acidic deliciousness of tomatoes even in the darkest days of winter. Just look in your freezer.
Instead of relying on cans of store-bought whole stewed tomatoes, tomato paste and tomato sauce, buy ripe tomatoes at the farmers market, roast and freeze them to be used in braises, soups and sauces. Once blasted with heat in the oven, the tomatoes happily take to the freezer if they are covered in liquid.
Enjoy frozen roasted tomatoes whole or puree into sauce, and as rain beats against your windows and snow accumulates on your lawn, you will call back those heady summer flavors.
A Taste of Summer From Your Freezer
One in a series of stories about freezing late-summer produce to enjoy all winter.
More from Zester Daily:
» Turn summer tomatoes into sauce for winter
Oven-roasted tomatoes to use as a side dish or in sauces
Use ripe and over-ripe tomatoes. If you can find only unripe, hard tomatoes, leave them in a sunny spot on the kitchen counter until they ripen. Bruised tomatoes are OK as long as you use a sharp paring knife to remove the damaged parts. Avoid tomatoes with broken skin because of the risk of mold.
Any kind of tomato can be used: heirloom, Roma, cherry, large or small salad tomatoes.
This time of year, over-ripe tomatoes are deeply discounted at our farmers market so I buy five pounds or more to make a lot of sauce to freeze.
A food mill is helpful when making the sauce. If one is not available, a fine meshed wire strainer will do almost as well.
When roasting the tomatoes, it is important to use parchment paper or a nonstick Silpat mat to prevent the tomatoes from sticking to the baking sheet. With a Silpat mat, none of the good bits that caramelize on the bottom are wasted.
Roasted Tomatoes
Tomatoes love the sun’s heat when they’re growing. And they love the oven’s heat that coaxes a rich umami sweetness out of their naturally acidic souls.
That sweetness is at the heart of the roasted tomatoes that will be in your freezer.
Prep time: 5 minutes
Roasting time: 60 minutes
Yield: 1 to 2 quarts
Ingredients
5 pounds tomatoes, washed, patted dry
1 tablespoon olive oil
¼ teaspoon sea salt
¼ teaspoon freshly ground black pepper
Directions
1. Preheat oven to 350 F.
2. Line a large baking sheet with a Silpat mat or parchment paper cut to size. Use a baking sheet with a 1-inch lip to capture any liquids created during roasting.
3. Use a sharp paring knife to cut a “V” shape around the stem, remove and discard. With cherry tomatoes, any stems can be brushed off the surface without making a cut.
4. Place the de-stemmed tomatoes on the lined baking sheet, stem side up.
5. Drizzle with olive oil and season with sea salt and pepper.
6. Place in oven and roast 60 minutes.
7. Remove and let cool.
Freezing Whole Roasted Tomatoes
When you remove the baking sheet from the oven, you’ll notice a clear liquid has accumulated on the bottom. Some of that is olive oil. But most of the liquid is a clear tomato essence prized by chefs for its clean flavor.
If you are freezing some of the roasted tomatoes whole, use the clear liquid to cover the tomatoes in the deli containers.
Use airtight containers that are about the same width as the tomatoes so you will need a small amount of liquid to cover them.
latt-diytomato1

Defrosting Whole Roasted Tomatoes
When you want to use the tomatoes, take them out of the freezer in the evening and let them defrost overnight. If any ice crystals have accumulated on top of the tomatoes, rinse off the ice before defrosting.
If you want to serve them whole, the tomatoes can be warmed in the oven or microwave. They are delicate, so handle them carefully.
Whole Roasted Tomato, Easy-to-Make Pasta Sauce
A deliciously simple pasta sauce to make any time of the year, not just in winter. Serve the pasta with steamed vegetables, a charred steak or a grilled chicken breast and you will have a perfect cold weather meal that warms body and soul.
The flavorful tomato sauce can become a vegan dish by simply omitting the butter and cheese.
Prep time: 5 minutes
Sauté time: 5 minutes
Pasta cooking time: 10 minutes
Total time: 10 minutes
Serves 4
Ingredients
1 tablespoon sea salt
1 pound fresh or packaged pasta
1 tablespoon olive oil
1 cup Italian parsley leaves, washed, roughly chopped (optional)
1 garlic clove, peeled, finely chopped
2 to 3 whole, large roasted tomatoes, skins removed
1 teaspoon sweet butter (optional)
Freshly ground black pepper to taste
1 cup freshly grated Parmesan or Romano cheese
Sea salt and freshly ground black pepper to taste
Directions
1. Place a large pot of water on high heat. Add 1 tablespoon sea salt to the water. Bring to a boil. Add the pasta. Stir well every 2 to 3 minutes.
2. Place a heat-proof cup in the sink next to a large strainer. When the pasta is al dente to your taste, about 10 minutes, pour the pasta into the strainer, capturing one cup of the salted pasta water. Reserve.
3. Toss the cooked pasta to prevent clumping.
4. At the same time the pasta is cooking, place a large sauté pan on a medium-high flame. Heat the olive oil.
5. Add the parsley and garlic. Lightly brown.
6. Holding the roasted tomatoes over the sauté pan, use your hands to tear them apart so you capture all the liquid. Add any liquid from the deli container.
7. Stir well and cook until the liquid is reduced by half.
8. Taste and salt, if needed; add a tablespoon or more of the pasta water.
9. Stir well and add butter. Taste and adjust seasoning by adding sea salt and black pepper.
10. When ready to serve, add the cooked pasta to the sauté pan. Over a medium flame, toss the pasta in the sauce to coat.
11. Serve hot with a bowl of Romano or Parmesan cheese.
Roasted Tomato Sauce
The tomatoes used to make the sauce are prepared and roasted in the same manner as those used to create whole roasted tomatoes.
Directions
1. Working with small batches, remove the roasted tomatoes from the baking sheet and put some of the roasted tomatoes into a food mill or fine mesh, wire strainer placed over a nonreactive bowl. Press the tomatoes through, collecting all the juice in the bowl.
2. Use a spatula to scrape off the pulp that will accumulate on the bottom of the food mill or the strainer. Add the pulp to the juice.
3. Discard the tomato skins. Or add to your compost. Or, even better, reserve in the freezer to use with other vegetable scraps to make vegetable stock.
Freezing Roasted Tomato Sauce
Put the open deli containers on a counter. Stir the tomato juice to mix with the pulp.
Fill each deli container to a half-inch below the top so that when the sauce freezes, the liquid will have room to expand and will not force open the lid.
When cooled, the filled containers can be placed in the freezer.
Defrosting Roasted Tomato Sauce
Even without defrosting, the frozen sauce can be used at the last minute, when you want to thicken a soup, add a layer of flavor to a braise or make a simple pasta sauce.
There are infinite ways to use this versatile sauce. One of my favorites is an easy-to-make pasta with sautéed vegetables.
If any ice crystals accumulate on the top of the sauce, rinse off the ice before defrosting.
Penne Pasta With Roasted Tomato Sauce and Sautéed Vegetables
Prep time: 10 minutes
Sauté time: 10 minutes
Pasta cooking time: 10 minutes
Total cooking time: 20 minutes
Yield: 4 servings
Ingredients
1 tablespoon sea salt
1 pound fresh or packaged pasta
2 tablespoons olive oil
2 carrots, washed, stems removed, peeled, cut into rounds
1 medium yellow onion, washed, stems removed, peeled, roughly chopped
8 large shiitake mushrooms, ends of the stems removed, washed, patted dry, roughly chopped
2 cups broccolini or broccoli, washed, cut into florets, the stems cut into slabs
2 garlic cloves, peeled, smashed, finely chopped
12 ounces frozen tomato sauce, defrosted on the counter overnight
1 tablespoon sweet butter (optional)
¼ teaspoon pepper flakes or pinch of cayenne (optional)
Sea salt and freshly ground black pepper to taste
1 cup freshly grated Parmesan or Romano cheese
Directions
1. Place a large pot of water on high heat. Add 1 tablespoon sea salt to the water. Bring to a boil. Add the pasta. Stir well every 2 to 3 minutes.
2. Place a heat-proof cup in the sink next to a large strainer. When the pasta is al dente to your taste, pour the pasta into the strainer, capturing one cup of the salted pasta water. Reserve.
3. Toss the cooked pasta to prevent clumping.
4. At the same time the pasta is cooking, place a large sauté pan on a medium flame.
5. Heat the olive oil.
6. Add carrots, onion, shiitake mushrooms, broccolini and garlic. Sauté until lightly browned.
7. Add roasted tomato sauce, butter and pepper flakes. Stir well. Taste. If salt is needed, add a tablespoon or more of the pasta water.
8. Simmer on a medium flame and reduce.
9. Taste, adjust seasoning and continue simmering if you want the sauce to be thicker.
10. When the sauce is the consistency you like, add the cooked pasta, coat well.
11. Taste and adjust the seasoning with more sea salt or black pepper.
12. Serve hot with a bowl of grated Parmesan or Romano cheese.
Main photo: Roasted tomatoes in a wire mesh strainer over a nonreactive bowl. Credit: David Latt

When I first opened the doors to my restaurant Tanoreen 15 years ago, I had a clear intention: offer my diners a peek into the Middle Eastern cuisine I knew beyond falafel and hummus. I also wanted to share a rich, nuanced culinary world that — contrary to popular belief — was more slow food than fast food.
At that time, hummus was not served at cocktail parties with carrot sticks, people didn’t know what tahini was or how to use it. Freekah (smoked wheat) was not proclaimed a “super food” and za’atar and sumac were not the trendiest spices in the land. But to me, these foods were things we consumed and used daily. They were part of the tradition of food in the Middle East that was then unknown in America. I am quite pleased that the Mediterranean diet has become so popular. It’s healthy, fresh and in my opinion, delectable.
ZESTER BOOK LINKS
» Click here for a chance to win Rawia Bishara’s book.

“Olives, Lemons & Za’atar: The Best Middle Eastern Home Cooking”
By Rawia Bishara
Kyle Books, 224 pages, 2014
» Click here to buy the book
But let’s be honest. Most of the popular Middle Eastern dishes that have worked their way through the food chain were, until recently, “fast food” such as supermarket shish kabob carts and hummus party trays. Middle Eastern food is about much more than dips and sandwiches. The spice mixes and the use of fresh vegetables, lean meats, grains and olive oil are all cornerstones.
Our meals, when I was growing up and with my own children, were and remain an active meditation. It’s not “on the go” but rather celebrating slow-cooked food, togetherness, conversation and phones off!
Unlike baking, cooking is not formulaic, even though recipes can feel that way sometimes. I always say two people can make the same recipe, and it will taste completely different. There is a soulfulness in this kind of cooking.
It’s an inner, almost empathetic connection to the people you’re cooking for. The focus is on what really tastes good, and not just on your tongue. It’s also in the emotions and memories triggered as your guests eat the meal you’ve prepared.

Chef and author Rawia Bishara: A great meal is a conduit to togetherness. Credit: Peter Cassidy
Similarly my cookbook, “Olives, Lemons & Za’atar,” comes from that same premise. I want to celebrate the variety of recipes, which are not at all difficult, along with the traditions and memories that come with Middle Eastern food.
Memories of such meals stand like flag posts throughout my life: the first meal I cooked for my husband (stuffed artichoke hearts), our traditional Christmas dinner (roast leg of lamb), my daughter’s favorite breakfast food as a child (potatoes and eggs) and traditional wedding mezzes.
I learned all this from my mother, a schoolteacher and home cook. Technically speaking, she was a genius chef. But her real strength as a cook lay in her ability to make meals that were an extension of her love for her family and guests — of which there were many! Her meals created an environment of warmth, safety, comfort and a total blast for the senses. It was hypnotic, with all your synapses triggered simultaneously.
A snapshot of a favorite meal: a warm winter stew of slow-braised cauliflower and fragrant spiced lamb, served alongside warm rice pilaf and toasted vermicelli noodles, fresh tomato salad with shaved radish and herbs from her garden. There were heaping plates of olives, warm fresh Arabic bread, long thin hot peppers to crunch on. And small plates of hummus and labne, served before the meal but later banished to the outer corners of a table almost wiped clean. Two parents, five children and almost always a guest or two — because if you cook for seven, you are cooking for 10.
More from Zester Daily:
Ghada, as we called it, was a refuge. The biggest meal of the day, served in the late afternoon, with dinner usually later and much lighter.
In today’s world, we may seem more connected, but really we’re more disconnected than ever. People click away on their smartphones on the train, walking down the street, at the gym and, yes, at the dinner table.
As a chef, I try to create a cozy bubble-like environment in my restaurant, just as I did in my own home as a mother and wife. Middle Eastern food creates that mood, using dishes that invite connection. A great meal is a conduit to togetherness.
Brussels Sprouts With Panko
Prep time: 15 to 20 minutes
Yield: 6 to 8 servings
Ingredients
Corn oil for frying
4 pounds Brussels sprouts, outer leaves removed, cut in half
1 cup Thick Tahini Sauce (see recipe below)
1 cup lowfat plain yogurt
2 tablespoons pomegranate molasses
2 tablespoons extra virgin olive oil
½ teaspoon finely chopped garlic
1 cup panko (Japanese-style bread crumbs)
Pinch sea salt
Directions
1. Pour ¼ to ½ inch corn oil in a large skillet and place over a high heat until hot. To test the temperature, slip half a Brussels sprout into the pan; if it makes a popping sound, the oil is hot enough.
2. Working in batches, fry the Brussels sprouts, turning occasionally, until they are browned all over, 2 to 3 minutes. Using a slotted spoon, transfer the sprouts to a paper towel–lined plate to drain.
3. Meanwhile, whisk together the Thick Tahini Sauce, yogurt and pomegranate molasses in a medium bowl. Set aside.
4. In a small skillet, heat the olive oil over medium-high until hot. Add the garlic and sauté until fragrant, about 1 minute.
5. Add the panko and stir constantly until the crumbs are golden brown, about 2 minutes.
6. Stir in the salt and remove the bread crumbs from the heat. Transfer to a paper towel-lined plate to cool.
7. Place the Brussels sprouts in a serving dish, drizzle with the sauce and top with the panko crumbs. Serve immediately.
Notes
Brussels sprouts were not part of the Palestinian kitchen when I was growing up. I discovered them here in the States and very eagerly tried to push them on my children. To that end, I did what any good mother would do — I pumped up their flavor by adding a little tahini sauce and sweet pomegranate molasses. It worked!
In fact these Brussels sprouts were so delicious that they made it onto the original Tanoreen menu and I’ve never taken them off.
Thick Tahini Sauce
Prep time: 5 minutes
Yield: 2½ cups
Ingredients
1½ cups tahini (sesame paste)
3 to 4 cloves garlic, crushed
Juice of 5 lemons or to taste (about 1 cup)
1 teaspoon sea salt
Chopped parsley for garnish
Directions
1. In the bowl of a food processor, combine the tahini, garlic, lemon juice and salt and process on low speed for 2 minutes or until thoroughly incorporated.
2. Turn the speed to high and blend until the tahini mixture begins to whiten.
3. Gradually add up to ½ cup water until the mixture reaches the desired consistency.
4. Transfer the sauce to a serving bowl and garnish with the parsley. Leftover tahini sauce can be stored, tightly covered in the refrigerator, for up to 2 weeks.
Notes
Tahini sauce is ubiquitous in Middle Eastern kitchens. It is the condiment. There is hardly a dish that isn’t enhanced by it. At Tanoreen, I mix it into salad dressings and drizzle it into cauliflower casseroles. My daughter? She dips French fries into it! Learn to make this and you will have a simple, delicious, versatile sauce to add to your repertoire.
Main photo: With a bit of tahini sauce and pomegranate molasses, even kids love the author’s Brussels Sprouts With Panko. Credit: Peter Cassidy

Careful thought can ease your workload considerably, if that’s how you think of cooking, by squeezing three dinners from one initial cooking. It’s a novel way of viewing leftovers in that you’re not using them so much as you are making leftovers to be used according to a plan.
More from Zester Daily:
First, in the method that follows, you’re not simply using leftovers, you’re following a game plan to create three nights of family dinners for four by using the foods from the first meal for the second meal and from the first and second meals for the third meal. You’ll add one or two foods to subsequent dinners Nos. 2 and 3. You can do all of this for about $40.
Ideally, dinner No. 1 should begin on a Sunday morning as you’ll be making a boiled dinner that can cook slowly all day either in a large slow cooker or on the stove top if your cook top has a simmer-control setting. A simmer-control setting is so low that a pot of water set on top of it will never boil; it will only shimmer on top.
The first meal is based on a New England boiled dinner, a family meal that was far more popular in the early 20th century than today and something of a misnomer as one never actually boils the chicken but rather poaches it. The second meal is based on an Alpine-type of baked casserole au gratin with fontina cheese. The third meal is based on a root vegetable soup purée with chunks of meat and vegetables.
First Dinner: Boiled Dinner
Prep time: About 30 minutes
Cook time: 3-9 hours
Yield: 4 servings
Ingredients
One 4-pound chicken
2 pounds fresh kielbasa sausage or mild Italian sausage
1¾ pounds boiling potatoes, such as small Yukon gold or fingerling, peeled
1½ pounds fat carrots, scraped and cut in half
1 pound (7 or 8) small onions, peeled
1½ pounds fat parsnips, scraped
1¼ pound small turnips (7 or 8), trimmed of tops
2 small celery roots (1 pound), trimmed and peeled
2 celery stalks, cut in half
50 garlic cloves
Bouquet garni, tied in cheesecloth, consisting of parsley, celery stalk top, marjoram, bay leaf, and oregano
10 peppercorns
Water as needed
Salt to taste
Directions
1. Wrap the chicken in cheesecloth and tie off with kitchen twine. Place in a large stockpot with the sausage, potatoes, carrots, onions, parsnips, turnips, celery root, celery stalk, garlic, bouquet garni and peppercorns and cover with water. Turn the heat to high and bring to a near boil. Reduce the heat to very low the minute you see a bubble or two rise to the surface. Cook until all the foods are very tender, about 9 hours with a simmer control and about 3 hours without. At no time should the water boil; it should only shimmer on top. About halfway through the cooking, season a bit with salt. Bring to just below a boil on high heat. Reduce the heat to low, so it is just shimmering on the surface.
2. Remove the chicken and unwrap from the kitchen twine. Set the chicken in the middle of a large round platter. It will be so well-cooked it will collapse unless you handle it gently. Surround with all the other meats and vegetables except for the celery stalk and bouquet garni, which you will discard. Serve with any two of these accompaniments: horseradish with apple, Bavarian mustard, Cajun mustard, regular mustard, Mostarda di Cremona, apple sauce or hot sauce of your choice.
3. Save all food not eaten.
4. Strain the broth through a cheesecloth-lined strainer and return to a pot. Boil until the broth is reduce by a third. Cool and save.
wright-boileddinner2
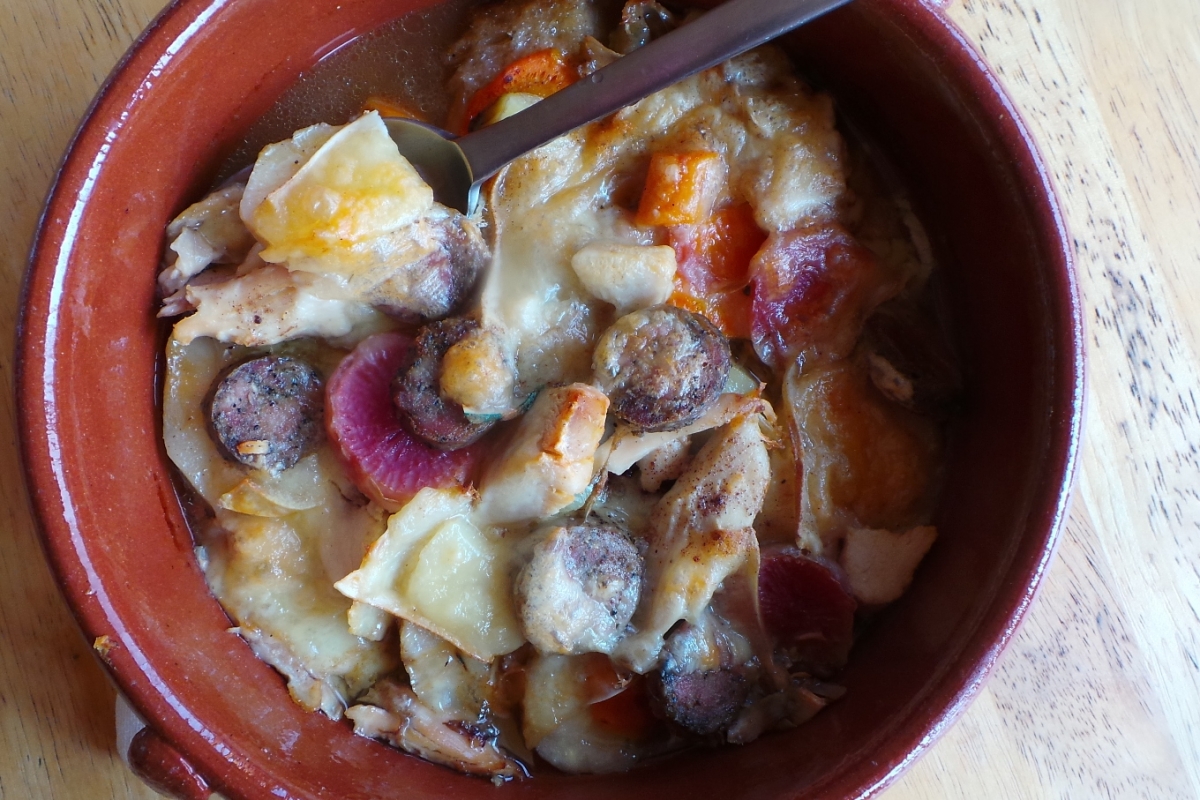
Second Dinner: Baked Casserole au Gratin
Prep time: about 10 minutes
Cook time: 1¼ hours
Yield: 4 servings
Ingredients
Leftovers from boiled dinner, sliced
2½ ounces smoked slab bacon, chopped
1 tablespoon olive oil, vegetable oil, butter, pork lard or duck fat
½ pound cabbage, cored and thinly sliced
Salt and freshly ground black pepper to taste
4 slices (about 2 ounces) French or Italian country bread
Pinch of freshly grated nutmeg
Pinch of ground cinnamon
¾ pound fontina Val d’Aosta cheese, in thin slices
2 tablespoons unsalted butter, in thin slivers
2 cups chicken broth (from first meal)
Directions
1. Remove the meat from the chicken and discard the carcass. Chop or slice the chicken and sausage keeping them separated. Slice all the vegetables but keep them separate. Remove half of everything and set aside for meal No. 3.
2. Preheat the oven to 325 F.
3. In a sauté pan, cook, stirring, the bacon and cooking fat over medium heat until almost crispy, about 4 minutes. Add the cabbage and a little water to deglaze the pan and cook, stirring, until it is wilted, about 5 minutes. Season with salt and pepper.
4. In four 8 x 1½-inch baking casseroles, or one larger baking casserole, or similar ovenproof vessel, place the bread and then layer half the leftovers on top and half the cabbage and sprinkle with nutmeg and cinnamon. Layer half the fontina cheese and then another layer of leftovers and cabbage and finally some slivers of butter. Finish with one more layer of cheese and butter. Pour ½ cup broth into each casserole and bake until golden brown and bubbling, 55 to 60 minutes. Serve hot.
Third Dinner: Root Vegetable Purée With Chicken and Sausage
Prep time: 10 minutes
Cook time: 15 minutes
Yield: 4 servings
Ingredients
Leftover vegetables from dinner one
3½ cups chicken broth (from first meal)
3 tablespoons heavy cream
3 ounces fresh or frozen peas
Leftover meat from dinner one
¼ teaspoon ground ginger
4 slices (about 2 ounces) Italian or French country bread, pan-fried in butter until golden brown
Directions
1. Place all the leftover vegetables in a food processor with 2 cups broth and blend in pulses at first then continuously until smooth. Transfer to a soup pot with the cream, peas, remaining meat leftovers, remaining broth and ground ginger and heat over low heat until hot. Check the seasoning. Serve with bread.
Main photo: New England boiled dinner with chicken and vegetables. Credit: Clifford A. Wright

Wanting to cook with farm-to-table ingredients is much more difficult in colder months than in the summer. Eating locally in the fall and winter means switching to recipes that feature root vegetables, cabbages and hearty greens like kale. The summer ingredient I miss the most is corn. My solution is to turn my freezer into a garden.
With a few easy steps, I can have fresh-tasting corn even during the darkest days of winter.
A Taste of Summer From Your Freezer
One in a series of stories about freezing late-summer produce to enjoy all winter.
Healthy tips to beat back winter’s grip
After years of experimentation, I believe that corn kernels retain their flavors best when frozen rather than pickled or preserved in glass jars. The trick with corn kernels is cooking them quickly and then submerging them in their own liquid.
Frozen in airtight containers, the kernels retain their qualities for several months, long enough to carry the home cook through to the spring when the farmers markets come alive again.
Use stacking containers so you can keep a half dozen or more in your freezer. Besides the containers available in supermarkets, restaurant supply stores sell lidded, plastic deli containers in 6-, 8- and 16-ounce sizes.
More from Zester Daily:
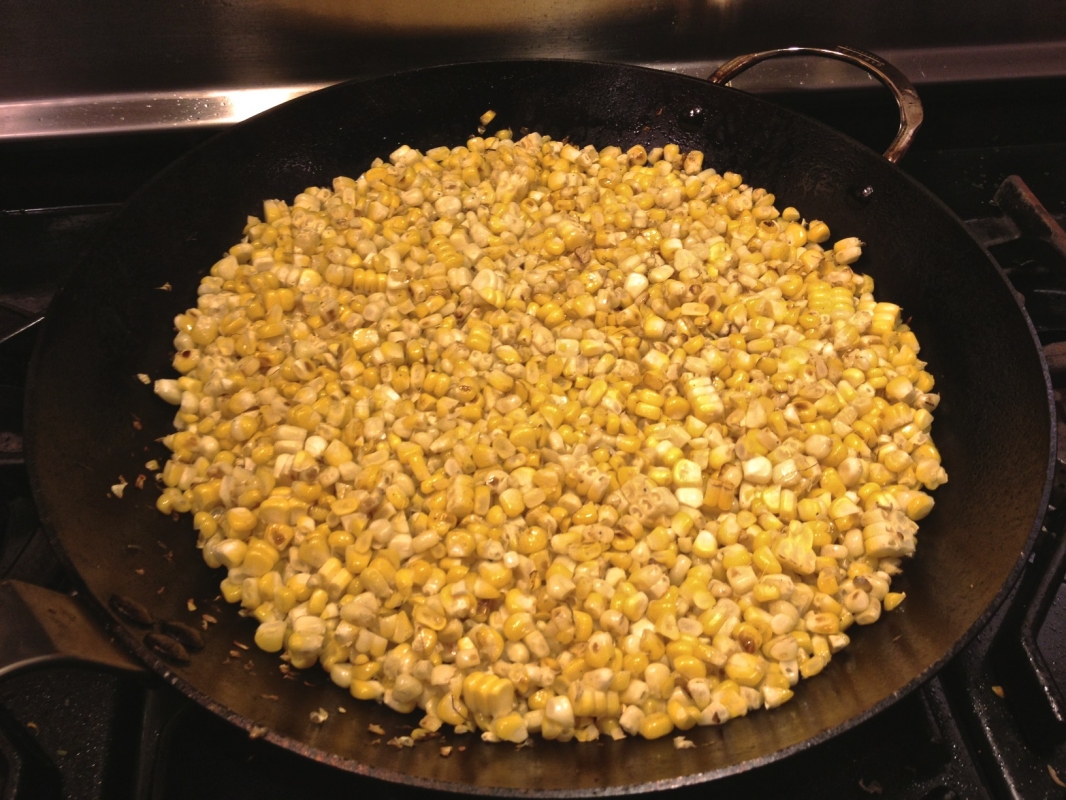
Charred Corn Kernels
Once defrosted, the kernels can be added to soups, stews, pastas and sautés.
Yield: 6 to 8 cups depending on the size of the ears
Prep time: 5 minutes
Sautéing time: 5 to 10 minutes
Ingredients
6 ears corn, husks and silks removed, ears washed
1 tablespoon olive oil
Directions
1. Using a sharp paring or chef knife cut the kernels off the cobs. Reserve the cobs.
2. Heat a large frying pan or carbon steel pan on a high flame.
3. Add olive oil and corn kernels. Stir frequently so the kernels cook evenly.
4. When the kernels have a light char, remove from the burner.
5. To avoid burning, continue to stir because the pan retains heat.
6. Set aside to cool.
latt-diy5
Corn Broth
Corn broth keeps the kernels fresh in the freezer. The broth is also delicious when added to soups, stews, braising liquids and pasta sauce. If your recipe only needs the kernels, after defrosting remove them from the deli container and refreeze the corn broth for another use.
Simmer time: 30 minutes
Cooling time: 30 minutes
Ingredients
6 corn cobs without kernels, each cob broken in half
4 quarts water
Directions
1. Place the cobs and water in a large pot on a high flame.
2. Boil uncovered until the water is reduced by half.
3. Cool. Remove the cobs and discard for compost.
Freezing Corn Kernels in Corn Broth
Directions
1. Fill the deli containers with the kernels, a half-inch from the top.
2. Add enough corn broth to cover the kernels.
3. Seal with airtight lid.
4. Place in freezer. Freeze any excess corn broth to use as vegetarian stock.
Chicken Soup With Charred Corn and Garlic Mushrooms
Perfect for cold, wet days, hot chicken soup is a healthy dish to eat for lunch or dinner. The charred corn gives the hot and nutritious soup an added brightness and sweetness.
Yield: 4 servings
Prep time: 5 minutes
Simmer time: 20 minutes
Ingredients
8 ounces frozen corn kernels including stock
1 teaspoon olive oil
6 cups chicken stock (preferably homemade)
2 tablespoons yellow onions, finely chopped
1 garlic clove, peeled, crushed, finely chopped
2 tablespoons Italian parsley, leaves only, finely chopped
1 cup shiitake, brown or Portobello mushrooms, washed, pat dried, sliced thin
Pinch cayenne (optional)
1 tablespoon sweet butter (optional)
Sea salt and black pepper to taste
Directions
1. Defrost the corn kernels overnight. If you are using homemade frozen chicken stock, defrost that overnight as well.
2. Remove the corn kernels from the corn broth and reserve separately.
3. In a large saucepan, heat the olive oil over a medium flame.
4. Sauté until lightly browned the corn, onions, garlic parsley and mushrooms. Stir frequently to avoid burning.
5. Add chicken stock and corn broth. Stir well and simmer 10 minutes.
6. Add cayenne and sweet butter (optional). Stir well, taste and adjust seasonings with sea salt and freshly ground black pepper.
7. Serve hot with homemade croutons or a loaf of fresh bread and butter.
Braised Charred Corn and Tuscan Kale
Adjust the amount of liquid to your liking. With more broth, the side dish is a refreshing small soup to accompany a plate of roast chicken. Reducing the broth to a thickness resembling a gravy, the corn-kale braise is a good companion to breaded or grilled filet of salmon or halibut.
Yield: 4 servings
Time: 15 minutes
Ingredients
8 ounces corn kernels and corn broth
1 teaspoon olive oil
1 bunch Tuscan (black) kale, washed, center stem removed, leaves roughly chopped
1 medium yellow onion, washed, peeled, roughly chopped
2 garlic cloves, skins removed, washed, crushed, finely chopped
1 cup vegetable or chicken stock, preferably homemade
Sea salt and black pepper to taste
Pinch cayenne (optional)
1 teaspoon sweet butter (optional)
Directions
1. Defrost corn kernels and broth overnight.
2. Separate the kernels from the broth, reserve both.
3. Heat a large frying pan.
4. Add olive oil.
5. Add kale and sauté, stirring frequently to avoid burning.
6. The kale will give up its moisture. When the kale has reduced in size by half, add the corn kernels, onion and garlic. Sauté until lightly browned.
7. Add the reserved corn broth and the other broth. Stir well.
8. Simmer 10 minutes.
9. Taste and adjust seasoning with sea salt and pepper. Add butter and cayenne (optional).
10 .Serve with more or less liquid as desired.
Onion-Corn-Mushroom Sauté
Personally, when it’s cold outside, I love a steak grilled on a high temperature carbon steel pan. The outside gets a salty crust while the inside stays juicy and sweet. Mashed potatoes are a good side dish, accompanied with an onion, corn and mushroom sauté. The combination of flavors—meaty, creamy-salty-earthly-summer sweet—is satisfyingly umami. Throw in a vodka martini ,and you’ll never notice that outside your warm kitchen the sidewalks have iced over and it is about to snow.
Yield: 4 servings
Time: 15 minutes
Ingredients
1 cup corn kernels
1 teaspoon olive oil
2 medium yellow onions, washed, peeled, root removed, thin sliced
2 to 4 garlic cloves, washed, peeled, crushed, roughly chopped
2 cups shiitake, brown or Portobello mushrooms, washed, pat dried, thin sliced
1 tablespoon sweet butter (optional)
Sea salt and black pepper to taste
Pinch cayenne (optional)
1 teaspoon fresh rosemary leaves, washed, pat dried, finely chopped (optional)
Directions
1. Defrost corn kernels and broth overnight.
2. Separate the kernels from the broth, reserve both. Refreeze the broth for later use.
3. Heat a large frying pan.
4. Add olive oil.
5. On a medium flame, sauté onions, stirring frequently until lightly browned. That caramelization will add sweetness to the sauté.
6. Add corn, garlic, mushrooms. Stir well. Sauté until lightly browned.
7. Add sweet butter (optional), cayenne (optional) and rosemary (optional). Taste and adjust seasoning with sea salt and black pepper.
8. Serve hot as a side dish or condiment.
Main photo: Corn kernels cut off the cob being prepared for freezing. Credit: David Latt

Pumpkin is an ideal bland food with a distinctive taste. That’s a good thing because it means you have to do something to the pumpkin to make it palatable and delicious. Typically, pumpkin pie is a solution, but nowadays it’s going into all kinds of things from beer to cookies.
Pumpkin is a member of the Cucurbitaceae and winter squash family (its Latin binomial is Cucurbita pepo) and when it first arrived in Europe following its discovery in the New World after Columbus’ voyages it did not impress. The Sicilians, for example, thought so little of winter squash such as pumpkin, they even have a derogatory saying about it: “Sali mitticinni nà visazza conzala come vuoi è sempre cucuzza” (Add a lot of salt and seasoning because squash it always remains).
More from Zester Daily:
» Look what Venetians did with pumpkins
» Pasta, pumpkin and pears make fall perfection
There are four basic species of Cucurbitaceae. Pumpkins or squash are easily hybridized so the range of colors and shapes is quite varied and it is difficult to tell one variety from another, resulting in many cultivars. If you are interested, a thorough and concise description of all the squashes can be found in my book “Mediterranean Vegetables.”
All that counts in this recipe is that you’ll need about 3 pounds of pumpkin flesh. The recipe calls for you to make your own pumpkin pasta and homemade ricotta cheese. That sounds hard, but it’s not. Just follow the instructions in the links.
Alternatively, use store-bought regular pappardelle with a high quality store-bought ricotta cheese. For the homemade pasta, follow the pasta-making instructions for “Homemade White Flour and Egg Pasta” in the pappardelle link below, adding 1 cup puréed and very well-drained pumpkin pulp to the mixture.
Pumpkin Pappardelle With Pumpkin and Poppy Seeds
Prep time: 15 minutes, does not include making homemade pasta and ricotta
Yield: 4 to 6 servings
Ingredients
¾ pound pumpkin pappardelle
3 tablespoons unsalted butter
14 ounces fresh pumpkin flesh, cut into 1½ by 1½ by ¼-inch squares
Salt to taste
1 tablespoon poppy seeds
¼ pound fresh ricotta cheese
¼ cup freshly grated Parmigiano-Reggiano cheese
Directions
1. Prepare the pasta. Cut into 1-inch wide strips and let dry 4 to 24 hours. The recipe in the link will provide 1¼ pounds dried pasta. Set aside ¾ pound for this recipe and store the remainder.
2. Preheat a cast iron skillet over medium-high heat.
3. Add ½ tablespoon butter to the skillet and it will smoke almost immediately. Quickly lay the sliced pumpkin in the skillet and salt lightly. Let cook until golden on both sides, turning only once, about 6 minutes in all. Remove and set aside, keeping the slices warm.
4. Meanwhile, bring a large pot of water to a rolling boil, salt abundantly then cook the pasta, stirring occasionally, until the pasta is al dente. Drain without rinsing.
5. Transfer the pasta while still very hot to a bowl with the remaining butter and poppy seeds. Toss well then transfer to a serving platter or bowl. Top with the sliced pumpkin, 4 dollops of ricotta, and the Parmigiano-Reggiano and serve.
Main photo: Pumpkin Pappardelle With Pumpkin and Poppy Seeds. Credit: Clifford A. Wright

If you are not clear exactly what Mediterranean food is, it’s actually very simple: It’s the cooking found in all the regions and provinces that have a littoral on the Mediterranean Sea. Because of that fact in a sense there is no such thing as Mediterranean cuisine because every region’s food, while tending to use the same ingredients, is strikingly different from one another. High on the list of staple Mediterranean foods are legumes.
More on Zester Daily:
Two Mediterranean countries famous for their legume dishes are Egypt and Greece. Here are two budget-friendly, healthy and delicious recipes that can be served in Near Eastern style, as both Greece and Egypt are considered Near Eastern countries. These dishes can be prepared as part of a larger meze or as an appetizer or side dish.
Edward William Lane tells us in his classic book “The Manners and Customs of the Modern Egyptians” first published in 1908 that many dishes prepared by the Egyptians consist wholly or for the most part of vegetables, “cabbage, purslane, spinach, bamiyeh [okra], beans, lupin, chick-pea, gourds, cut into small pieces, colocasia, lentils etc.”
Called salāṭa ‘adas and made with tiny brown lentils slightly cooked with olive oil, garlic and spices, I had this lentil salad as a meze at the Tikka Grill, a restaurant on the corniche of Alexandria in Egypt. Although you don’t have to use freshly ground spices, you’ll find if you do, the result is a dish far fresher, more pungent and better tasting than one made with pre-ground spices. Too many home cooks keep spices far beyond their shelf life, so check the date on your jar.

Lentil Salad With Egyptian Spices. Credit: Clifford A. Wright
Lentil Salad With Egyptian Spices
Yield:6 servings
Preparation time: about 30 minutes
Ingredients
¼ cup extra virgin olive oil, divided
2 large garlic cloves, finely chopped
½ teaspoon freshly ground cumin seeds
½ teaspoon freshly ground coriander seeds
¼ teaspoon freshly ground cardamom seeds
½ teaspoon ground fenugreek
1 cup dried brown lentils, picked over and rinsed well
Salt and freshly ground black pepper to taste
Directions
1. In a small saucepan, heat 3 tablespoons olive oil over medium heat with the garlic and as soon as the garlic begins to sizzle remove from the burner, add the cumin seeds, coriander, cardamom and fenugreek, stir, and set aside.
2. Place the lentils in a medium-size saucepan of lightly salted cold water and bring to a boil. Cook until al dente, about 25 minutes from the time you turned the heat on. Drain and toss with the garlic, olive oil and spices while still hot. Season with salt and pepper, toss and arrange on a serving platter, drizzling the remaining 1 tablespoon olive oil over the top. Serve at room temperature.
Black-Eyed Pea Salad
This simple preparation called mavromakita fasolia in Greek can be made with canned black-eyed peas, as long as they are packed in only water. I prefer using dried black-eyed peas but they are not always to be found. Typically you would serve this salad as a meze, but it’s fine as a side dish too. This recipe was given to me by chef Estathios Meralis of the motor yacht M/Y Sirius out of Piraeus, Greece.
Yield: 6 servings
Preparation time: about 1 hour
Ingredients
2½ cups canned black-eyed peas (two 15-ounce cans) or 1 cup dried black-eyed peas
2 scallions, trimmed and finely chopped
1 small garlic clove, finely chopped
3 tablespoons chopped fresh dill
5 tablespoons extra virgin olive oil
Freshly ground pepper and salt to taste
Directions
1. If using dried black-eyed peas, boil over high heat in water to cover until tender, about 1 hour. Drain and rinse. If using canned peas, drain and rinse, then place in a bowl.
2. Toss the black-eyed peas with the scallions, garlic, dill, olive oil, pepper and salt. Serve at room temperature.
Main photo: Black-Eyed Pea Salad. Credit: Clifford A. Wright

Japanese miso can deliver great health benefits — and of course, everyone wants those. However, not all miso is created equal. Inexpensive miso made from low-quality ingredients through an automated process has little nutritional value and may be laden with chemicals. When you look at the traditional way of making miso, you can see why.
The most popular miso is made from rice, soybeans, salt, spring water and koji, the fermentation starter. Koji, aspergillus oryzae, is a type of mold. When mixed with steamed rice, it breaks down the carbohydrates into simple sugars. The resulting koji rice is mixed with cooked soybeans, sea salt and pure spring water. This mixture is then left in wooden barrels to ferment naturally. Dark brown miso, or aka-miso (often known as “red miso”), can take more than one year to ferment properly. During this period, the koji is assisted by hundreds of species of bacteria living in the wood of the barrels. They produce peptides and amino acids, organic acids and other nutrients, giving the miso its wonderful flavor and nutritional value.
More from Zester Daily:
» Shio-koji takes off as a seasoning
» Make a great miso soup–with dandelions
But all that work pays off for the cook, because using good-quality miso produces wonderful-tasting dishes with little effort. Good miso contains lots of umami, savory flavor, enhancing all the other ingredients you use. In contrast, miso made in an automated factory substitutes artificial flavoring for the rich layers of flavor in the traditional product.
But American cooks don’t have to order a shipment of Japanese miso from abroad to get the real experience: Several American companies are now making very high quality, traditionally produced miso. On a day when I did not have time to walk 20 minutes to the Japanese food store, I discovered the American-made Miso Master brand at my neighborhood large chain supermarket in New York City. In my kitchen, this miso really surprised me. It had the quality and taste characteristics that I had long yearned for.
Japanese tradition comes to America
I was curious to find out how my favorite miso was made in America. So I headed to Great Eastern Sun, the North Carolina-based company that has been making Miso Master miso for 33 years. In 1979, when American interest in macrobiotic products was booming, John and Jan Belleme, the early partners of the company, traveled to Japan to investigate natural miso production. A small miso brewer, Takamichi Onozaki, in Yatai, a village in Tochigi Prefecture northeast of Tokyo, opened his arms and factory to the Bellemes and taught them the art of traditional miso production. Upon returning to America, they built the Great Eastern Sun factory in the village of Rutherfordton, 55 miles east of Asheville.
On my visit to the factory I found the same qualities that I had found at the miso factory in Japan: far from the city, with clean water, pure air and people who cared about producing high-quality food. Great Eastern Sun picked Rutherfordton not only because of the qualities of nature and people, but also because it sits at the same latitude as the village of Yatai in Japan.

Miso master Joe Kato with the fermentation barrels at Great Eastern Sun. Credit: Hiroko Shimbo
A Japanese miso master, Joe Kato, oversees production of the miso, which uses all organic and non-GMO ingredients. In the large processing room, six local American employees were working on koji rice. The rice had been steamed the day before, inoculated with koji mold and left spread on a large wooden stand in a temperature- and humidity-controlled room. The workers were breaking up and turning the koji rice, which released a sweet, slightly chestnut-like fragrance. When I closed my eyes I felt as if I were standing in my friend’s miso factory in Japan. But soon the workers’ jokes and chatting in English brought me back to where I was.
Below you will find a very simple, but delicious recipe with which you can try real miso to enjoy a healthy diet. You may have had the somewhat boring typical miso soup at a Japanese restaurant, featuring wakame seaweed, tofu and scallion. This spicy kale miso soup recipe shows that you can use any seasonal vegetable from your refrigerator to make an excellent miso soup. You can find many more delicious uses for miso – dressings, marinades, sauces and more –in my book, “Hiroko’s American Kitchen.”
Spicy Kale Miso Soup
Prep time: 10 minutes
Cooking time: 8 minutes
Total time: 18 minutes
Yield: 4 servings
Ingredients
½ bunch kale
1 teaspoon canola oil
½ cup chopped red onion
¼ cup finely julienned ginger
¼ teaspoon toban jiang (fermented chile bean sauce) or red pepper flakes
3 cups dashi stock or low-sodium chicken stock
1½ tablespoons aged brown miso from Miso Master or other high-quality miso producer
Directions
- Cut off the very bottom of the hard stems of the kale, and cut the remaining kale, including the stems, into thin slices crosswise.
- Heat the oil in a medium pot over medium heat, and then add the onion. Cook the onions for 1 minute, stirring until they are slightly translucent. Add half of the ginger and the toban jiang, and give the mixture several stirs. Add the kale and cook, stirring, until the leaves are wilted.
- Pour in the stock and bring it to a simmer. Decrease the heat to low and cook, covered, for 3 minutes. Turn off the heat.
- Add the miso, stirring briskly with a whisk until it is dissolved.
- Divide the soup into small soup bowls, garnish with the remaining ginger and serve.
Main photo: Workers tend the koji rice at Great Eastern Sun’s facility in Rutherfordton, North Carolina. Credit: Hiroko Shimbo

A number of Chicago’s 3,000 Burmese refugees have found a place that feels like home, improbably situated in the middle of a thriving metropolis of 2.6 million people: a lush, sprawling acre of Midwestern farmland. Tucked inside an 8-foot-tall metal fence and pinched between the shadows of large brick apartment complexes, this all-organic farm gives these and other refugees a chance to do what they know best.
“Just about everybody here was a farmer back home,” says Linda Seyler, the manager of the Global Garden Refugee Training Farm. “They used the word home a lot, especially when we were building this. It’s in a ‘being resettled finally’ sense.”
AUTHOR

Maddy Crowell is a multimedia freelance journalist who has previously reported out of Ghana and Morocco. Twitter: @madcrowell
Converted from the ruins of a candy distribution warehouse, the land was purchased by the Refugee Agricultural Partnership (an arm of the Federal Office of Refugee Resettlement) from the city of Chicago for $1 (although apparently the city has yet to collect). Located in the ethnically diverse Albany Park neighborhood, it is the only refugee farm in Illinois, and one of a small handful in the United States.
Seyler says many of the urban farmers at Global Garden spent at least 20 years of their lives in refugee camps after being forced out of their home countries. “That’s 20 years in limbo,” she says. “They were not allowed to work, and everything is rationed — food, water, living space.”
With the farm, the refugees nurture a small piece of land they can call their own, rent free. For many, it’s also an escape from the chaos of the city. A hundred individual plots feed about 100 Bhutanese, Burmese, Nepalese and Congolese families, and anything left over can be sold at a nearby farmers market.
It’s a living amoeba of shared space, with farmers tending not only their own gardens but also their neighbors’. Some farmers push their growing season as late as November to get the last of the summer harvest.
Despite ministering to four different ethnic groups, Seyler found surprising agreement when it came to choosing which crops would kick-start the farm. “There would be one picture of some greens in the catalog, and they’d all say, ‘We like that!’ The pictures evoked something,” she says. She ordered anything they requested from a Johnny’s Selected Seeds catalog.
Roselle is a sour surprise
At first, the farm was dotted with standard American crops — spinach, corn, tomatoes, zucchini, cucumber, basil, thyme, sunflowers, mustard greens. Soon, however, Seyler began to notice a crop she didn’t recognize.
Chin baung, or roselle in English, announced itself in the form of red sticks poking up from the ground and appeared on the farm three years ago. A chewy, leafy, tart relative of the hibiscus family, the plant is as common in Myanmar as basil is here. Many Burmese families began searching it out as soon as they emigrated.
“My dad first ordered it from Thailand because he didn’t know there were seeds here,” explains 16-year-old Su Mon, a Burmese refugee who has spent the past seven years in Chicago. Mon sells her family’s vegetables at a local farmers market in Chicago every Saturday, including bunches of chin baung. “It’s very, very popular. Every Burmese family plants it.”
More from Zester Daily:
» Changing farmers markets
» Winter’s last brunch
» Shopping for a farmer at the farmers market
» Worlds of food crowded under one roof
Before the Albany Park farm was founded in 2011, the Mon family stocked up on chin baung by traveling to Fort Wayne, Ind., which has a large Burmese population. Although the seeds are expensive, chin baung grows fast and stays hearty in the field a long time. It emerges as a maroon stem, and then buds into a three-leaved green leaf, edible immediately.
Known as mei qui qie in Mandarin Chinese, krajeap in Thai and asam paya in Indonesia, the plant does more than add a tangy kick: it’s full of iron, calcium, niacin, riboflavin and vitamin C, and can either be ground for tea or chopped up and added to salads. Mexicans put its red flowers in their tea for a tart Flor de Jamaica-flavored accent. Most Burmese throw the leaves on top of anything, from chicken soup to fish curry.
At the local Horner Park farmers market, one bunch of chin baung sells for $2 and is becoming popular among American customers looking to add some exotic leafy greens to their dinners. It provides a chewy complement to a lemony chicken or whitefish.
But for the Burmese, chin baung is invariably the featured ingredient of any meal. Chin baung kyaw is a popular Burmese curry, a deeply flavorful whirlwind for the taste buds — spicy and sour at the same time.
burmaman

Chin Baung Kyaw (Fried Roselle Leaves)
Cooking Time: 30 minutes
Yield: 3 to 5 servings
Ingredients
2 bunches roselle leaves
1 tablespoon cooking oil
¼ tablespoon turmeric powder
¼ tablespoon red chili powder
1 medium red onion, finely chopped
4 garlic cloves, finely chopped
1 tablespoon pounded dried shrimp (optional)
1 small can of shredded bamboo shoots (not raw)
6 green chilies
Bean noodles (optional)
Directions
Prepare the roselle by breaking off the leaves at the base. Wash and drain the leaves.
Heat the oil in a frying pan.
Add turmeric, red chili powder, onion and garlic. Stir until the onion paste is golden brown.
Add the dried shrimp if using, roselle leaves, 1 tablespoon of water and stir well. Add salt if desired.
When the roselle leaves are soft, add the shredded bamboo shoots and green chilies. For extra spice, cut small slits into the chilies.
Cover and let simmer for about 10 to 15 minutes, stirring occasionally. In a separate pan, heat up the bean noodles if using or steam rice for extra texture.
Main photo: Chin baung kyaw is a popular Burmese curry. Credit: Maddy Crowell