Articles in Cooking

As a kid, my world of food revolved around my family’s Italian cooking: artichokes baked with crisp olive oil crumbs and prosciutto bits, my Nana’s soft pillowy ravioli made with passata di pomodoro from her backyard tomatoes, and piles of Mom’s crisp fried squash blossoms eaten like potato chips.
During college, Atlantic Avenue was walking distance from my campus in Brooklyn, seducing me with belly dancing, creamy feta cheese and wrinkly black olives. The travel bug propelled me to New Delhi, Kulala Lumpur, St. Petersurg, Casablanca, Cairo and points far beyond. Now, living in Eugene, Oregon, food carts expand my horizons as Juanita teaches me to make pupusas. A Mexican torta cart, manned by two adorable university students whom I pedal past on my morning bike ride, brings me back for lunch when hunger pangs hit, and adds a new recipe to my repertoire. At home, I hit my cookbooks for recipes from far-flung places, exotic ingredients and exciting new tastes.
A world of vegetarian
And I then I noticed: All this great food I’ve been tasting, craving and cooking — it’s vegetarian! My whole food world is vegetarian. Exciting!
“Whole World Vegetarian”
By Marie Simmons,
Rux Martin/Houghton Mifflin Harcourt, 2016 320 pages
» Click here to buy the book
The alchemy was in the ingenuity of the cooks and the agrarian-based cooking and eating of cooks around the world. Meat, even consumed in moderation, is often expensive, and so vegetarian dishes are often a more affordable daily staple — especially for those with a green thumb.
Take, for instance, leafy greens. Any leafy green. Magically, almost every patch of dirt on earth grows green leaves. Freshly harvested, they can be melted into curried coconut milk in India, wilted in oil, butter or ghee with dill and mint and topped with garlic walnuts in Armenia, or tossed with ras el hanout and preserved lemons in Casablanca.
Cooking vegetables from the backyard or garden plot adjacent to the kitchen is cheap, nutritious and lends a palate for the local flavors and seasonings readily available to home cooks worldwide. Consider a garam masala available to every cook in New Delhi, preserved lemons on the shelf from Casablanca to Marrakesh, and chile, cumin and Mexican oregano in every pantry in Mexico — all of these enhance vegetarian dishes. Yes, not all whole world kitchens are vegetarian, but creative vegetable dishes are spilling out of kitchens and onto family tables. From my traveling fork to my home kitchen, from the taste memories that poured from the souls of cooks I met on the road, was born my book “Whole World Vegetarian.” I cooked and tasted and fed my friends, who finally said, “Enough!”
Moroccan Greens with Preserved Lemons

Moroccan greens are made with caramelized red onions, a Moroccan spice blend and preserved lemons. Credit: Copyright 2016 Marie Simmons
Prep time: 15 minutes
Cook time: 15 minutes
Total time: 30 minutes
Yield: 4 servings
Ingredients
1 large bunch (about 1 pound) rainbow Swiss chard
2 tablespoons extra virgin olive oil
1 cup thinly sliced red onion
1 teaspoon ras el hanout, or Moroccan spice blend
1 tablespoon finely diced rind from Moroccan Preserved Lemons (recipe follows)
Directions
1. Rinse the chard and, while still wet, pull the leafy greens from the stems. Reserve the stems for other use. Tear or coarsely chop up the greens. You should have about 8 cups loosely packed.
2. In a 10-inch skillet, heat the oil over medium heat until hot enough to gently sizzle a slice of onion. Add the onion and cook, stirring with tongs, until the onion begins to brown and caramelize, about 10 minutes. Sprinkle with the ras el hanout.
3. Add the wet greens to the onion all at once and toss with tongs to blend. Cook, covered, until the greens are wilted, 3 to 5 minutes, stirring with tongs once or twice.
4. Sprinkle with the preserved lemon and toss to blend. Serve hot.
Moroccan Preserved Lemons
Prep time: 10 minutes
Standing time: 3 to 4 weeks
Yield: 1/2 pint
Ingredients
2 to 3 small lemons, preferably organic, scrubbed clean
2 tablespoons coarse salt
1/3 cup fresh lemon juice
Directions
1. Trim the ends from the lemons and partially cut into 8 wedges, leaving the wedges attached at one end. Rub the cut surface of the wedges with the salt. Press the lemons back into their original shape. Pack into a clean half-pint canning jar. Add enough of the lemon juice to cover the lemons. Wipe off the rim of the jar. Top with the lid and fasten the screw band to secure. Store in the jar in a dark place for 3 to 4 weeks, turning the jar upside down every few days so the salt is distributed evenly.
2. Store the opened jar in the refrigerator. They will keep for at least 6 months.
3. To use the lemons, lift from the brine and separate the pulp from the rind. Finely chop the rind and sprinkle on vegetables, salad, soup or stew. Finely chop the pulp and add it to salad dressing, mayonnaise or other sauces.
New Delhi-Style Curried Spinach
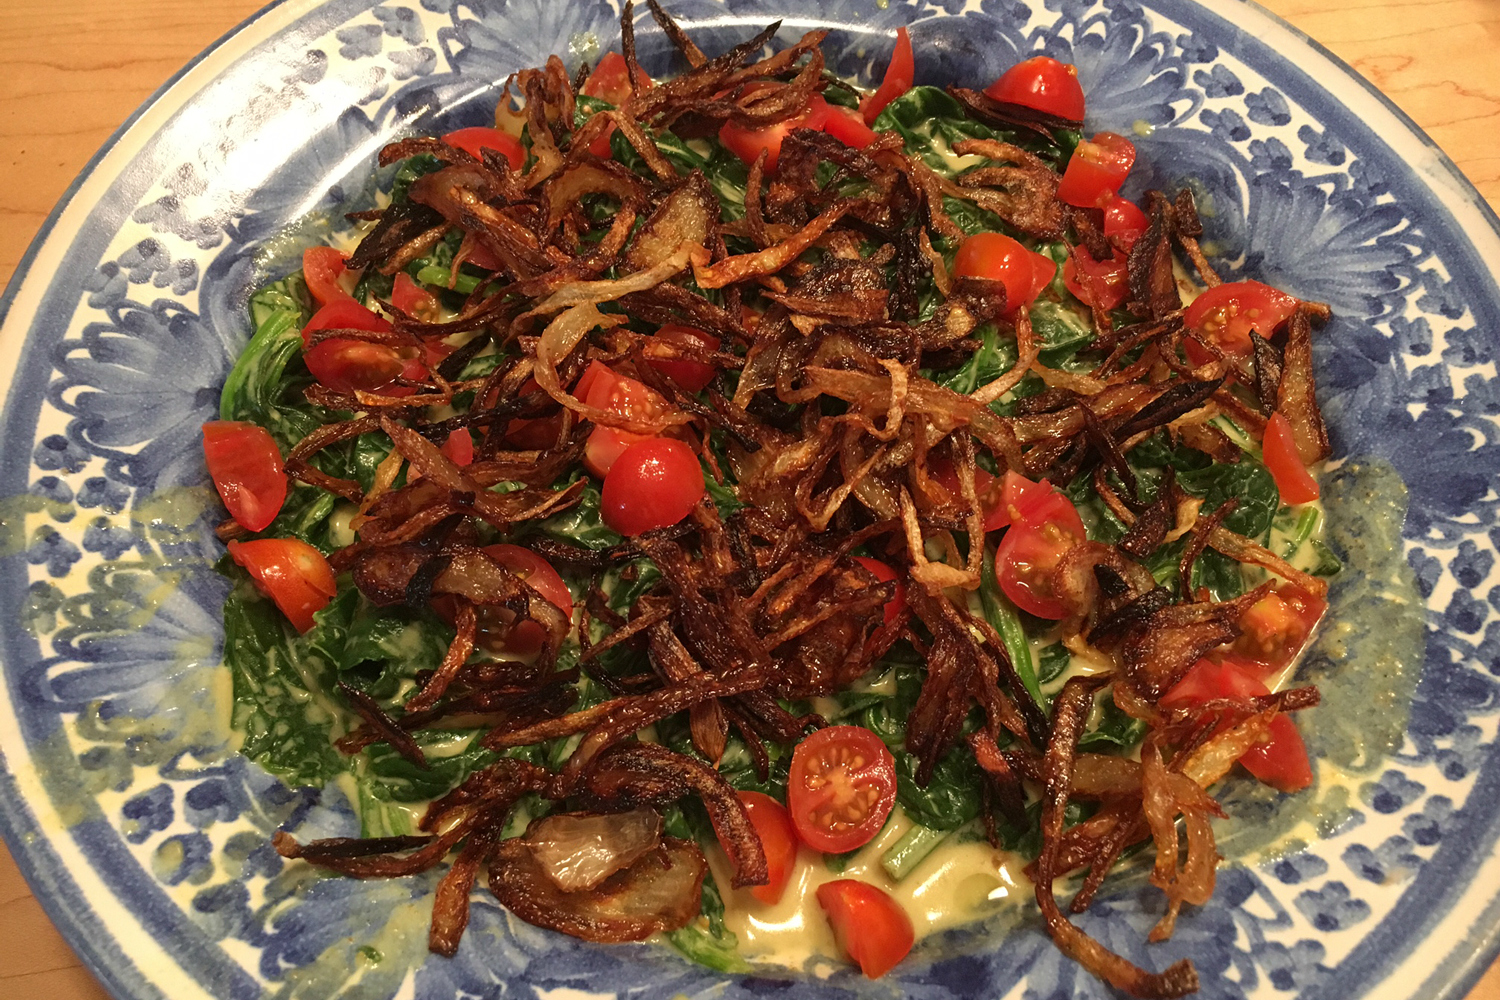
A New Delhi-style curried spinach has coconut milk, tomatoes and fried onions. Credit: Copyright 2016 Marie Simmons
Sturdy, large-leaf (or winter) bunch spinach is the better choice for this recipe than the bagged leaves of baby spinach. The large leaves are more flavorful and retain their texture as they gently cook.
More from Zester Daily:
» Eating vegetarian in China to save the world
» Carbs may have proteins, but are they the enemy of vegetarians?
Prep time: 15 minutes
Cook time: 26 minutes
Total time: 41 minutes
Yield: 4 servings
Ingredients
Coconut or vegetable oil, as needed
2 cups slivered (1/8 inch thick lengthwise pieces) onion
1 tablespoon Madras-style curry powder
1 can (13.5 ounces) coconut milk
1 pound large-leaf spinach, rinsed, thick stems coarsely chopped
1/2 cup seeded and diced fresh or canned tomatoes
Directions
1. Heat about 1/2 inch oil in a deep 9-inch skillet until hot enough to sizzle a piece of onion. Gradually stir in the onions, adjusting between low and medium low as the onion sizzles. Cook the onions until well browned, but not black, 15 to 20 minutes. Lift onions from the oil with a slotted spoon and place in a strainer set over a bowl. Do not use paper for draining the onions as the paper will make them soggy. Let stand until ready to serve. Reserve the onion-infused oil for future onion frying or to season other dishes.
2. In a large, wide saucepan or deep skillet, heat the curry powder over medium-low heat, stirring, until it becomes fragrant, about 1 minute. Stir in the coconut milk and boil. Add the spinach all at once. Toss to coat. Cook, covered, until wilted, 3 to 5 minutes.
3. Spoon into a serving dish. Serve at once garnished with the diced tomatoes and fried onions.
Main photo: Cuisines from around the world can influence our vegetarian choices, such as in this Armenian-style salad. Credit: Copyright 2016 Marie Simmons

Dinner-party ready and perfect for everyday meals, a whole fish roasted in salt puts “wow” on the table. A whole fish cooked inside a dome of kosher salt looks beautiful and is easy to make. Ten minutes to prep, 30 minutes in the oven, a salt-roasted fish on your table will make everyone happy.
More from Zester Daily:
» Don’t despair summer’s end. It’s wild char season
» The slick idea that elevates super-simple antique fish
» Five types of Pacific salmon you need to know
» Invasive fish: If you can’t beat ’em, eat ’em
Using whole fish costs less per pound than filleted fish. Cocooned inside its salt blanket, the protein rich-fish cooks in its own juices.
The technique is very low-tech. No fancy machines or tools are required. Some recipes call for egg whites and water to moisten the salt, but from my experience, water alone works perfectly. After the fish has cooked inside the coating of moistened salt, a fork will effortlessly peel back the skin and a chef’s knife easily separates the meat from the bones.
When creating the salt coating, it is important to use kosher salt. Do not use table salt and definitely do not use salt that has been treated with iodine, which has an unpleasant minerality.
When you buy the fish, ask to have the guts and gills removed but there is no need to have the fish scaled because the skin will be removed before serving. If the only whole fish available in your seafood market is larger than you need, a piece without the head or tail can still be used. To protect the flesh, place a small piece of parchment paper across the cut end, then pack the moistened kosher salt on all the sides to completely seal the fish.
Even though the fish is cooked inside salt, the flesh never touches the salt. The result is moist, delicate meat.
After removing the salt-roasted fish from the oven, let it rest on the table on a heat-proof trivet. The sight of the pure white mound, warm to the touch and concealing a hidden treat is a delight.
What kind of fish to use?
So far I have used the technique on trout, salmon, sea bass, salmon trout and pompano with equally good results. This makes me think that the technique can be used with any fish.

Salt-roasted trout filleted. Credit: Copyright 2016 David Latt
Choose a fish that is as fresh as possible, with a clean smell and clear eyes. When you press the body, the flesh should spring back.
The cooking time will vary depending on the size and thickness of the fish.
In general, a whole fish weighing 3 to 5 pounds will require a three-pound box of kosher salt. Since that is an estimate, it is a good idea to have a second box of kosher salt on hand. Personally, I prefer Diamond Crystal kosher salt because it is additive-free.
Salt-Roasted Fish
Use only enough water to moisten the kosher salt so the grains stick together. Too much water will create a slurry, which will slide off the fish. Because kosher salt is not inexpensive, use only as much as you need. A quarter-inch coating around the fish is sufficient.
Placing herbs and aromatics inside the fish’s cavity can impart flavor and appealing aromas when the salt dome is removed. Sliced fresh lemons, rosemary sprigs, parsley, cilantro, bay leaves or basil all add to the qualities of the dish but discard before platting.
Depending on the density of the flesh, generally speaking, one pound of fish requires 10 minutes of cooking at 400 F.
The mild fish can be served with a tossed salad, pasta, rice or cooked vegetables. The fish goes well with freshly made tartar sauce, salsa verde, pesto, romesco, chermoula or pico de gallo.
Prep time: 10 minutes
Cooking time: 30 minutes if the fish weighs 3 pounds, 50 minutes if the fish weighs 5 pounds
Resting time: 5 minutes
Total time: 45 or 65 minutes depending on the size of the fish
Yield: 4 to 6 servings depending on the size of the fish
Ingredients
1 whole fish, 3 to 5 pounds, with the head and the tail, cleaned and gutted but not necessarily scaled
1 3-pound box kosher salt, preferably Diamond kosher salt
½ to 1 cup water
2 cups fresh aromatics and lemon slices (optional)
Directions
1. Preheat oven to 400 F.
2. Wash the fish inside and outside. Pat dry and set aside.
3. Pour 2 pounds of the kosher salt into a large bowl. Moisten with ½ cup water. Mix with your fingers. If needed, add more water a tablespoon at a time until the salt sticks together.
4. Select a baking tray that is 2 inches longer and wider than the fish. Line with parchment paper or a Silpat sheet.
5. Place a third of the moistened salt on the bottom of the lined baking tray.
6. Lay the whole fish on top of the salt. Place aromatics and lemon slices inside the fish, if desired.
7. Carefully mold the rest of the moistened salt over the entire fish. If more salt is needed, moisten an additional amount of salt.
8. Place the baking tray into the pre-heated oven.
9. After 30 minutes for a 3-pound fish and 50 minutes for a 5-pound fish, remove the baking tray from the oven and allow the fish to rest for 5 minutes.
10. Using a chef’s knife, slice into the salt dome on the back side of the fish, along the fin line. Make another slice on the bottom of the fish. Lift the salt dome off the fish and discard. Using the knife, make a cut across the gills and the tail. Insert a fork under the skin and lift the skin separating it from the flesh.
11. Have a serving platter ready. Using the flat side of a chef’s knife, slide the blade between the flesh and the skeleton along the fin line. Separate the flesh from the bones. Try as best you can to keep the entire side of the fish intact, but no worries if the flesh comes off in several pieces. When you place the flesh on the serving platter, you can reassemble the fillet.
12. Turn the fish over and repeat the process on the other side.
13. Discard the head, tail, bones and skin or reserve to make stock. If making stock, rinse all the parts to eliminate excess salt. Place into a pot, cover with water, simmer 30 minutes covered, strain and discard the bones, head, tail and skin. The stock can be frozen for later use.
14. Serve the fish at room temperature with sauces of your choice and side dishes.
Main photo: Salt-roasted sea bass. Credit: Copyright 2016 David Latt

Granola is a marvelous vehicle for foraged seeds. When I harvested more than a quart of fennel seeds last fall, I never could have imagined that I’d have used them all by spring.
Thanks to the delicate anise cookie-like taste of fennel granola, I believe my demand for fennel seeds will always outreach my supply. Fennel granola is so delightful that even those who don’t have access to wild-harvested seeds will want to make it. Store-bought fennel seeds are slightly less flavorful, but work well in this recipe.
More from Zester Daily:
As a forager, I find wild seeds to be fascinating, particularly in fall, when the number of other crops to pick diminishes. Every year, I work hard to collect all manner of wild seeds. Some of these, such as seeds from the mustard family, are very flavorful and can be used as spices. Others, such as lamb’s-quarter (Chenopodium spp.) and its cousin kochia (Kochia spp.), need to be processed to remove bitter components before they can be utilized as food. Other seeds, for example evening primrose, a high source of gamma-linolenic acid, are relatively flavorless but powerfully nutritious.
Seeds such as amaranth (Amaranthus spp.), nettle (Urtica spp.) or evening primrose (Oenothera spp.) are easy to bring into the kitchen, requiring little more to process than simply shaking them off the plant and some minor winnowing. These seeds are a dream to harvest, but because they have little flavor, I often forget about using them over the course of the winter. In theory, they can be ground to better access their nutrition, then used atop or mixed into pretty much anything you could cook, from salad to breadcrumb toppings to dessert. In practice, these flavorless wild seeds sit unused in my kitchen. A foraging friend, Erica Marciniec, mentioned using her seeds in granola. I followed her advice and it worked brilliantly. Finally, with granola, I’ve found a way to use these wild seeds in a way that is convenient for me to cook, and that the whole family will enjoy.
While I really enjoyed eating my wild seeds in a typical cinnamon-flavored granola, I knew I could somehow boost the flavor.
That’s when I rediscovered my quart of fennel (Foeniculum vulgare) seeds. Initially, I added only a teaspoon of fennel seeds. I discovered that I loved the taste so much that I omitted cinnamon entirely and increased the fennel to further enhance the flavor of the granola.
I ran nine test batches of fennel granola, tweaking every detail you could imagine. In the end, leaving it in the oven produced the most consistently brown and crunchy granola. The addition of the egg white helps to form clusters. Of course, it could easily be omitted if you are making granola for someone with an egg allergy.
I tried making this granola with honey, but found the flavor competed too much with the fennel. Using brown sugar as a sweetener makes this recipe budget friendly, too. If you’d prefer to use honey, substitute 2/3 cup honey, and omit the brown sugar and water.
Fennel Granola
Prep time: 10 minutes
Cook time: 10 to 12 minutes
Total time: 6 to 8 hours (including cooling time in the oven)
Yield: 5 cups
Ingredients
½ cup butter
¾ cup packed brown sugar
3 tablespoons water
1 teaspoon vanilla
3 cups quick oats
2 cups old-fashioned oatmeal
¼ cup fennel seeds, lightly ground in a spice mill
2 tablespoons other wild seeds such as evening primrose (optional)
¼ teaspoon salt
¾ cup slivered almonds
1 egg white
Directions
1. Preheat the oven to 325 F.
2. In a small pot, melt the butter over low heat. Add the brown sugar and water, raise the heat to medium, and let it bubble for 2 minutes. Remove it from the heat, and stir in the vanilla.
3. In a large bowl, mix together the two kinds of oatmeal, seeds, salt and almonds.
4. Pour the warm liquid ingredients over the dry ones, and make certain that they are mixed very thoroughly, so that all of the oatmeal appears wet.
5. In a small bowl, whisk the egg white with a fork until it is frothy. Add it to the oatmeal mixture, and again, stir very well.
6. Pour the granola mix onto a greased 12×17-inch baking sheet. Use a spatula to press it down and make it evenly thick. This will help to ensure that you will have big chunks once it is cooked.
7. Place the granola in the oven and bake it for 10 to 12 minutes. When that time is up, turn off the oven, and leave the granola inside until it is cool. From the time the granola goes into the oven until the oven is cool, do not open the oven door.
Main photo: Fennel granola. Credit: Copyright 2016 Wendy Petty

Kale, Dandelion And Mustard Greens: 3 Star Attractions
by: Clifford A. Wright
in: Vegetables w/recipe
Although vegetables — especially dark leafy greens — are often treated as a side dish, they also can be served as an appetizer; as a bed for other foods; a dish on their own if made in quantity; or just cold as a kind of tapas.
More from Zester Daily:
» Brussels sprouts so good they’ll convert haters
The attribute I like most about dark leafy greens, perhaps excepting spinach, is that they are rugged vegetables that can handle a variety of cooking methods including long cooking times.
These three simple recipes each result in a surprisingly delicious dish, but also in three quite appropriate appetizers for a follow-up dish the next day should you have leftovers. The recipes for the kale and the dandelion are Italian-style, sweet-and-sour preparations, which I find work particularly well (as the Italians discovered long ago) with bitter greens.
Black kale and vinegar
Kale is a bitter cruciferous plant and the so-called black kale, also known as Russian or Tuscan kale, is a particular cultivar that has very dark green, oak-like and crinkly leaves. The following is an Italian method of cooking, and it also makes the preparation very nice served at room temperature.
Prep and cooking time: 45 minutes
Yield: 2 to 3 side dish servings
Ingredients
1 tablespoon extra virgin olive oil
2 garlic cloves, finely chopped
One 1/8-inch-thick slice pancetta, cut into strips
10 ounces Russian or black kale, rinsed
1 tablespoon red wine vinegar
1 teaspoon sugar
Salt and freshly ground black pepper
Directions
1. In a sauté pan, heat the olive oil with the garlic and pancetta over medium-high heat, stirring, and once the pancetta is slightly crispy in about 4 minutes, add the kale.
2. Cover and cook on low until the kale is somewhat tender, about 30 minutes. Add the vinegar with the sugar dissolved in it to the pan, cover, and continue cooking 10 minutes.
3. Season with salt and pepper and serve warm or at room temperature.
Sweet and sour dandelion
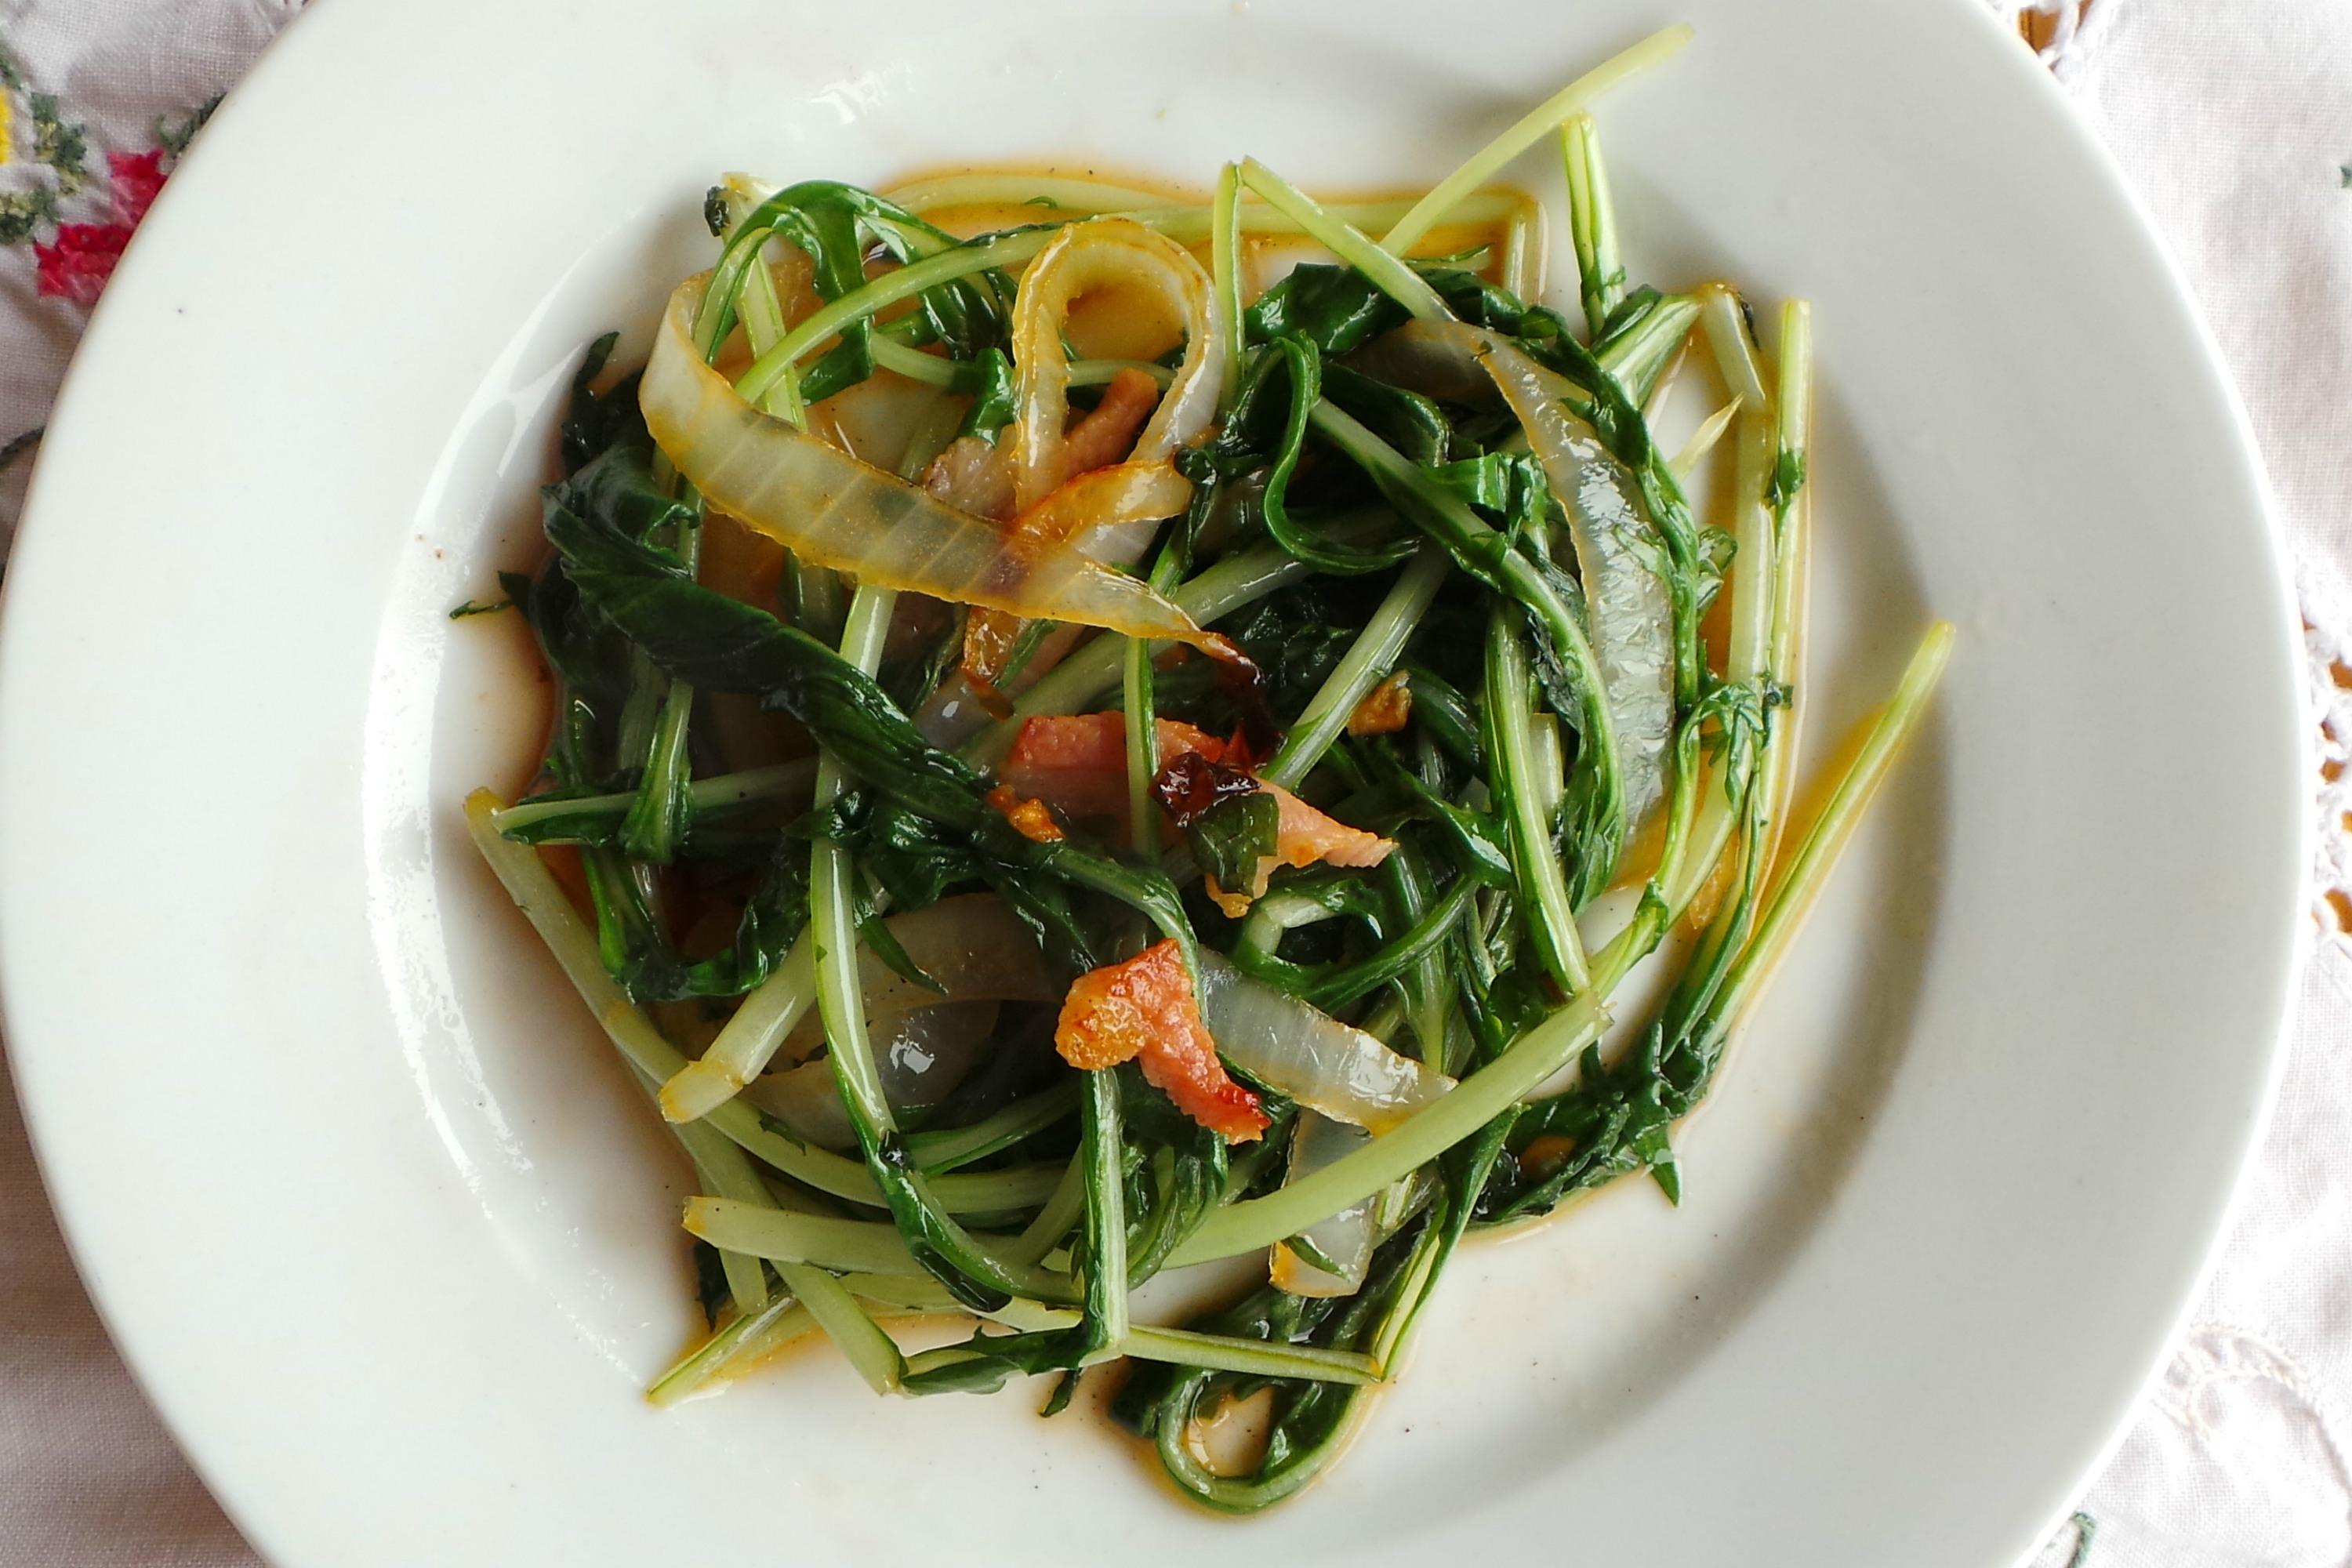
Sweet and sour dandelion. Credit: Copyright 2016 Clifford A. Wright
In Italian they would call this kind of dish agrodolce or sweet and sour. The sweetness added to the bitter taste of dandelion is a contrast that many gourmets swoon over.
Prep and cooking time: 20 minutes
Yield: 2 side dish servings
Ingredients
1/4 cup extra virgin olive oil
1/2 ounce pancetta, diced small or cut into thin strips
2 large garlic cloves, finely chopped
Four 1/4-inch thick slices onion
1 bunch dandelion (about 3/4 pound), bottom quarter of stems removed, washed
3 tablespoons chopped fresh mint
Salt and freshly ground black pepper to taste
2 teaspoons sugar
2 tablespoons red wine vinegar
Directions
1. In a sauté pan, heat the olive oil over medium heat with the pancetta, garlic and onion and cook until softened, stirring, about 5 minutes.
2. Add the dandelion and mint and cook until they wilt, tossing frequently. Season with salt and pepper. Meanwhile, dissolve the sugar in the vinegar then pour over the dandelion and cook until evaporated, about 3 minutes.
3. Serve warm or at room temperature.
Drowned mustard greens
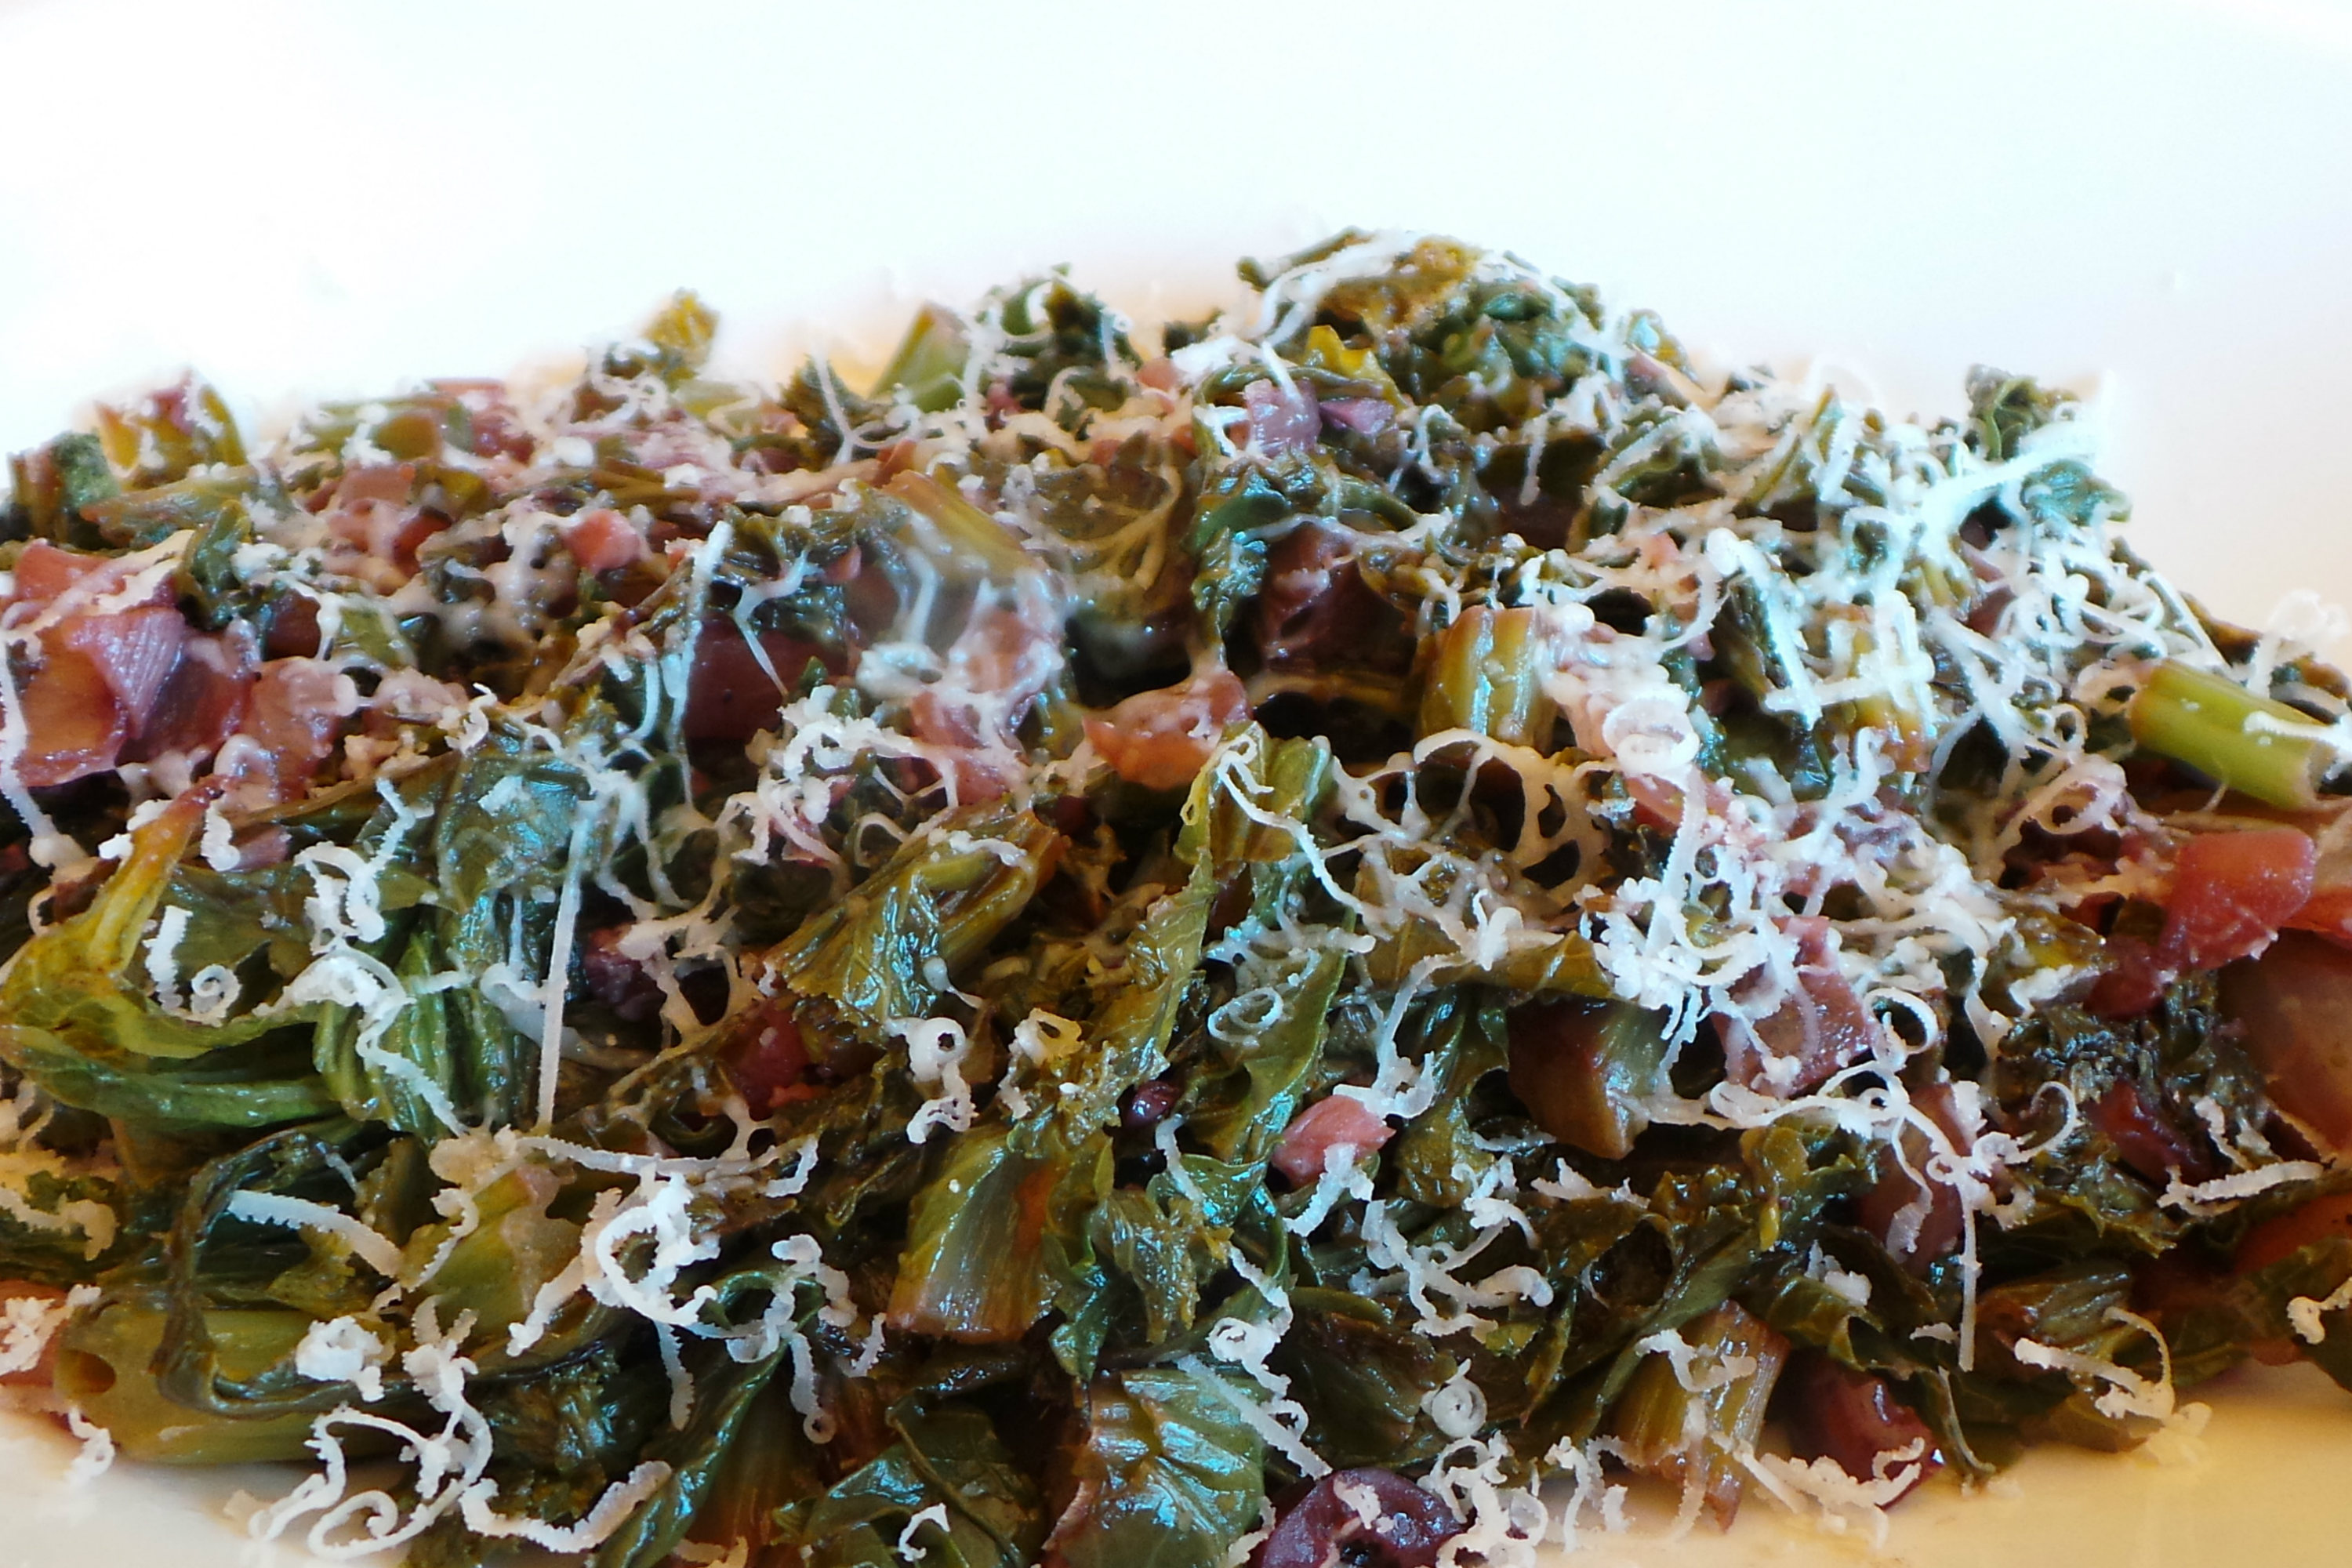
Drowned mustard greens. Credit: Copyright 2016 Clifford A. Wright
This Sicilian-inspired recipe is derived from a recipe originally for broccoli, but it works spectacularly with mustard greens. The Sicilians call this kind of dish affucati, ”drowned,” because it’s smothered in wine. It’s terrific as a room-temperature appetizer the next day too. If serving the next day as a room temperature antipasto, let the Parmigiano-Reggiano melt and then drizzle some olive oil to serve.
Prep and cooking time: 30 minutes
Yield: 4 side dish servings
Ingredients
1/4 cup extra virgin olive oil
1 onion, coarsely chopped
4 garlic cloves, finely chopped
4 salted anchovy fillets, rinsed
1 pound mustard greens, heavier stems removed and discarded, leaves washed and shredded
3/4 cup dry red wine
8 imported black olives, pitted and chopped
Salt and freshly ground black pepper to taste
3 tablespoons freshly grated Parmigiano-Reggiano cheese
Directions
1. In a flameproof casserole, heat the olive oil over medium-high heat, then cook the onion and garlic until soft, stirring constantly so the garlic doesn’t burn, 3 to 4 minutes. Add the anchovies and once they have melted add the shredded mustard greens, cover, and cook until they wilt, about 5 minutes.
2. Pour the red wine into the sauce with the olives, salt and pepper. Cover again, reduce the heat to medium and cook 15 minutes. Transfer to a serving platter with a slotted spoon and sprinkle on the Parmigiano.
Main photo: Black kale with vinegar. Credit: Copyright 2016 Clifford A. Wright

Passover is a Jewish holiday celebrating freedom. The initial meal (the seder) and the way you eat for a week offer a small part of the ancient Israelites’ experience as they journeyed from slavery in Egypt to the complexity of freedom. Breads, cooked on the run during their flight, didn’t have sufficient time to rise. The result? Matzo.
Every year, for the first few days of Passover, matzo seems somehow so new. A fat shmear of Temp-Tee ultra-whipped cream cheese and a tart and fruity jelly on top. Or soaked and fried into a matzo brei (a French-toast-like dish) crunchy with sugar and cinnamon. These are the foods of memory to me.
But the problem is that Passover is a weeklong festival. And when it comes to cooking and eating, it is a very long week indeed. Matzo is eaten all the time. I mean ALL the time. It’s in every food, every dish, every treat and in every course. It’s ground into breading, pulverized into cake flour, crushed into farfel and layered into mini “lasagnas.”
More from Zester Daily
» Passover’s diverse flavors shine in these sweet treats
» A lasagna for Passover that melds French, Italian flavors
Matzo fatigue and the dreaded matzo-pation set in. Desperation takes over by around day four. But frankly, what bothers me the most is when matzo invades desserts. Folks often cook more on Passover than all year long, often pulling out heritage recipes. Even I, a modernist, will cook up a heritage dish or two along with my flights of imagination and globally influenced dishes.
When it comes to desserts, though, many holiday cooks reach for box mixes. Virtually none taste good. These mixes are often packed with processed ingredients and artificial flavors. As a professional cook and culinary instructor — and honestly, a person with taste buds — I don’t make them and I don’t buy them.
If I want heritage desserts, I buy Passover chocolates. That does the trick.
But making desserts at home? What can you do that tastes great and is still Passover-worthy? Matzo in desserts always makes itself known in taste and texture — and I don’t mean that in a nice way whatsoever. No matter how you cut it (pun intended, sorry), matzo desserts are definitely not what I want in order to make a holiday more special.
My advice? If you can put the time and effort into cooking desserts, fear not. Here is a solution.
Delicious Passover desserts

This Sirio Maccioni’s Cirque Creme Brulee has been adapted from Molly O’Neill’s “New York Cookbook” — it’s a delicious Passover dessert. Credit: Copyright 2016 by Tami Weiser
Offer up some treats that are deliciously Passover-ready AND matzo-free and grain-free. Try a Pavlova, a macaroon, a flourless chocolate cake, ice cream, chestnut-flour crepes, custards, crème brûlée or nut paste-based cookies.

This Vanilla Pavlova is light, airy and sweet. The recipe was contributed by Elizabeth Schwartz. Photo credit: Copyright 2016 Tami Weiser
A world of matzo-free desserts awaits you.
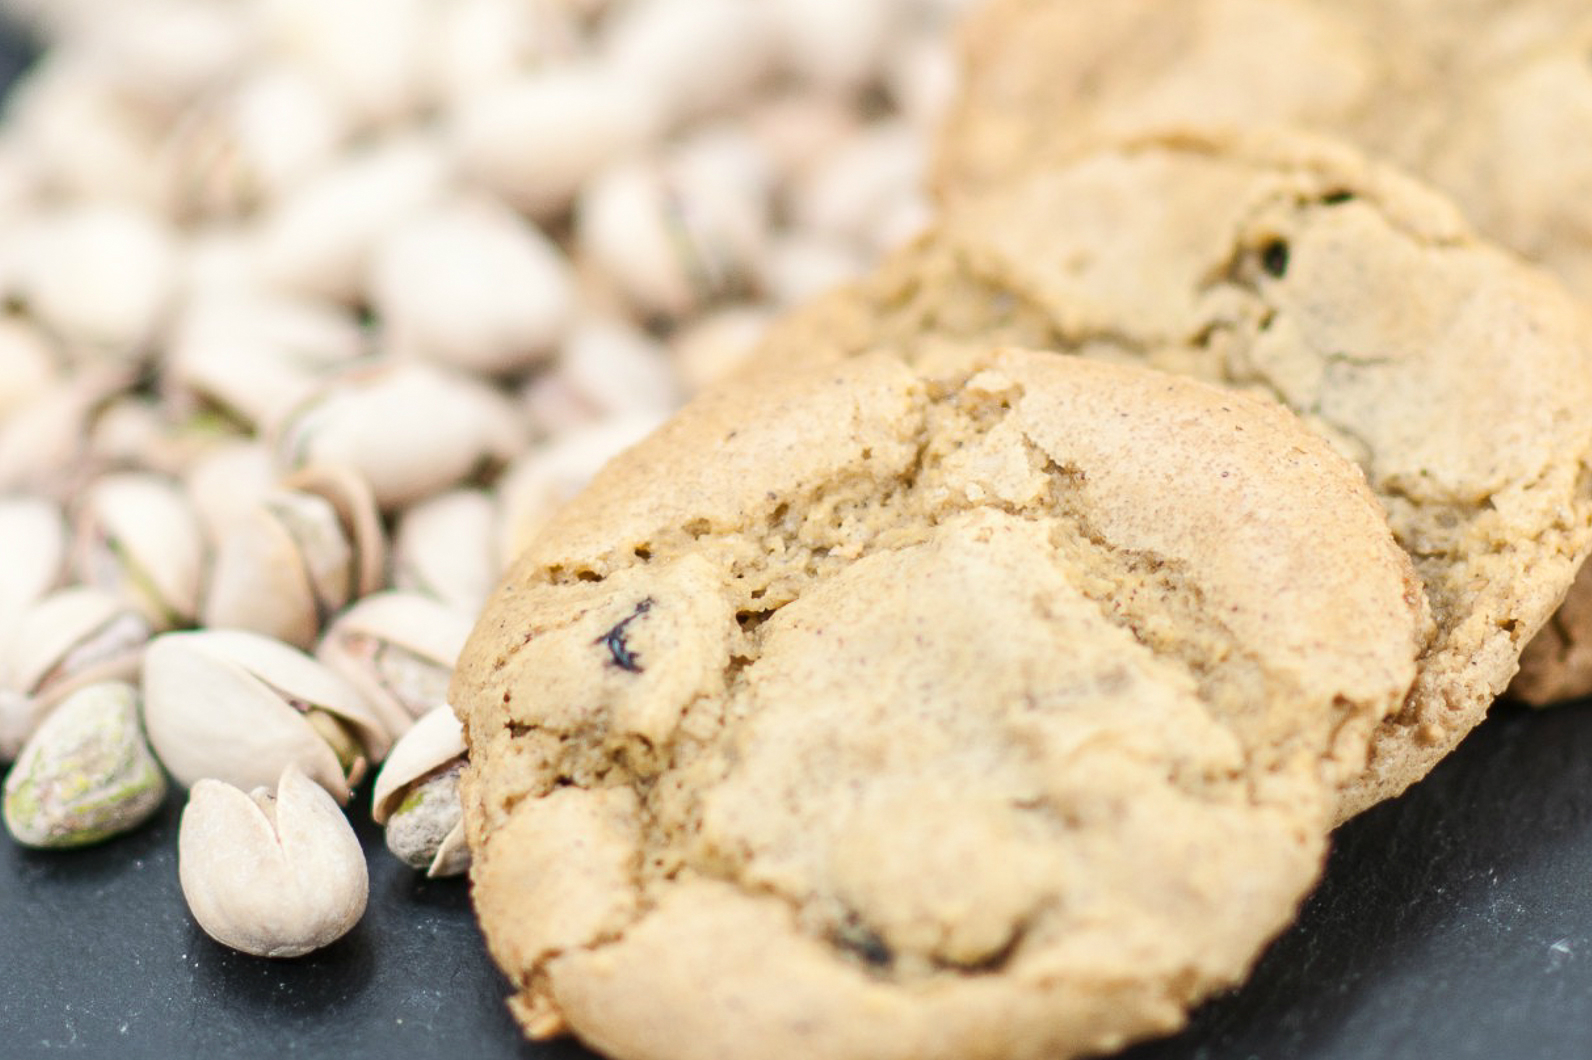
Pistachio and Tart Cherry Chewy Cookies strike just the right balance between sweet and tart. Credit: Copyright 2016 Tami Weiser
Pistachio and Tart Cherry Chewy Cookies
Prep time: 15 minutes
Cook time: 15 minutes
Total time: 30 minutes
Yield: 24 cookies
Ingredients
14 ounces pistachio paste, King Arthur or another all-natural brand preferred
1 cup (200 grams) sugar
2 large egg whites
1/4 teaspoon ground cardamom
Scraped seeds of 1 vanilla bean pod
1 cup dried tart cherries
1/2 cup pistachios, lightly crushed
Directions
1. Preheat oven to 350 F. Line 2 baking sheets with parchment paper.
2. In the bowl of a standing mixer fitted with a paddle attachment, mix the pistachio paste until it resembles big cookie crumbs, 20 to 30 seconds. Add the sugar and mix thoroughly. Add the egg whites, cardamom and vanilla. Mix until completely smooth, 3 to 4 minutes. Stir in the tart cherries.
3. Drop 2 teaspoons of batter per cookie on the sheet, leaving 1 1/2 to 2 inches between the cookies. Sprinkle the pistachios over the top of the cookies.
4. Bake until light brown but still soft, 12 to 13 minutes. (The cookies will firm up considerably as they cool). Store at in an airtight container at room temperature for up to 4 days.
Main image: Macaroons are a traditional Passover sweet, but this recipe brings a new dimension by adding homemade chocolate ice cream. The chocolate ice cream base is adapted from “The Perfect Scoop,” by David Lebovitz. Credit: Copyright 2016 by Tami Weiser

As the Korean palate becomes more adventurous, a whole new meat has become South Korea’s next big culinary craze — lamb.
For years, lamb and mutton were considered unpalatable by Koreans — too strong, too smelly, not to mention too cute while prancing through the fields. Meat consumption was limited to beef, chicken, pork, sometimes duck, and very occasionally dog. But a booming Korean-Chinese population has got the country into the swing of lamb.
“When it started we aimed for Chinese people, but then they brought their Korean friends to the restaurant,” says Lee Hang-yung, a Korean-Chinese worker from Heilongjiang Province who lives in Seoul. “And people’s tastes slowly changed, and that’s what’s happened here.”
Chinese food booms

A Chinese restaurant in South Korea serves lamb skewers. Credit: Copyright 2016 Jo Turner
Lee helps operate Gyeongsong Yanggochi, the first Chinese lamb restaurant in what is now a small Chinatown outside Konkuk University. The street is end-to-end with Chinese lamb restaurants, some that Lee derides as “imitators.”
Lee speaks Korean with a Chinese accent, and though he is ethnically Korean, he is, like most of the workers and owners on this street, a Chinese national, born and raised in the People’s Republic.
He is part of a growing minority in South Korea called — sometimes derogatorily — Joseonjok, a name that references a former Korean kingdom. Like ethnic Koreans from the former Soviet Union, Korean-Chinese are not granted automatic right of return in South Korea the way Korean-Americans, Korean-Japanese and many other ethnic Koreans are.
Still, since the re-establishment of ties between South Korea and China in the early 1990s, Korean-Chinese have come in large numbers, usually to work the dirty, dangerous and difficult jobs local Koreans won’t do. Like immigrants the world over, some open restaurants, and Chinese lamb has proved to be the safest investment.
Serving up lamb

Yanggochi has spread well beyond its initial market of Chinese living in South Korea; 80 to 90% of customers are now Korean. Credit: Copyright 2016 Jo Turner
The flavors are a bit different, but the dish is basically the same as in China.
More from Zester Daily:
» Eat like a khan with Mongolian lamb jambalaya
Yanggochi, meaning lamb skewers, are cubes of skewered lamb barbecued at the table over hot coals. Holding the skewers together while turning them is quite a skill, and as a result, most restaurants now have a machine that automatically rotates the skewers.
“In China, the yanggochi is prepared with the fat and the meat together,” Lee says. “But here it’s more like galbe,” referring to common Korean barbecue, with the fat trimmed from the meat. The meat and the seasoning is much less strong than in China, to cater to Korean tastes.
Once the skewers are cooked, they’re placed on a rack above the heat to cool, then dipped in a seasoning of red pepper, cumin, parilla, mustard seed and other spices. There is a bevy of side dishes that can go with it, including steamed dumplings, mapo tofu in hot and sour sauce, peanuts, cubes of radish kimchi, and thick sliced tofu with chili sauce. The lamb can be wrapped in ggotbbang — literally, “flower bread,” or mandarin rolls — a rolled, steamed bun, along with zha cai, pickled mustard plant stem.
For drinks, Chinese Tsingtao beer is a must for most patrons — a series of ad campaigns and clever product placements have made yanggochi and Tsingtao inseparable. Goryangju, a very potent clear Chinese liquor, is also popular, as is Korean soju.
Trying new flavors

A worker stokes the coals at Gyeongsong Yanggochi, the oldest lamb restaurant on the block. Credit: Copyright 2016 Jo Turner
Korean lamb restaurants can be found all over this restaurant-dense city. The trade magazine “Meat & Livestock Australia” noted in a report this February that Australian mutton and sheep exports to Korea have risen sharply year-on-year over the last six years.
The report says that despite a continued “general negative perception” toward lamb, “the market’s younger generation is more willing to try new flavors, and there has been an emergence of Chinese-influenced lamb barbecue and skewer restaurants in Seoul, commonly frequented by male consumers in their 30s to 40s.” Australia is the source of 94% of South Korea’s sheep meat.
Yanggochi recently also got a boost when celebrity TV chef Baek Jong-won recommended it on his TV show a few months ago.
“In the past, our customers were all Chinese, but now it’s 80 to 90% Koreans,” says one young woman who works at Kondae Yanggochi, and declined to provide her name. “I think they’ve been trying yanggochi, have gotten used to it, and now they really like it.”
Main photo: Lamb skewers are cooked at the table at Songhwa Yanggochi near Konkuk University in Seoul. Credit: Copyright 2016 Jo Turner

It’s the side dish of my childhood, what school cafeterias invariably paired with burgers, sloppy Joes, hot ham-and-cheese sandwiches and sundry other entrée staples. Growing up, I must have eaten Tater Tots at least once a week, but after college I turned my back on those golden brown, crunchy-yet-soft, mild-yet-savory fried potato puffs.
While I never would have guessed that we’d be reunited, tastes and times have changed with the re-invention of my old school friend. Today these potatoes are no longer relegated to institutional fare. Tots appear everywhere from upscale, New American-style restaurants to bars, burger joints and food trucks. Nor are they merely side dishes for hot sandwiches. Chefs partner them with omelets, pulled pork and fried chicken or serve them on their own as a hearty appetizer or entrée.
Fond memories of Tater Tots
Tater Tots have long been a staple of school lunches. Credit: Copyright 2016 Kathy Hunt
More from Zester Daily
» Easy, healthy potatoes from containers
» TEDxManhattan: Changing the way kids eat in schools
Nostalgia drives this renewed passion for Tater Tots, said Julie Crist, owner of The Tot Cart in Philadelphia. “Parents used to make Tater Tots for their kids. Now they have souped-up versions of those elementary school lunches,” she said.
Among The Tot Cart’s offerings are “chicken tot pies,” which feature chicken potpie filling layered over potatoes, and a dessert tot consisting of tots tossed in cinnamon sugar and drizzled in dulce de leche. “The salty-sweet mixture makes tots ideal for dessert. With their crispy outsides you really can put anything on them,” said Crist, who serves more than 100 types of tots from her food truck in Pennsylvania, New Jersey and Delaware.
At Alexander’s Tavern in Baltimore, tots are the house specialty. “Tots play on Alexander’s theme of taking a childhood classic and giving it an adult twist,” said executive chef Faith Paulick.
Alexander’s Tavern diners nosh on “tot-chos,” potatoes smothered in queso and jack cheeses, salsa, sour cream and jalapenos, as well as chili- and cheese-covered tots and BBQ sweet potato tots. The best-selling item on the menu is Maryland tots, Paulick said. These are tots blanketed with lump crab meat, crab dip and Old Bay seasoning.
To keep tabs on the food’s popularity, Alexander’s Tavern maintains a “tots sold” counter on its website. To date, the restaurant has sold more than 3 million.
Tater Tots a boon to profits
Tater Tots were created in an attempt to make use of the potato scraps leftover from cutting french fries. Credit: Copyright 2016 Kathy Hunt
Although Tater Tots now feature in an array of clever dishes, they had far humbler beginnings. They simply were a way to use the scraps from freshly cut french fries.
In 1952 F. Nephi Grigg of Nampa, Idaho, began considering how he and his brother Golden could turn the leftover slivers at their potato-processing plant into something more profitable. At that time the cuttings were being sold as livestock feed. Grigg decided to try grinding up the pieces, mixing in some spices, pushing the concoction through a form and then deep-frying the bite-sized chunks. With that, Grigg created the first batch of Tater Tots.
He premiered his invention at the 1953 National Potato Convention in Miami, and the tots were an instant hit.
Thanks to Tater Tots, by the late 1950s the Grigg brothers possessed a quarter of America’s frozen potato market. In 1960 the brothers changed their company name from Oregon Frozen Foods to Ore-Ida, a nod to their facility’s proximity to the Oregon-Idaho border.
Five years and multiple new facilities later, the Griggs sold Ore-Ida and its Tater Tots to the H.J. Heinz Co. for $31 million. Heinz, in turn, made these frozen potatoes a staple of American kitchens, cafeterias and childhoods.
While I may have been raised on those mass-produced, frozen tots, I now prefer to make my own. It’s not a complicated or labor-intensive process. In fact, I only need a few ingredients — potatoes, flour, salt, pepper and oil — and a grater, a slotted spoon and a deep pot.
As I’ve learned through trial and error, the key to good tots is to fry rather than bake them. The difference between those two techniques is night and day, Paulick said.
“Frying gives you nice, even cooking. The potatoes are crispy on the outside and cooked completely on the inside. Unfortunately, you don’t get the same result when you bake tots,” she said.
Crunchy tots allow you to pile on a host of ingredients, including cheeses, meats and sauces. They also enable you to serve them school-cafeteria-style, unadorned except for a dusting of salt and pepper.
Scallion Potato Tots
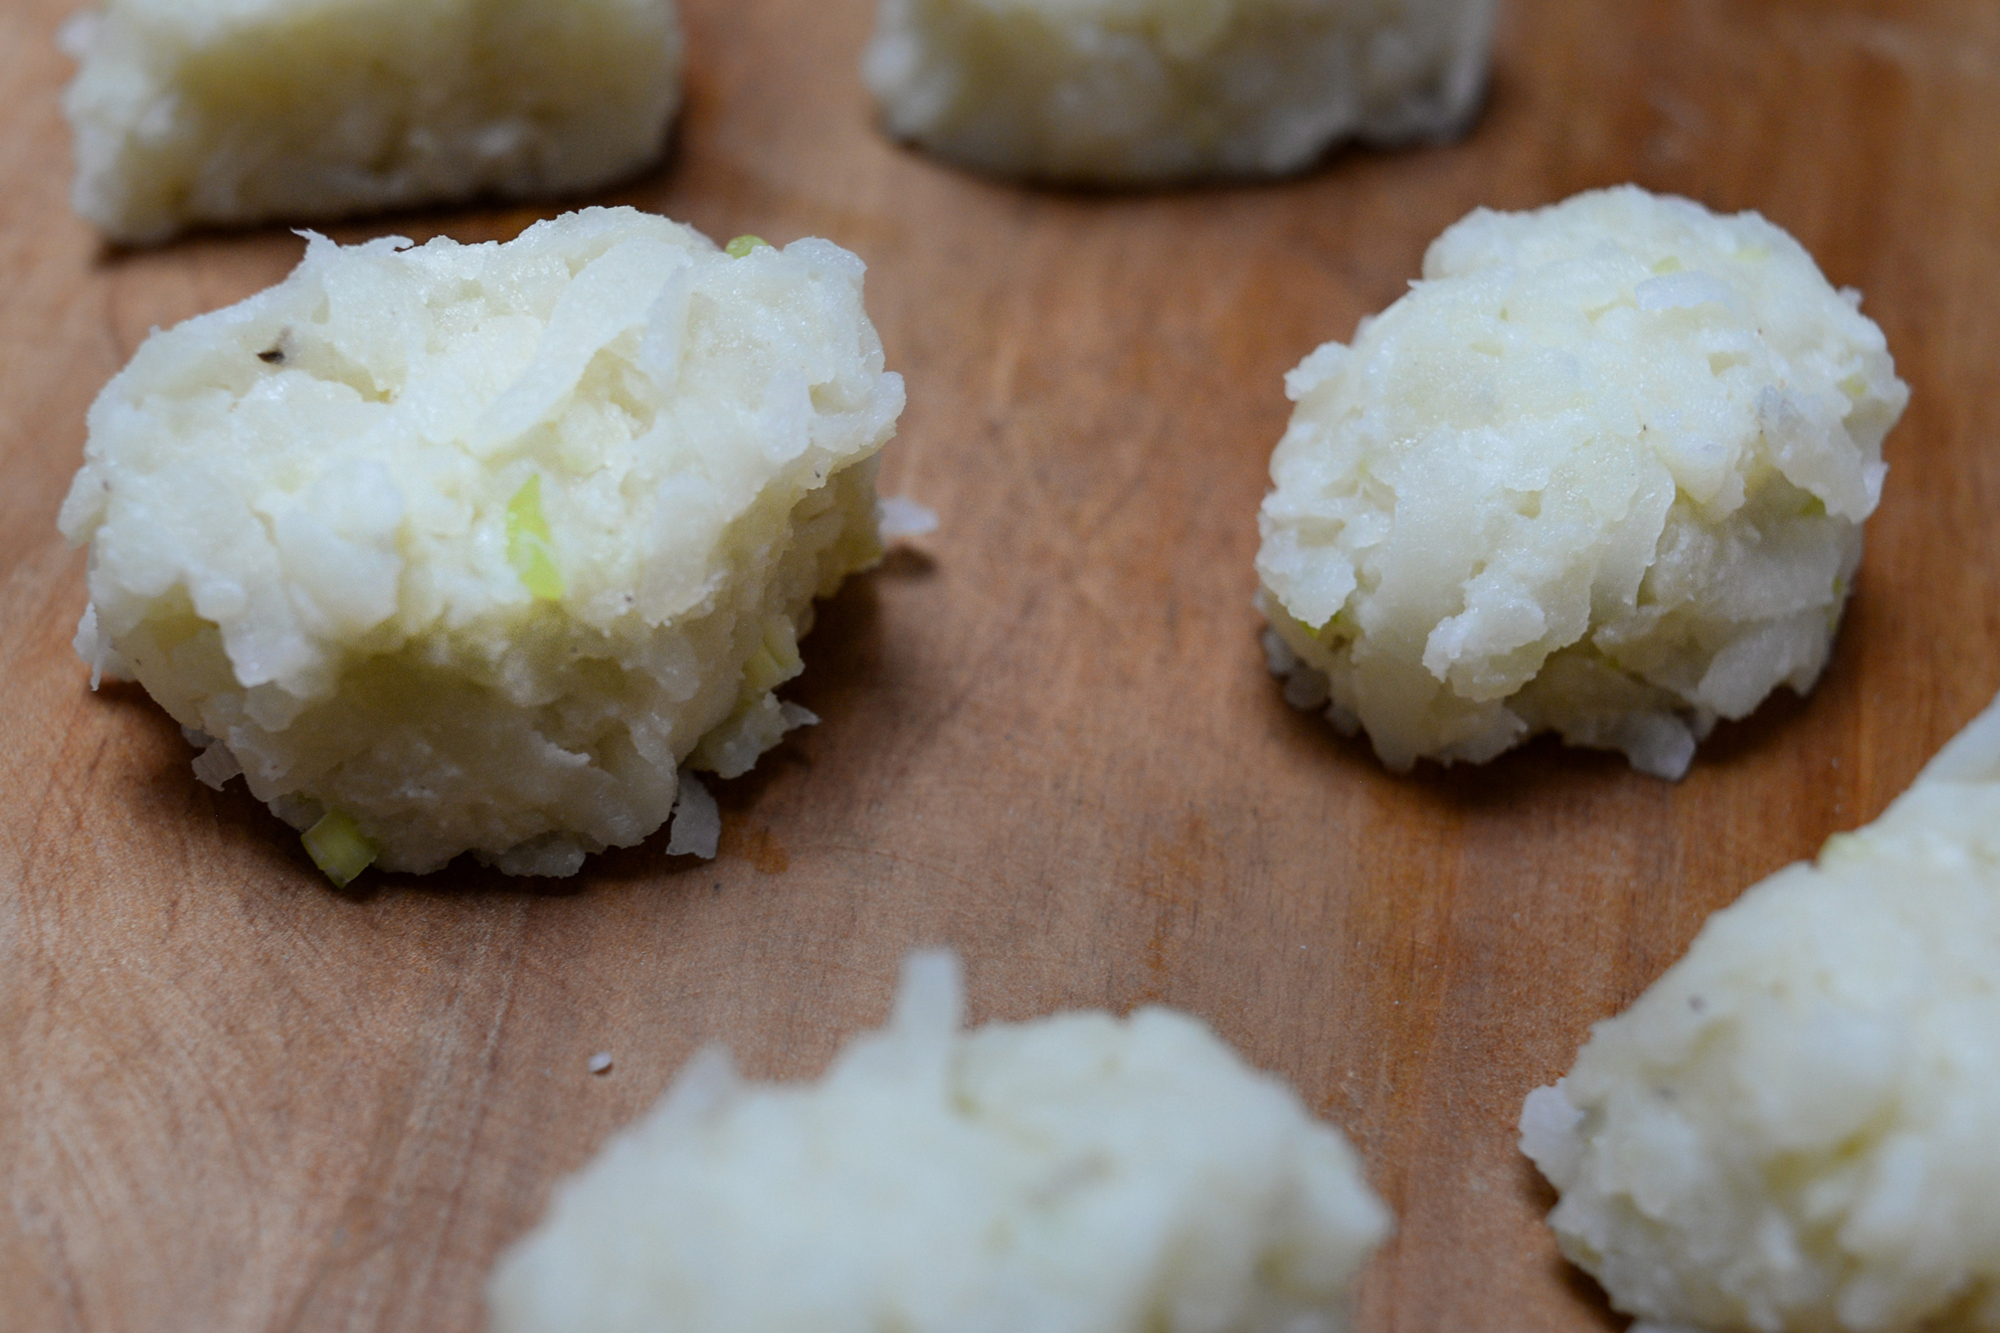
Scallion Potato Tots ready for frying. Credit: Copyright 2016 Kathy Hunt
Prep time: 40 minutes
Cook time: 5 minutes
Total time: 45 minutes
Yield: Makes 6 servings
Ingredients
2 pounds Russet potatoes, washed
1/4 cup all-purpose flour
1 1/2 teaspoons onion powder
1 teaspoon salt
1/4 teaspoon white ground pepper
3 tablespoons minced scallion, whites only
Grapeseed or canola oil, for frying
Salt (optional)
Directions
Preheat the oven to 425 F. Prick the potatoes with a fork and place them in the oven. Bake for 30 minutes. Remove them from the oven and allow them to cool for 10 to 15 minutes, until they are no longer too hot to touch.
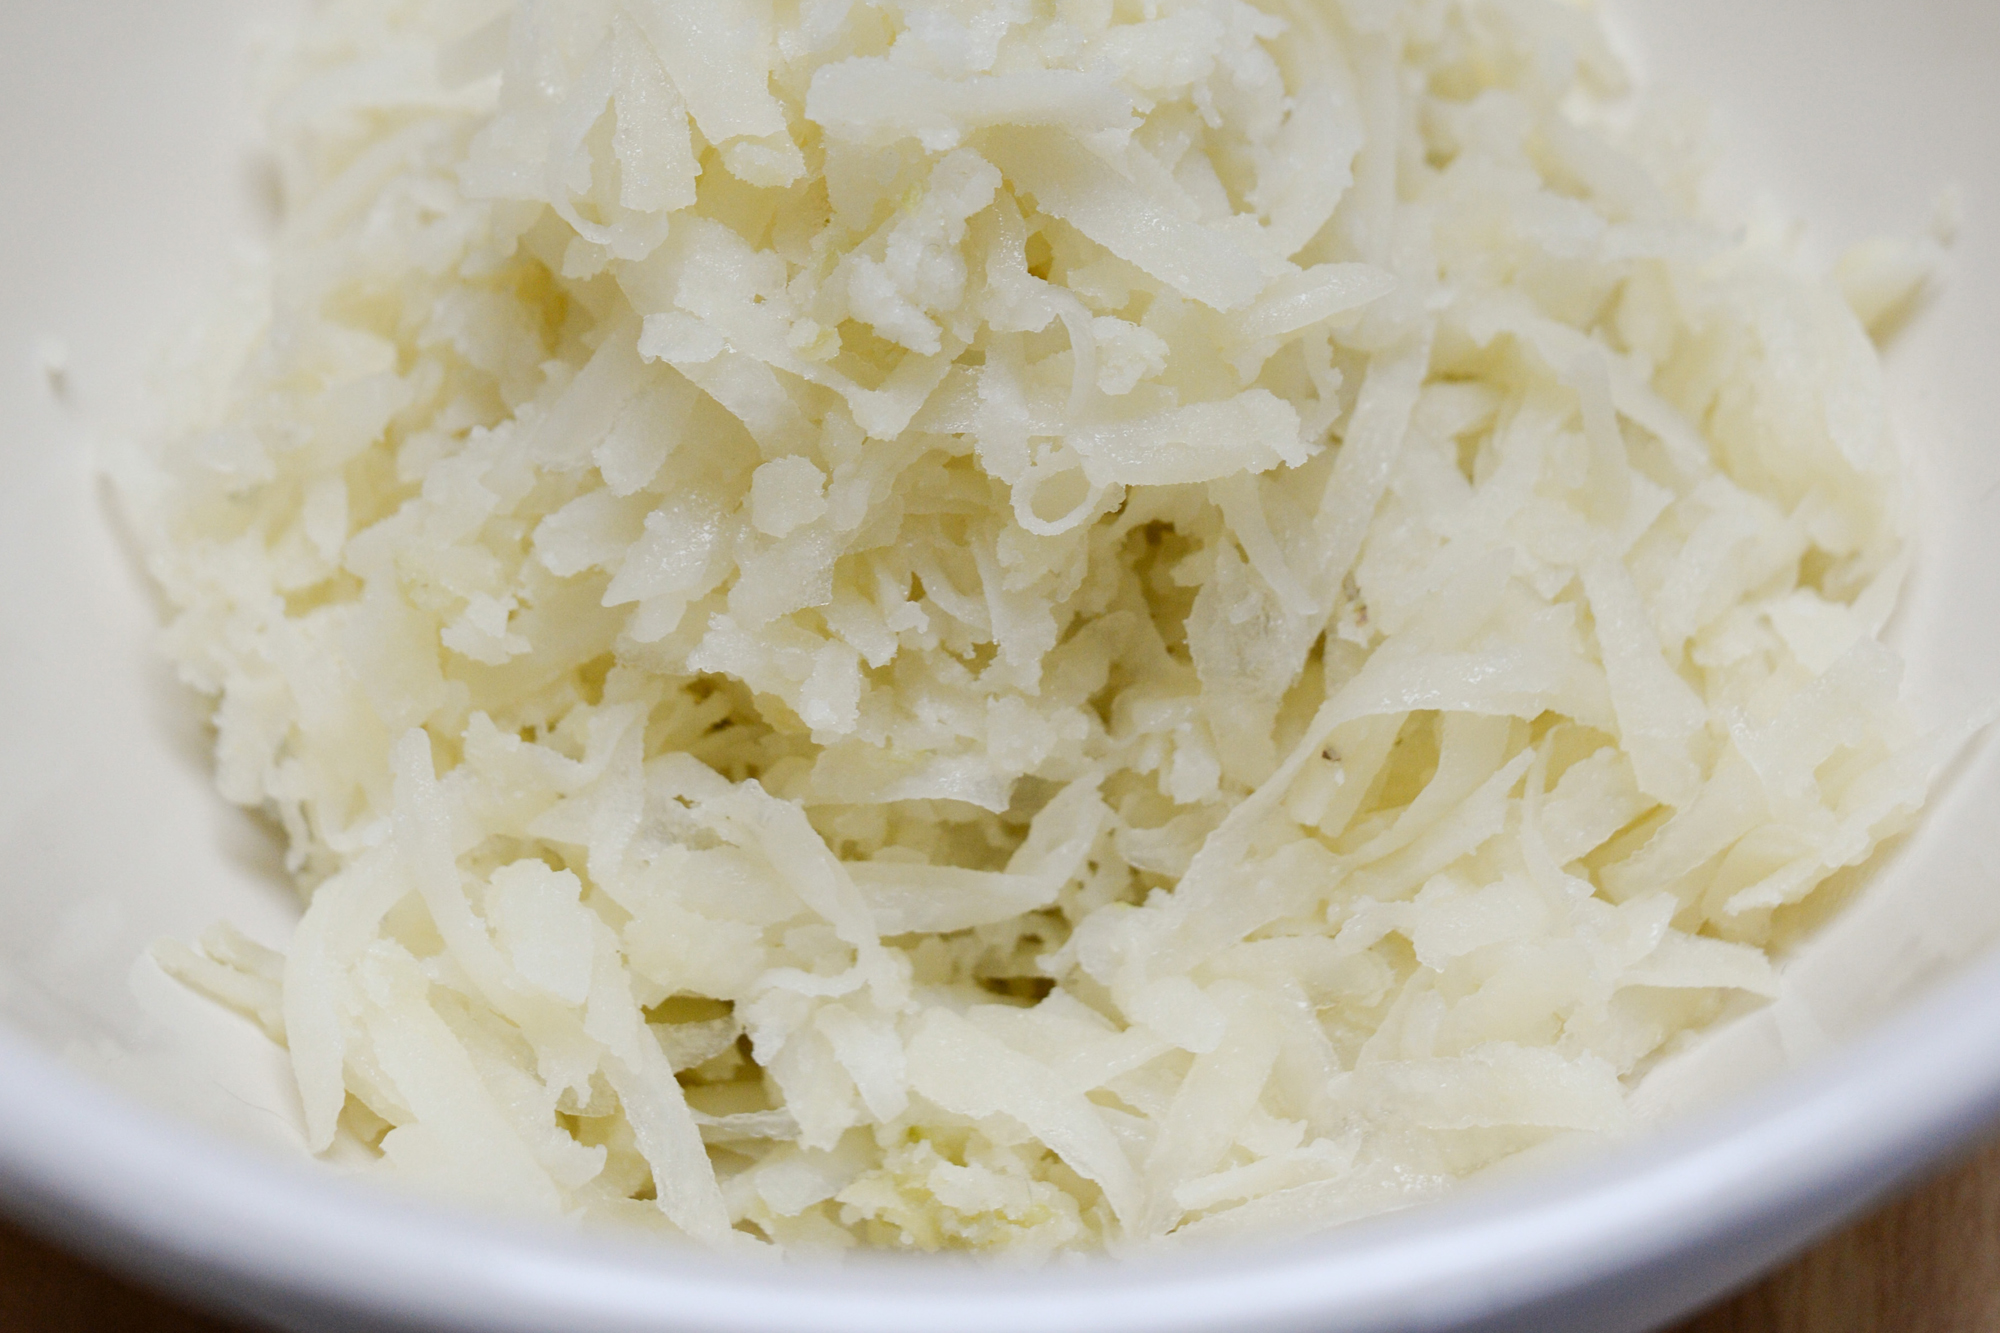
Using a pairing knife, peel off and discard the potato skins. With a box grater, grate the potatoes into a bowl.
Add the flour, onion powder, salt, white pepper and minced scallion and, using a fork, toss together until evenly combined.
Fill a deep pot with 2 1/2 to 3 inches of oil. Heat the oil on medium-high until it reaches 350 F on a thermometer.
Drop the tots into the oil one at a time. Cook until golden, 3 to 5 minutes. Using a slotted spoon, scoop out the cooked tots and place them on a clean, dry cloth to drain. Repeat until all the tots have been fried.
Sprinkle a smidgen of salt over them, if desired. Serve warm.
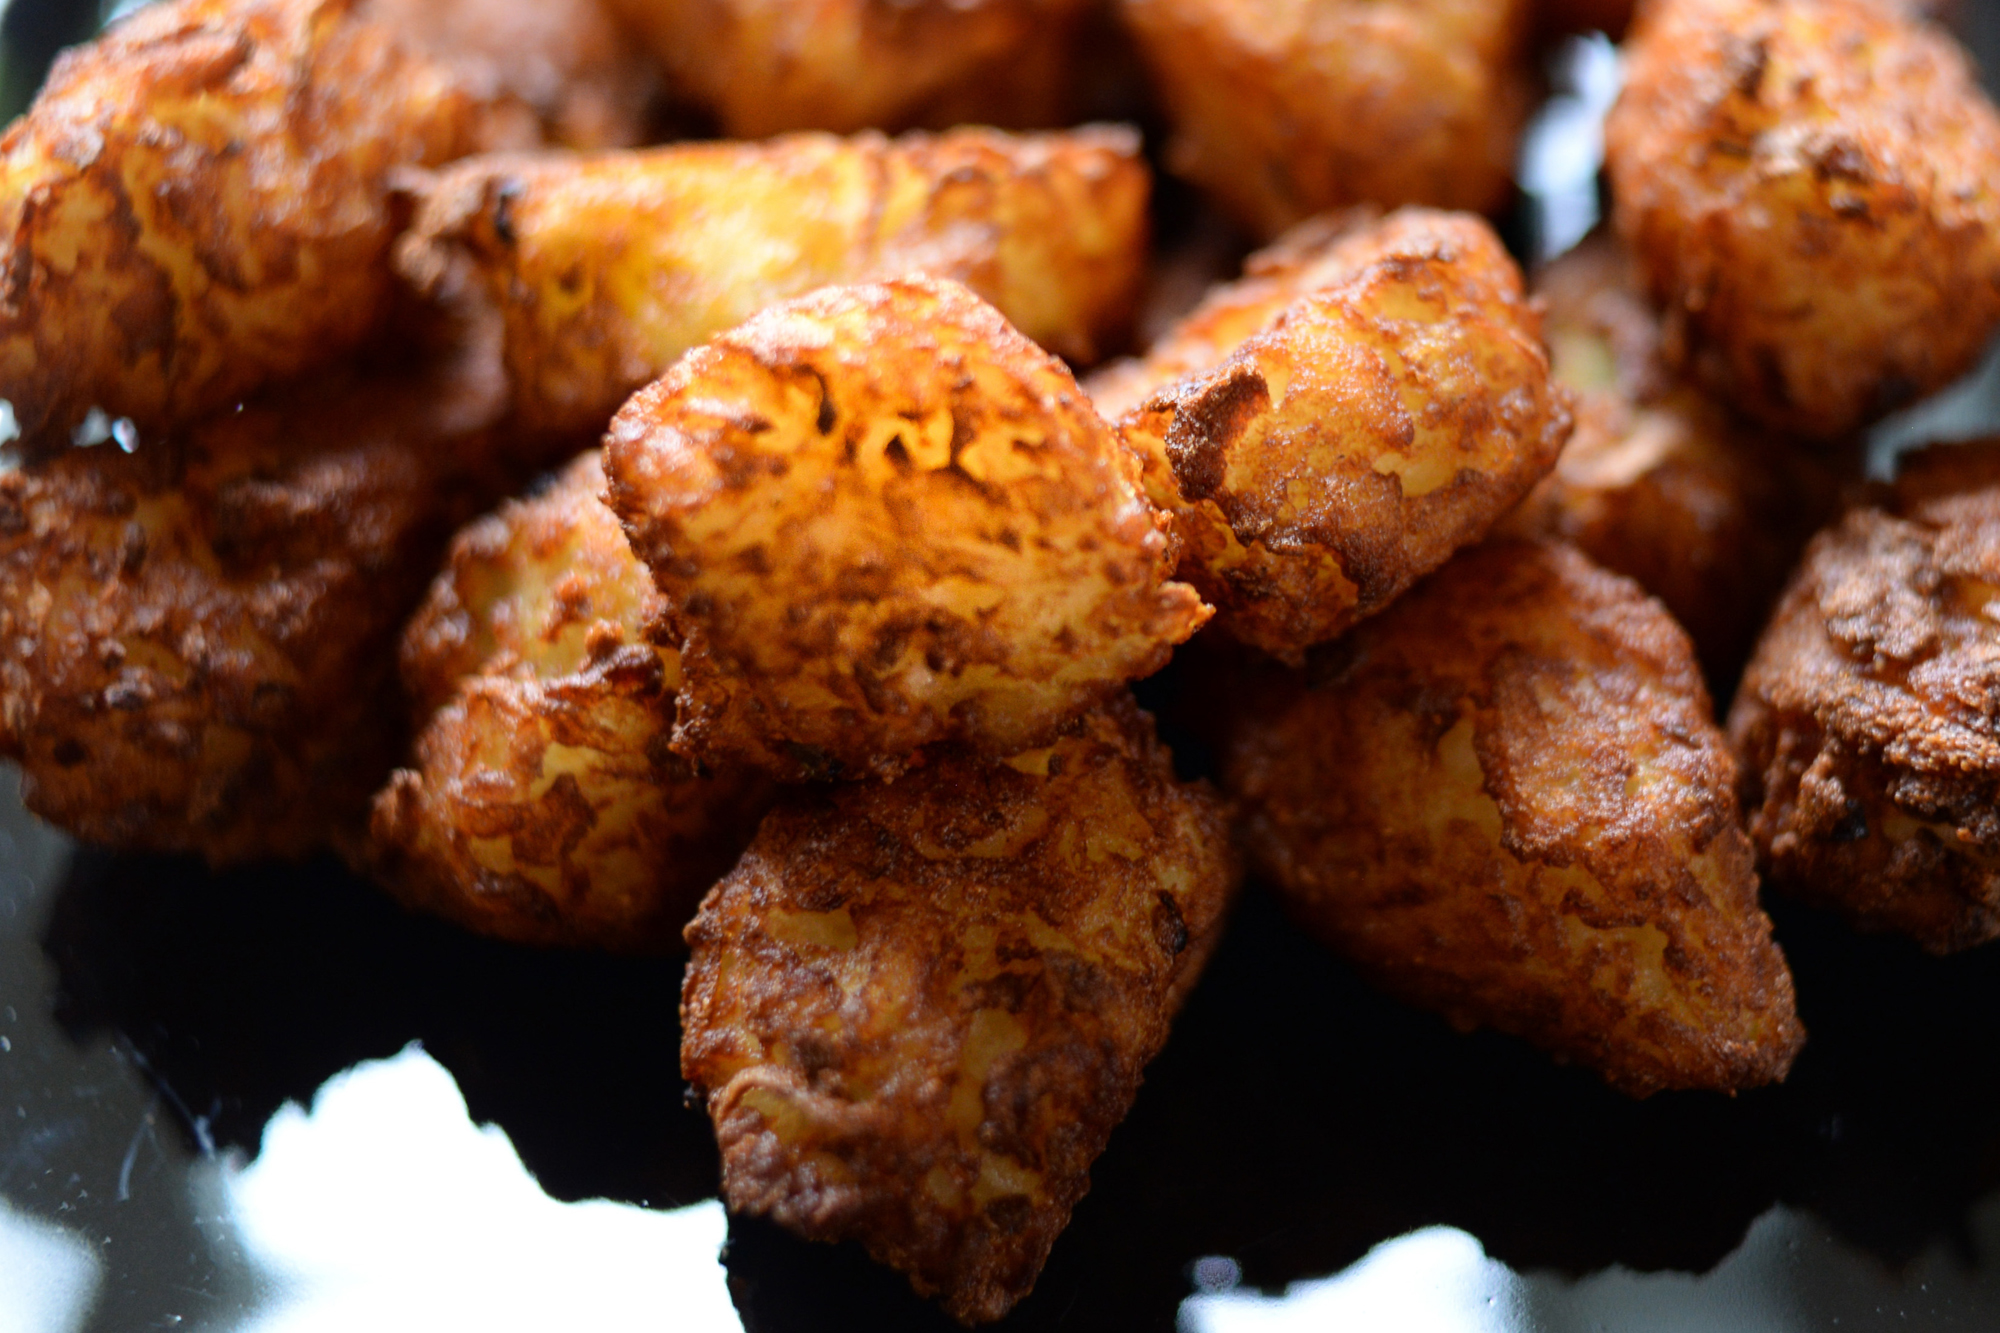
Main image: Tater Tots, long a staple of school lunches, have been elevated to gourmet fare by some chefs. Credit: Copyright 2016 Kathy Hunt

Montana is called “the last best place,” a long-cherished refrain that applies now more than ever to its increasingly innovative restaurants. Here, diners can taste not just local Montana ingredients, but the spirit of the state itself.
One restaurant that embodies that spirit is Lilac in downtown Billings, the largest city in Montana. The restaurant has earned local adoration and national accolades. The year after it opened, Lilac was the only restaurant in the state to be included in OpenTable’s Diners’ Choice Awards for the Top 100 American Fare Restaurants in the United States.
Crafting good food, good staff

Jeremy Engebretson, proprietor and chef of Lilac in Billings, Montana. Credit: Copyright 2016 Louis Habeck
At Lilac, glossy black and pearly white subway tiles frame a short row of bar seating that anchors the restaurant space and provides an unobstructed view directly into the kitchen. There is no haughty mystery, overwrought culinary performance or exclusivity here.
More from Zester Daily:
» Buying local makes economic sense
» Five habits for a farm-to-table lifestyle
Rather, proprietor and chef Jeremy Engebretson describes Lilac’s food with prose so succinct and assertive it would cause Ernest Hemingway to sit up and take notice: “Local from scratch, responsible cooking. Modern American food with a fistful of approachability.”
Even given the area’s short growing season and challenging kinks in local distribution chains, Montana has ranked among the top 10 states nationally for commitment to locally produced food by Strolling of the Heifers Locavore Index. For Lilac, Engebretson, who grew up in Montana and neighboring Wyoming, describes local as “a regional idea here,” one that is more “Montana-centric than Montana-only.”
It’s a food worldview that brings ingredients like Montana-grown grains, produce, beef, cheese and honey together with, for example, wild boar from Denver or Texas and seafood from around the world.
Cooking as ‘a soulful experience’
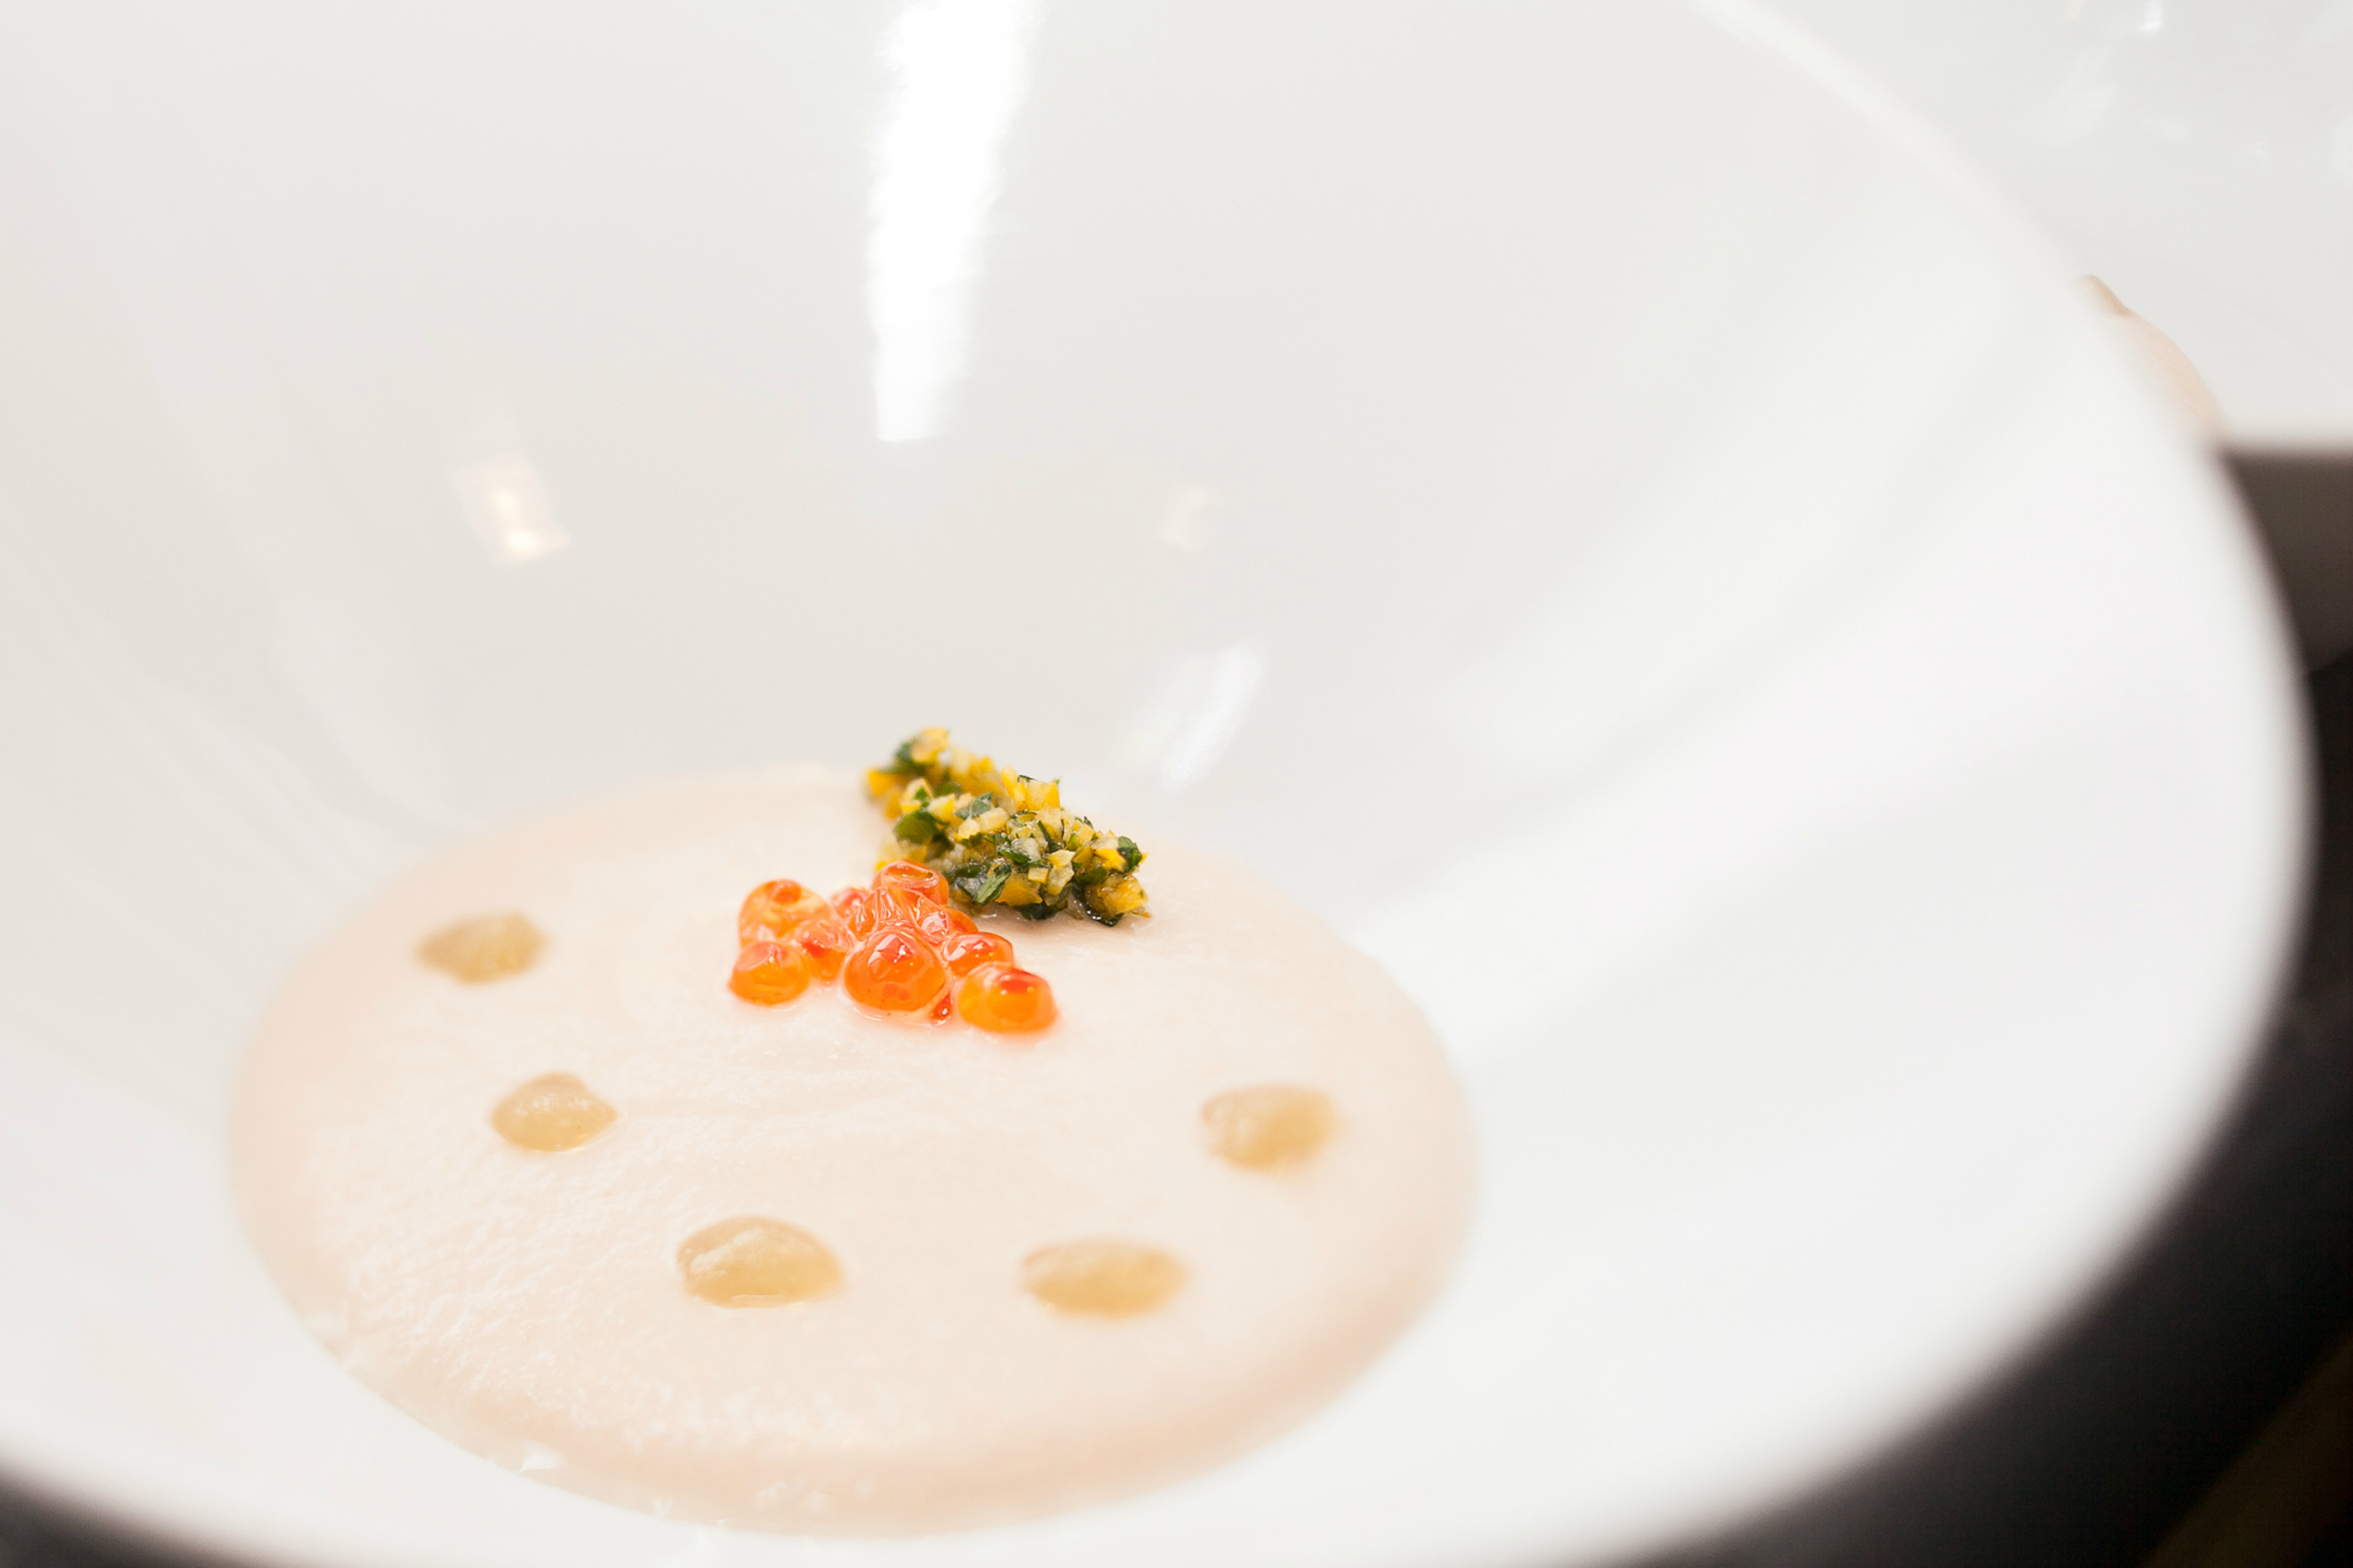
A pear gazpacho with pickled pear, Meyer lemon and parsley gremolata. Credit: Copyright 2016 Louis Habeck
Expanding upon these ingredients and flavors, Lilac’s menu builds from the ground up. “The sense of accomplishment you get from seeing a project from beginning to end is a soulful experience,” Engebretson says. “I believe that to be true in those who do things like make pasta, as well as those who make things such as tables.”
And Lilac’s staff makes pasta. Lots of it. Every day. They also butcher whole animals, grind beef, concoct salad dressings, craft ice creams and bake bread — all this (and more) in a kitchen so tiny no casual observer could imagine such an enthusiastically artisan stream of activity pouring from it.
These close quarters are part of what crafts a deeply committed team, comfortable in the back of the house and the front. Ask any server or chef at Lilac where an ingredient comes from, how a dish is prepared or what they’d recommend, and they can tell you, because they know. They’ve done it. Chefs and cooks share their intimate knowledge as they serve from a seasonal menu.
Dishes range from duck fat fingerling potatoes to octopus fritti, wild boar chop with cornbread dressing, roasted parsnip and a maple mustard glaze to a vegetarian option: grilled zucchini naan with gruyere, ancho aioli and micro salad. At the same time, servers make gnocchi, manage the pantry and prep desserts, like the sticky toffee pudding, which has been on the menu since Lilac opened with every component made in-house.
Innovative but approachable
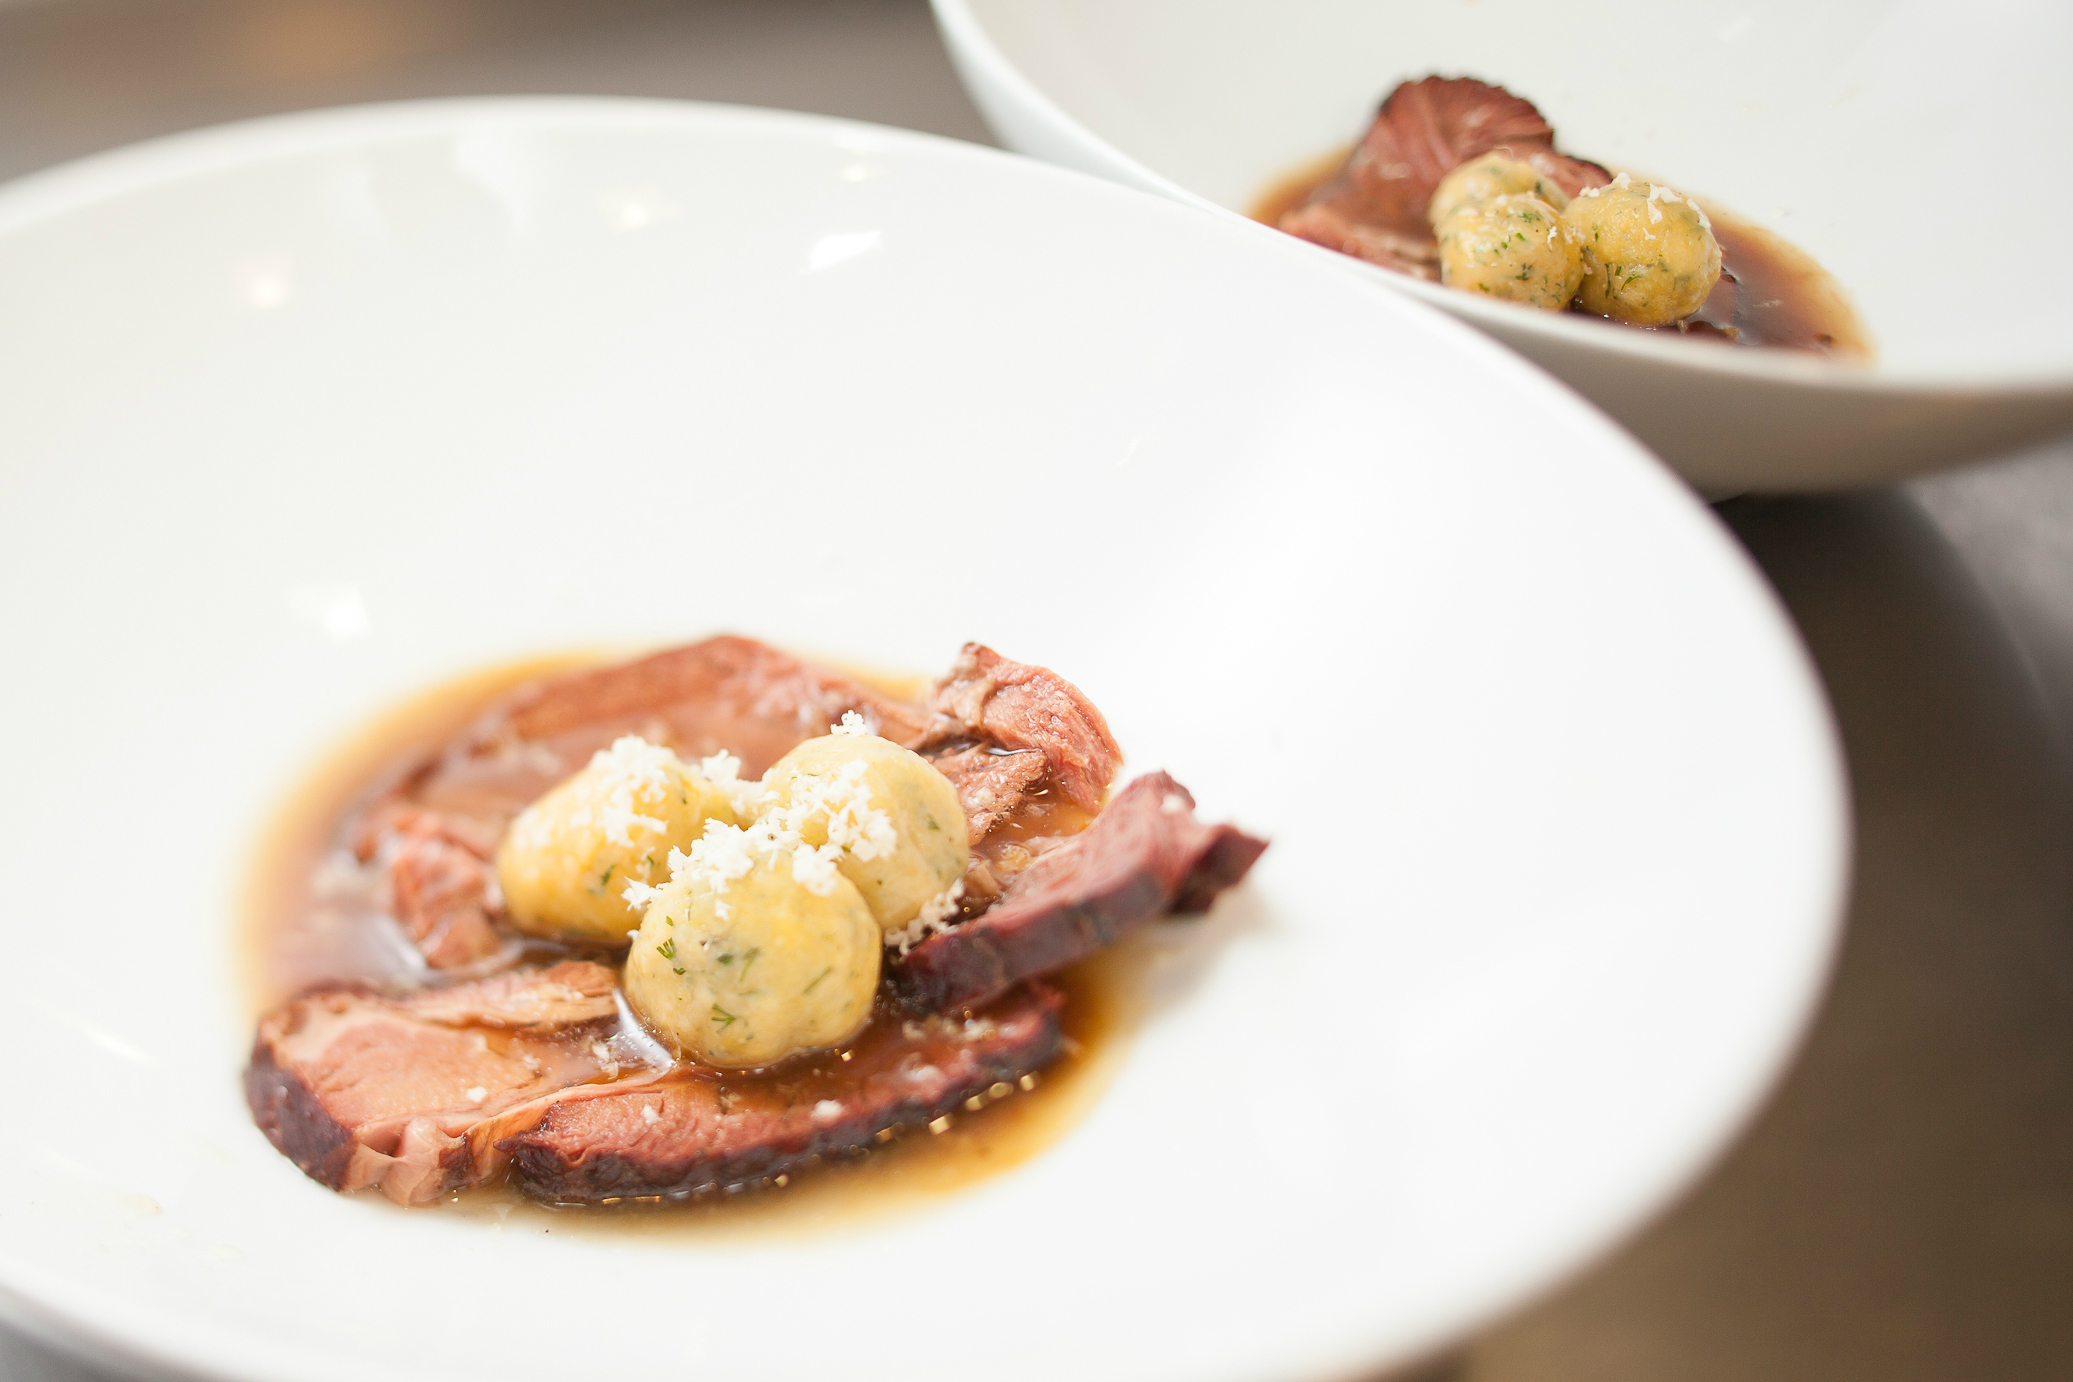
A smoked brisket with cheddar dumpling, roasted carrot and horseradish. Credit: Copyright 2016 Louis Habeck
Describing the restaurant’s style as modern American cooking, Engebretson asserts, “Modern and approachability go hand in hand.” The cheeseburger with bacon jam and house-made fries is a constant on the menu, and Engebretson insists it always will be. Concurrently, he says that modern American cooking means embracing all “the ingredients, technologies and ideas that speak to us today.”
It can mean hydrocolloids, sous vide cooking and variations on flavor profiles, as well as interpretations of classic dishes, traditional techniques and a heritage focus.
Serving up dishes with a uniquely Montana sensibility, Lilac aspires to a dualistic set of goals that unite innovation, frankness and a strong sense of purpose. In one vein, the restaurant endeavors to “blend a myriad of philosophies” at a democratic price point. “At the same time,” Engebretson pragmatically states, “one can say we’re just trying to serve people dinner. The variance of those two elements encapsulates the challenge of the restaurant, on every level. I’m OK with that.”
Main Photo: Lilac has been open since 2012 on historic Montana Avenue in downtown Billings, Montana. Credit: Copyright 2016 Louis Habeck