Articles in Holidays
Instead of buying candy to serve at home or give as gifts, flex your culinary muscles and make your own. It’s easier than you think.
For years, a close friend has always given gifts she makes herself. She believes strongly that a homemade gift expresses the character of the giver so much more than a store-bought gift.
Making chocolates requires a few specialized tools, some of which may already be in your kitchen. A double boiler or two saucepans that can fit together is essential. A Silpat or nonstick sheet is also very important. A silicone spatula is better than a rubber one.
Making individual chocolates is infinitely easier and more elegant if you invest in hard plastic or silicone molds.
If you want to make chocolates, be prepared to do a lot of tasting in your search for good quality, bulk chocolate. Before you buy, read the label. Look for natural ingredients. Avoid chocolate with artificial flavorings and additives.
Good chocolate is going to be more expensive than lesser quality chocolate, but it is worth the price. This is an instance when it’s worthwhile to splurge.
You might have to sample a few types to find a chocolate that suits you. You want a chocolate with clean flavors and a good mouth feel. If the chocolate tastes gummy or has an aftertaste, then try another.
I found two chocolates I thought were good. To make my candy, I discovered that instead of one chocolate, I liked using both. Equal amounts of milk (33 percent cocoa solids) and semi-sweet dark (72 percent cocoa solids) chocolate worked well because they complemented each other. The milk chocolate was sweet and creamy. The dark chocolate had more bite and was less sweet.
Then I experimented using different nuts and flavors. Hazelnuts, peanuts, almonds and walnuts worked well, as did vanilla, espresso syrup, crystallized ginger and candied orange peel.
I quickly learned a few lessons.
Less is more is certainly true with chocolates. Almond slivers were better than a whole almond in the small chocolate bars I was making. Barely a quarter-teaspoon of finely chopped crystallized ginger was more than enough to flavor a mini chocolate bar.
If you have parchment paper or a Silpat sheet, you can make a beautiful chocolate sheet, studded with bits and pieces of dry roasted nuts or flavorings like crystallized ginger.
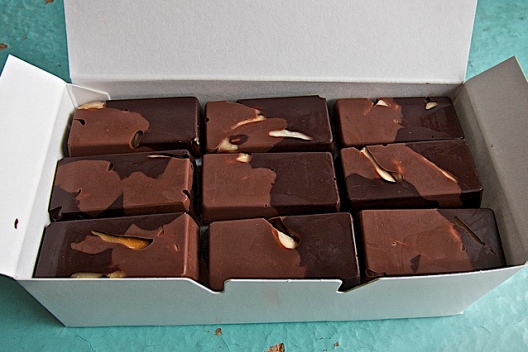
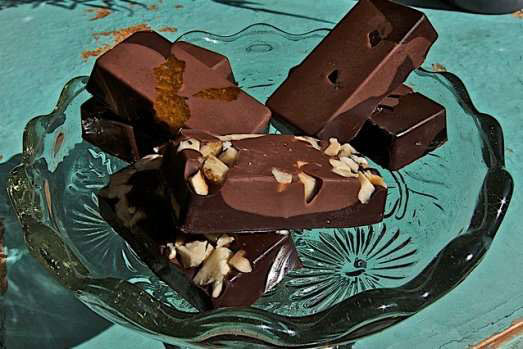
If you want to make individual chocolates, you will need hard plastic or silicone molds, which come in dozens of fun shapes: stars, hearts, rounds, squares, unicorns, horses, leaves, flowers, jewels and — my personal favorite — mini-candy bars.
Once you have made your chocolates, store them in an air-tight container in the refrigerator, using waxed bakery tissue between layers to prevent sticking.
If you want to give your chocolates as a gift, many kitchen and professional restaurant supply stores and Websites, sell candy boxes that are perfect to box up your treats.
Homemade Chocolates
Serves 6-8
Ingredients
¼ pound good quality milk chocolate
¼ pound good quality dark chocolate
¼ cup raw, slivered almonds
1 teaspoon sugar
Directions
- Use two double boilers or 4 saucepans to separately melt the two chocolates. Fill the bottom part of the double boiler or one saucepan with water, being careful that the bottom of the top or second saucepan doesn’t not touch the water.
- Break up the chocolate and place the milk chocolate into one saucepan and the dark chocolate into the other. Stir occasionally as the chocolate melts.
- Lower the temperature for 5 minutes, stir and then raise the flame again so the water simmers as it did before. This will temper the chocolate so it achieves a good finish. Be careful not to over heat the chocolate. That will granulate the chocolate and make it bitter. Keep the water in the bottom pan gently boiling so the chocolate stays in a liquid state. Add water as needed.
- While the chocolate is melting, place the almonds in a frying pan on medium heat. Toss and sprinkle with sugar. Keep the pan moving as the sugar liquefies. Coat the almond slivers, remove with a silicone spatula and let cool on a Silpat sheet or parchment paper.
- To make one, large chocolate sheet, pour dark chocolate onto the nonstick or parchment sheet placed on a cookie sheet. Press a flat knife against the sides of the chocolate to create a rectangular shape. Sprinkle the almonds on the top. Pour the milk chocolate over the almonds. Use a clean, flat knife to keep both chocolates in the rectangular shape. Let the bottom layer be larger than the top so there is a colorful contrast between the two chocolates.
- Place in the freezer uncovered for 10 minutes. Remove and refrigerate until ready to serve. If any chocolate in the saucepan is unused, use a silicone spatula to remove the chocolate from the sauce pan, place in an airtight container and refrigerate to use at a later date.
- To store the chocolate sheet, peel off the nonstick sheet and place into an airtight container. To serve, place the chocolate sheet on a platter and accompany with ice cream or whipped cream.
- To make individual chocolates, use a silicone baking or candy-making mold. Pour a small amount of one chocolate into each mold section, drop in 2-3 almond slivers and layer in the second chocolate. Place the mold on a cookie sheet, put in the freezer 10 minutes until the chocolate sets. For storage, remove the individual chocolates from the mold, place in an airtight container with waxed bakery tissue between the layers to prevent sticking and store in the refrigerator.
- The chocolates can be served either cold, straight from the refrigerator so they are crisp, or allowed to come to room temperature so they are soft. Serve on a decorative plate or platter.
Variations
- Instead of almonds, use chopped dry roasted peanuts, pecans or hazelnuts.
- Instead of nuts, use finely chopped crystallized ginger.
- Instead of nuts, use finely chopped candied orange peel.
Zester Daily contributor David Latt is a television writer/producer with a passion for food. His new book, “10 Delicious Holiday Recipes” is available on Kindle. In addition to writing about food for his own site, Men Who Like to Cook, he has contributed to Mark Bittman‘s New York Times food blog, Bitten, One for the Table and Traveling Mom. He continues to develop for television but recently has taken his passion for food on the road and is now a contributor to Peter Greenberg‘s travel site and the New York Daily News online.
Photo: Chocolate mini-candy bars with caramelized almond slivers in a candy box. Credit: David Latt
This is eggnog season, and we all know eggnog is flavored with rum, or maybe whiskey.
But not necessarily. Mediterranean sweet wines work beautifully, and they’re even more traditional.
The word “eggnog” doesn’t show up until the early 19th century. It’s a bit obscure — the Oxford English Dictionary connects it with “nog,” which was a sort of strong ale made in East Anglia, but it might more logically be connected with “noggin,” which meant a small quantity of liquor or a mug (before it became a quaint old-fashioned slang word for the head). Or who knows, all these words might be connected.
At any rate, eggnog is just one member of an English family of hot sweet drinks of milk or cream mixed with some kind of liquor. There had been drinks called caudles and possets at least since the 17th century. Originally, possets were enriched with nuts and were partly drunk, partly eaten, from special posset cups. All these drinks were considered soothing and digestible and a proper treatment for the common cold. In the original 1896 edition of “The Boston Cooking-School Cookbook,” Fannie Farmer still placed her eggnog recipes in the sick-room food chapter.
No kidding, it’s rich
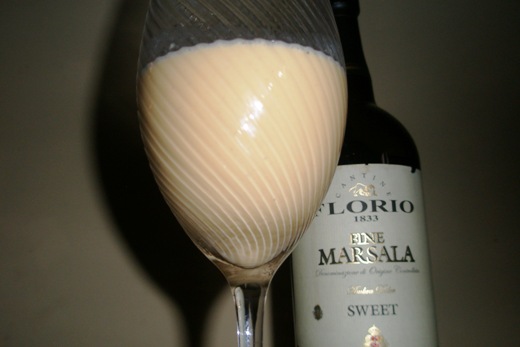
The direct ancestor of eggnog might be the sack posset, which was made with sack instead of rum or whiskey. “Sack” was the general name for raisiny Mediterranean sweet wines such as sherry, Marsala, Malaga and others we’ve forgotten, such as Canary and Mountain. Personally, I prefer Marsala for this recipe, which comes from “Kidder’s Receipts,” a 1740 manual of dishes taught at Edward Kidder’s cooking school for those who might be required to prepare “cuisine suitable for the corporate dinners of aldermen and lawyers.”
Kidder’s original recipe calls for eryngo, an ingredient you just don’t see any more. In its day, though, eryngo was hot stuff, literally. It was considered an aphrodisiac, which is why Falstaff calls for the skies to “hail kissing-comfits and snow eryngoes” in “The Merry Wives of Windsor.” Eryngoes were the candied stems of a thistle-like member of the carrot family. (Kidder refers to eryngo roots; he might have been confused, or he might have been leaning a little too heavily into his own sack posset.)
Anyway, by all means add eryngoes if you have them. Maybe they turn this drink into the culinary equivalent of mistletoe. And by the way, other old sack posset recipes used milk instead of cream and cinnamon in place of nutmeg, so there are some other possibilities in old school nog.
Sack Posset
Makes 5 or 6 servings
Ingredients
Directions
- Separate 7 of the eggs and discard the whites. In a mixing bowl, beat the 7 yolks and 7 whole eggs with the sugar and sherry. Beat on high speed 30 seconds.
- Put the cream in a saucepan with the nutmeg or cinnamon and bring it to a full boil, 7 or 8 minutes.
- Slowly pour the boiling cream into the eggs, whisking constantly until thoroughly blended.
- Cook over medium heat, stirring constantly until the texture is distinctly thickened, the eggs no longer smell raw and if you stir in one direction and remove the spoon, the liquid quickly stops moving, 6 or 7 minutes. The temperature will be 159 or 160 degrees F.
- Immediately transfer the posset back to the mixing bowl to stop cooking and serve.
Zester Daily contributor Charles Perry is a former rock ‘n’ roll journalist turned food historian who worked for the Los Angeles Times’ award-winning Food section, where he twice was a finalist for the James Beard award.Photo: Sack posset. Credit: Charles Perry

On Christmas, many Sicilians in the province of Catania will make a magnificent baked rice timbale, a feast dish shared with many friends and family, called tummàla. Although tummàla is a Christmas specialty, Sicilian cooks prepare it for all sorts of celebrations warranting a grand culinary gesture.
The Arabs introduced rice to Sicily in the 9th or 10th century, and tummàla is considered a representative example of cucina arabo-sicula, the folkloric expression of a vestigial Arab culinary sensibility found in contemporary Sicily, some 800 years after the last of the Arab-Sicilian population disappeared.
The Italian translation of the Sicilian tummàla is timballo, leading one to believe that this dish is derived from the French timbale. In fact, the name comes from Muhammad Ibn al-Thumna, the 11th-century emir of Catania, or from tummàla, the purported Arabic name for a certain kind of earthenware plate. Traditionally, this dish is made with a chicken with its unborn eggs. The cheeses — pecorino pepato, caciocavallo and fresh mozzarella — can be found in Italian markets, gourmet cheese shops or better supermarkets, and all of them can be ordered online through www.pastacheese.com. (You can receive a discount on cheeses by clicking on the pastacheese.com banner on my website, www.cliffordawright.com). The first cheese, pecorino pepato, is simply a young pecorino cheese made with peppercorns thrown into the curd. The mozzarella is used in place of fresh tuma, a fresh pecorino cheese only found at the source of production, so it’s not available in this country, although a young tuma between 3 months and 6 months old can be found in Italian markets. Caciocavallo, a spun-curd cow’s milk cheese, can be replaced with provolone.
This modern recipe is probably an invention of a 19th-century monzù, one of the French-trained chefs of noble families. But don’t let the list of ingredients intimidate you. Great length, in this case, does not mean great difficulty.
Tummàla
Serves 8 to 10
Ingredients
For the chicken and broth:
For the veal croquettes and sausage:
For the tummàla:
Directions
- In a large stock pot that will fit the chicken comfortably, place the chicken with its gizzards, onions, celery stalks, tomatoes, parsley sprigs and peppercorns. Cover with cold water and bring to a near boil over high heat.
- As soon as the water looks like it is going to boil, reduce immediately to a simmer and cook the chicken until the meat falls off the bone when pushed with a fork, about 2 hours. Don’t let the water boil or it will toughen the chicken.
- Meanwhile, prepare the veal croquettes. In a bowl, soak the fresh bread crumbs in the milk. If the mixture looks soggy, squeeze the milk out. Add the veal, half of the pecorino pepato, the garlic, 2 tablespoons chopped parsley, ½ teaspoon salt and the pepper. Lightly beat 1 egg and add to the mixture. Mix well with a fork or your hands.
- Form croquettes the size and shape of your thumb. Cover and put aside in the refrigerator.
- Drain the chicken, saving all the broth in a smaller pot. Remove and discard all the skin and bones from the chicken and cut the meat into small pieces.
- In a large frying pan, cook the chopped onion in 1 tablespoon lard over medium heat until golden, stirring, about 8 minutes. Remove from the pan and set aside.
- Add the remaining lard to the pan and cook the veal rissoles until they are browned. Add the sausage and pork rind and cook for 10 minutes. Add the sautéed onion, the remaining 4 tablespoons parsley and the diluted tomato paste. Cook over low heat for 10 minutes. Set aside.
- Preheat oven to 350 degrees F.
- Bring the chicken broth to a boil and reduce by one-third.
- Pour 2½ cups broth into a heavy saucepan, bring to a boil, add the rice and about 1½ teaspoons salt. Cook, covered and without stirring, until al dente, about 15 minutes.
- Pour about ¾ cup of broth into the veal-sausage mixture.
- Drain the rice, if necessary, and mix it with the remaining pecorino pepato.
- Butter a 4-inch deep round baking dish or baking casserole and spread 1 cup of dry bread crumbs on the bottom, shaking vigorously to spread them thin so that they coat the bottom of the baking dish.
- Spread the rice on top of the bread crumbs, about ¾-inch deep. Spread ¾ of the chicken and ½ of the veal croquettes and sausage mixture on top of the rice. Make a layer of hard-boiled egg. Layer the mozzarella cheese on top of the eggs. Cover with the remaining veal and sauce. Spread on a layer of caciocavallo cheese. Mix the remaining chicken with the remaining rice and spread it on top.
- Beat the remaining 4 eggs lightly and combine with the pecorino romano. Season with salt and pepper. Pour the sauce evenly over the top.
- Bake until the top has a nice golden crust, about 1 hour. Check from time to time to be sure it doesn’t dry out. The tummàla can be served directly from the baking dish with the pan sauces or with tomato sauce.
Zester Daily contributor Clifford A. Wright won the James Beard / KitchenAid Cookbook of the Year Award and the James Beard Award for the Best Writing on Food in 2000 for “A Mediterranean Feast.” His latest book is “Hot & Cheesy” (Wiley) about cooking with cheese.
Photo: Santa Maria del Monte, a landmark in Caltagirone, Catania province, Sicily. Credit: Clifford A. Wright
Most American families who take food seriously during the holidays are now beginning to think about all they need to do for its preparation. In our family, it’s quite a production, beginning at least two weeks in advance and sometimes more.
But there’s one thing families often overlook, and that’s the holiday toast. Many people are perfectly happy toasting thanks for their bounty with a fine wine, a bourbon and water, or a beer, but our family cannot not have our homemade holiday eggnog. We have it at Christmas, and it’s really a joy at Thanksgiving.
Our eggnog is ridiculously rich, a bit involved to make, and we really only drink it for toasts, as to drink it continuously has alcoholic and caloric consequences. Nevertheless, it’s just too delicious to have only one glass, so we each have at least two, and some of us — usually my adult children — have even more.
Wright Family Eggnog
Serves 10
Make sure you have the finest ingredients: good bourbon, such as Woodford Reserve; a good dark rum, such as Myers’s; and the freshest eggs, whole milk and heavy cream — preferably not ultra-pasteurized, although that is fine to use.
Ingredients
Directions
- Set out three bowls, one larger than the other two. Separate 3 large eggs and put the yolks into the largest bowl and the whites into another bowl.
- Whisk the yolks until they are thick and lemon-colored. Add ½ cup sugar to the yolks and stir until the sugar is dissolved.
- In the second bowl, beat the egg whites and ½ cup sugar until the whites are very stiff but not dry.
- In the third bowl, whip the cream until it forms peaks and you have 1 cup of whipped cream.
- Begin combining the contents of the bowls by pouring about ¼ cup of bourbon over the yolks, stirring constantly.
- Then add the whites, a small quantity at a time, to the bowl with the rest of the bourbon, stirring and folding.
- Next, stir and fold in the whipped cream, the rest of the bourbon and the rum.
- Pour in the milk, stir gently, sprinkle with a little freshly ground nutmeg, stir and transfer to a punch bowl or a pitcher and chill for at least 2 hours.
This amount is good for 10 small one-drink toasts. Triple the recipe if you want to get blotto.
Zester Daily contributor Clifford A. Wright won the James Beard / KitchenAid Cookbook of the Year Award and the James Beard Award for the Best Writing on Food in 2000 for “A Mediterranean Feast.” His latest book is “Hot & Cheesy” (Wiley) about cooking with cheese.
Photo: Some of the ingredients for eggnog. Credit: Clifford A. Wright
Everybody loves apple pie, and everybody at the very least has warm feelings about pumpkin pie, which is practically a symbol of the holidays.
Apple and pumpkin, two seasonal ingredients. Hmm. Apple and pumpkin, apple and pumpkin.
Hey, why not combine them in one super-seasonal pie?
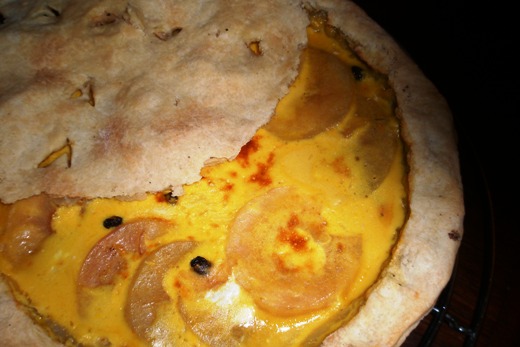
This edgy, avant-garde idea was already thought of 350 years ago. The leading English chef of the Restoration period, Robert May, gives a recipe for Pumpion Pie in his magnum opus “The Accomplisht Cook, or the Art & Mystery of Cookery.” It’s a wonderful pie, the apples giving perfume and juiciness to the pumpkin, and May’s pumpkin filling is nicely plush.
And it’s also exotic. It contains the usual pumpkin pie spices cinnamon, nutmeg and clove (plus pepper, which has a sweet aroma atop the pepperiness), but it’s also flavored with herbs: thyme, marjoram and rosemary. The herb flavoring works surprisingly well with pumpkin.
Or perhaps this is not so surprising. After all, winter squashes such as pumpkin are usually treated as vegetables, and herbs go well with them in a savory context, so why not in pie? I personally think rosemary is excellent in pumpkin pie, and if you ever have it at my house, there’s probably going to be some rosemary in it from now own.
But I’m also the kind of guy who likes to pump up the clove flavor by grinding cloves fresh. I recognize that a lot of people are reluctant to mess with the basic pumpkin pie recipe, which is practically set in stone because of its association with Thanksgiving.
Master the caudle
And the traditional Thanksgiving pumpkin pie tends to be very simple and straightforward because Thanksgiving spread around the country as a symbol of national unity after the Civil War. Pumpkin pie seemed a natural element in the great American feast because it seemed homespun and unpretentious, a symbol of sturdy Yankee self-reliance with no foreign frippery about it.
May’s recipe does admit the foreign frippery of currants, and it includes a typical 17th-century addition to pie, the caudle. This was a mixture of eggs and wine or other ingredients which was usually added to pie after it was baked, often through a hole poked in the crust. For this pie, you’re supposed to remove the whole top crust before pouring in the caudle.
I’m of two minds about this caudle business. It adds a pleasant bit of richness and a glamorous golden surface. On the other hand, it calls for six egg yolks, and this pie already contains 10 whole eggs. I’m thinking it may belong in the foreign frippery category.
An interesting thing about the filling is that May says to cook it before filling the pie. In fact, he calls on bakers to fry it “like a froise,” which was a sort of thick, eggy pancake, often containing bacon. This particular froise is so thick that it’s never going to turn into anything like a pancake because the bottom will burn before the top is ever done. You have to stir it like scrambled eggs (in effect it’s pumpkin scrambled eggs), which seems to give a pleasant crumbliness to the filling’s texture.
Robert May’s ‘Pumpion’ Pie
Serves 8
Ingredients
Directions
- Heat the oven to 350 degrees F. Line the pie pan with the bottom crust.
- Put the pumpkin in a food processor. Add the thyme, rosemary, marjoram, cinnamon, nutmeg, pepper, cloves, eggs and sugar, and process to a smooth soupy consistency. Transfer this to a buttered medium frying pan and cook over medium heat, stirring often, until thickened.
- Pour the filling into the bottom crust in a pie bpan. Sprinkle the currants over the pie filling. Peel and core the apples, cut in thin slices and arrange on top. Spoon the melted butter over the apples, affix the top crust and bake the pie until the crust is turning tan and you can hear bubbling, 35 or 40 minutes.
- At this point you can let the pie cool for a couple of hours in the usual way, or you can apply the “caudle.” To do so, slice around the top of the pie and lift off the crust. Pour the egg yolks and wine over the apple slices and return the pie to the oven until the caudle sets, about 7 minutes. Return the crust and let cool.
Zester Daily contributor Charles Perry is a former rock ‘n’ roll journalist turned food historian who worked for the Los Angeles Times’ award-winning Food section, where he twice was a finalist for the James Beard award.
Photo: Apple pumpkin pie. Credit: Charles Perry
Every November, the advice about roasting turkey comes fast and furious. But for rank beginners it’s a confusing world. What they’re looking for is hand-holding, and it just doesn’t exist. Besides, even if it did, whose hand do you hold? The celebrity chef with his hidden staff of 20 or your mother who consistently ruined turkey? Who do you believe with so many ideas and pieces of advice?
I cooked my first turkey probably when I was about 20 or 21 and away at college the year I didn’t come home for Thanksgiving. The one thing I remember was that it was a joint effort and we were all clueless. I don’t remember the turkey, but I bet it was dry and crumbly.
The reason it’s often late in life that we cook our first turkey is for years we’re always going home where our mom, aunt or grandmother does the cooking and we’re playing football waiting for food. Then suddenly, perhaps in our late 20s, we’ve got to cook a turkey. So we hit the cookbooks to find their myriad pieces of advice: Do this, don’t do that.
Here are the 10 steps to a perfect turkey, your first turkey. Follow these instructions and these instructions alone and you’ll be a happy camper.
- Place an order for a fresh turkey with your local butcher and pick it up the Wednesday before Thanksgiving. Do not freeze it. If it’s too late for that, place your frozen turkey in the refrigerator the Monday before Thanksgiving to defrost. Buy a turkey big enough to feed your party and to have leftovers for one or two more days. You don’t want enough leftovers for weeks or people will get sick of it. So for 10 to 12 people a 16- to 18-pound turkey is more than enough. A stuffed 18-pound turkey will take 4½ hours to cook at 350 F.
- A few days before you’ll cook, place an oven thermometer in your oven then set the oven to 350 F for an hour and see if it’s calibrated correctly. If it is not, make the proper adjustments.
- If you don’t have the following, buy them at the supermarket:
- an independent oven thermometer
- a quick-read thermometer
- a disposable aluminum roasting pan
- kitchen twine
- bamboo skewers
- a bulb baster
- aluminum foil.
- Decide whether you want a stuffing. Most people want stuffing. Choose your stuffing from a favorite cookbook or heirloom recipe. On Thanksgiving Day, remove the turkey from the refrigerator and remove the bag containing the gizzards and neck and use them to make a gravy (follow any recipe from any cookbook). Stuff the body and tail cavity, not too loosely and not too tightly. Preheat your oven to 350 F. Remove and discard any pop-up thermometer in the turkey.
- Make sure your work surface is large and uncluttered. After stuffing the tail cavity, make sure the skin flap covers the opening and lies flat on the counter. Take a long length of kitchen twine and wrap around the turkey so it encircles the bird and the wings are flat against the body and tie off tightly.
- Stuff the body cavity, then take a skewer and lace it through the two sides of the opening, as if you were stitching leather. When they are closed, the sharp point should be facing down. Use a length of kitchen twine and lace it around the skewer as if you were lacing shoes and tie it off. With another length of kitchen twine tie the ends of the legs together to further close up the opening. (Some turkeys come with a plastic hold on the legs to do this, which you can use). Place in the roasting pan and smear room-temperature butter on the breast halves, which is the top exposed portion. Sprinkle top and bottom with salt.
- Place in the oven and roast the turkey until some juice and fat has accumulated in the roasting pan. Baste by pulling the rack out a little and using the bulb baster to suck up some juices and then squirt it over the breast (mostly) and the legs. Roast the turkey 13½ minutes per pound and baste every 20 minutes. Be careful because the turkey could be done before the time you’ve calculated, so keep taking its temperature with the quick-read thermometer.
- When the turkey is three-fourths done, make a triangle with the aluminum foil and place over the breast meat and continue roasting.
- The turkey is done when the quick-read thermometer is 160 F measured in the breast. Push the thermometer in but make sure it’s not touching bone and not touching the stuffing. Remove the turkey and let it rest for 25 minutes before carving. This is important so the juices can sink back into the meat and so the meat won’t shred when you carve. When carving, the white meat is the breast meat and the dark meat is the thighs and legs.
- Cautionary note: You will see many cookbooks and temperature guides saying a turkey should be roasted until 185 degrees F internal temperature. This is absolute nonsense. Roasting to that temperature will leave you with crumbly dry meat.
Zester Daily contributor Clifford A. Wright won the James Beard / KitchenAid Cookbook of the Year Award and the James Beard Award for the Best Writing on Food in 2000 for “A Mediterranean Feast.” His latest book is “Hot & Cheesy” (Wiley) about cooking with cheese.
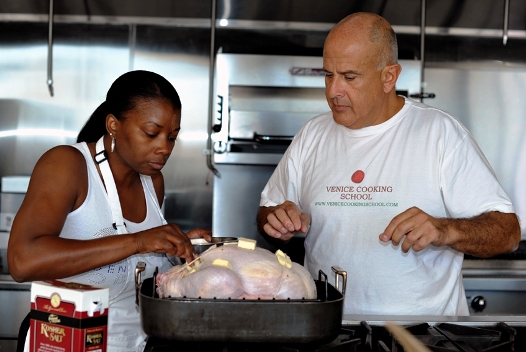
Photo: Clifford A. Wright with assistant Lori Alston preparing a turkey for students at the Venice Cooking School in Los Angeles. Credit: Michelle van Vliet
Stressed about planning a family Thanksgiving dinner? Overwhelmed at the prospect of planning a menu? Stuck trying to choose the perfect green vegetable for the big dinner?
Take the guesswork out of your Thanksgiving planning and follow this step-by-step plan for dinner, complete with a timeline. We even have you covered with the perfect just-like-homemade dessert.
The menu:
- turkey
- gravy
- cranberry sauce
- stuffing (baked separately)
- sweet potatoes on the side
- broccoli, boiled or steamed
- bumpkin pie
- Take turkey out of refrigerator.
- Preheat ove.
- Make pie.
- Make stuffing to bake separately.
- Trim broccoli, wrap and save in refrigerator.
- Make cranberry sauce.
- Make sweet potatoes, will go in oven with turkey.
- Season turkey and put in oven.
- Put big pot of salted water on stove with steamer basket.
- Set up coffeemaker.
- Clean up kitchen, take a shower and get dressed for company.
- Turkey’s done, can sit one hour.
- Pour juices off turkey, let fat rise in refrigerator.
- Make gravy.
- Stuffing and sweet potatoes done, will stay hot 30 minutes.
- Put wine and other drinks on buffet or table.
- Bring broccoli water to a boil.
- Carve turkey.
- Put cranberry sauce on table.
- Put baked stuffing and sweet potatoes on table.
- Cook broccoli.
- Bring broccoli to table.
- Meal time.
- Enjoy meal.
- Flick on coffeemaker.
- Serve pies.
Bumpkin Pie
The biggest surprise to new cooks is that canned foods usually avoided by purists aren’t across-the-board offenses. One of the most reliable canned products is pumpkin pulp (often labeled as solid-pack pumpkin). Without a real pumpkin to peel, boil or roast, seed and mash, these pies come together quickly. You don’t even need a mixer, only a whisk.
Here’s a shortcut sure to horrify culinary elites: Go buy a package of pre-made pie shells. You can get good quality, even whole wheat pastry. Thaw them slightly. They’ll be just soft enough to re-crimp the edges with your fingers so they look homemade.
Ingredients
Directions:
- Take crusts out of freezer to partially thaw. Preheat oven to 400 F. Set rack on lowest notch.
- Get out a big mixing bowl. Whisk pumpkin, cream and milk. Whisk in eggs one by one. Whisk until smooth.
- Whisk in sugar and spices.
- Re-form pie dough edges with thumb and forefinger to remove tell-tale stamped-out fork imprints, so they look homemade. Place pie plates on a cookie sheet (to catch any drips).
- Fill shells with pumpkin filling (each will hold about 2 cups)
- Bake at 400 F for 8 minutes. Set a timer! Reduce heat to 350 F and bake 35 minutes more. Pies are done when a knife inserted into center comes out clean.
Zester Daily contributor Elaine Corn is a James Beard Award-winning cookbook author and food editor. A former editor at the Louisville Courier-Journal and the Sacramento Bee, Corn has written six cookbooks and contributed food stories to National Public Radio.
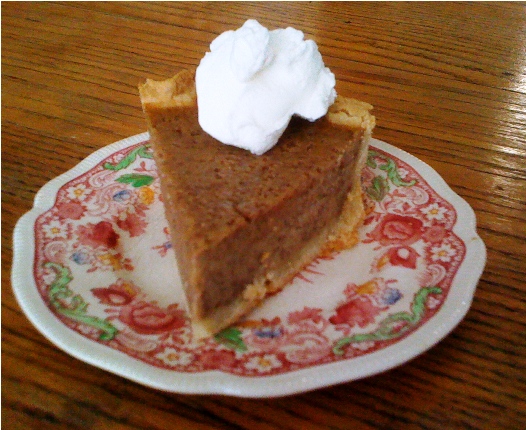
Photo: Bumpkin pie, on Grandmother Shirley Siegel’s china inherited by the author.
Credit: Elaine Corn
On the third Friday and Saturday of every November, in countless homes in America, smart cooks are preparing dishes based on leftovers from Thanksgiving. There are some wonderful dishes to be had on these days, and here are two great ways to provide delicious non-tiresome post-Thanksgiving dishes. The first — no big surprise here — is turkey soup. But this isn’t your mother’s turkey soup. Why settle for the same old soup when you can, with little effort, enliven it?
It begins with that beautiful roasted turkey carcass, the big chunks of leftover meat having been taken off, that goes into a stockpot and is covered with water and made into a flavorful broth. A good time to do this is Thursday evening once Thanksgiving dinner is over. Let the carcass simmer in the stockpot overnight, adding whatever vegetables you’d like to get rid of in your refrigerator such as an onion, celery, carrots, leeks, scallions, garlic, parsley, cilantro, sage or other herbs and peppercorns. Strain the broth Friday morning and reduce the remaining broth over high heat if you like a rich tasting stock.
Now things get interesting. First, you’ll make some crêpes that will be stuffed with cheese and folded over, placed in the soup bowl, and then soaked with the boiling turkey broth.
Turkey Soup With Gruyère-Stuffed Crêpes
Serves 4
Ingredients
Directions
- In a bowl, beat the eggs until frothy. Add the milk, flour, parsley, 1 tablespoon Parmesan cheese, salt and nutmeg. Beat some more, then set aside at room temperature for 20 minutes. (You can use a blender for this step if you like.)
- Over medium-high heat, heat a 9-inch crêpe pan or nonstick pan, then rub the surface of the pan with a little lard or oil, using a paper towel, so there is only a film on the surface.
- Pour in enough batter, 3 to 4 tablespoons, to cover the bottom of the pan, twirling the pan as you do it so the batter covers the entire bottom. The batter should be thin enough to spread rapidly, not slowly like pancake batter. Use the first crêpe as a test case.
- Once the crêpe is in the pan, cook until the top surface looks dry, then flip and cook the other side, about 1 minute in all. The earlier crêpes will take a little bit longer to cook and the latter ones less as the pan gets hotter.
- As they finish cooking, set the crêpes aside, making sure they cool before placing another one on top of them. Alternatively, separate them with sections of plastic wrap or aluminum foil as you continue cooking. The crêpes can be frozen at this point if desired or left at room temperature if using the same day.
- Sprinkle some Gruyère cheese on each crêpe, then roll them up tightly like a handmade cigar. Arrange 2 crêpes in each serving bowl, side by side, bending them if you must.
- Bring the turkey broth to a boil then ladle over the crêpes so the liquid only comes up to about a third of the crêpe. Cover and let the crêpes absorb the broth and serve hot.
Another great dish to make with Thanksgiving leftovers, especially if you have out-of-town guests who need to be fed (effortlessly) over that weekend, is a twist on a Lebanese dish called fatta. Fatta refers to a family of culinary preparations popular in the eastern Mediterranean in which pieces of stale, toasted or fried flatbread are crumbled and used as a foundation for a casserole. For a lighter dish, toast the bread rather than frying it.
Turkey Fatta
Ingredients
Directions
- Heat the oven to 350 F.
- In a large sauté pan, heat 1 cup oil over medium-high heat, until nearly smoking, then fry the bread until golden, about 10 seconds a side. Set the fried bread aside to drain on paper towels. Let the oil cool, then discard the oil and wipe the pan clean with a paper towel, or use another pan for the next step.
- In a large sauté pan, heat the extra virgin olive oil over medium-high heat, then add the onion and garlic and cook, stirring constantly so the garlic doesn’t burn, until the onion is translucent, about 5 minutes. Add the turkey, baharat and cinnamon, season with salt and pepper, and cook, stirring occasionally, until the turkey is heated through, 3 to 4 minutes. Set aside.
- Arrange the fried bread on the bottom of a 12-by-9-by-2-inch (or similarly sized) casserole. Cover with the turkey mixture and spread the yogurt over that. Sprinkle the walnuts on top. Bake until the yogurt is hot but not bubbling, 15 to 20 minutes. Serve hot.
Zester Daily contributor Clifford A. Wright won the James Beard / KitchenAid Cookbook of the Year Award and the James Beard Award for the Best Writing on Food in 2000 for “A Mediterranean Feast.” His latest book is “Hot & Cheesy” (Wiley) about cooking with cheese.
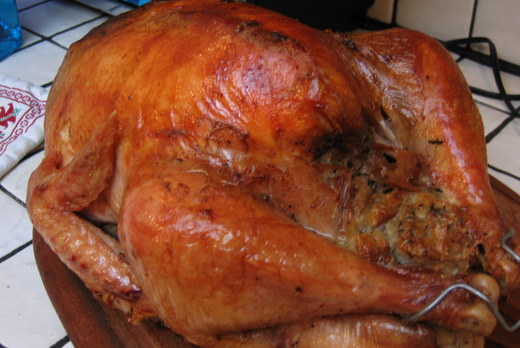
Photo: Thanksgiving turkey. Credit: Clifford A. Wright