Articles in Holidays
When apple cider is pressed from an orchard full of heirloom varieties, the result has all the complexities of the best vintage red wine, but the finish is as crisp and clean as water from a spring-fed stream. Cider this good can be served ice-cold in a glass and downed in one long draw, making it the simplest of holiday drinks.
But as good as it is, there’s still room for embellishment. Cider — hard or sweet — is enjoying a revival as the new “it” libation among the growing gluten-free crowd. And five minutes of prep time now will yield the perfect cocktail for a holiday party weeks away.
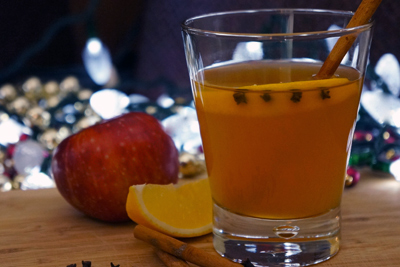
“Banjo Bill’s Anticipation” is a simple cider-based libation that comes straight out of old-time Arizona. Although the cocktail’s history stretches back to the late 1800s, you only need three to four weeks to steep the spiced rum that marries with fresh cider to create a rich, warm apéritif.
With a color that mimics the intensity of the surrounding red-rock landscape, this cocktail is the house signature drink at Garland’s Oak Creek Lodge in Sedona. Gary and Mary Garland have been serving cider-inspired cocktails at their historic rustic lodge for decades. But the inspiration for this one came from two other characters in the lodge’s history.
The first was a settler named William “Banjo Bill” Dwyer, who came to the Oak Creek Valley in the mid-1800s and was known to share spirited refreshments from his own whiskey still at the end of a hard day. He was born long before some of the dozen or so heirloom apple varieties were even planted in Garland’s orchard, but well in time to be one of the original lodge kitchen’s customers in 1908. The second source for the recipe was Forest “Captain Vacation” Hunter, a modern-day customer turned dining-room manager at Garland’s who dreamed up the home brew for the spiced rum.
Organic apple cider’s revival
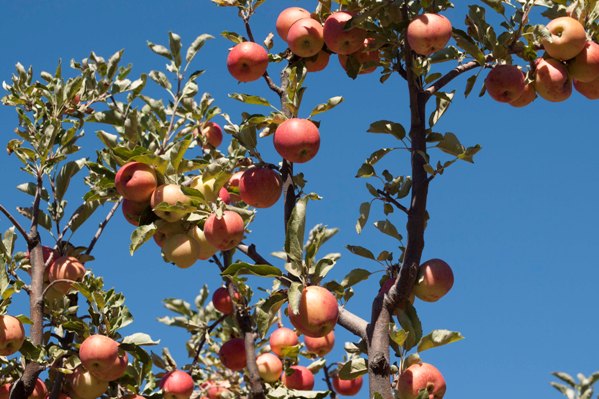
I first tasted this drink after an hour-long tour of Garland’s organic apple orchards and gardens. Rob Lautze, master orchardist, explained that the biggest, boldest cider flavor comes from blending a balance of sweet and tart varieties. In making Garland’s cider, he was lucky enough to have more than one dozen heirloom types to pick from, including Grime’s Golden, Star King Double Red, Spitzenberg and even one that Lautze named Thomas, a hybrid apple grafted from a neighboring orchard of Winesap and Arkansas Black.
The fresh cider served to me had been pressed the previous day, and it was proof that the best ingredients can elevate even the simplest of drinks to a deeply rich and nuanced flavor. The magic behind the recipe is its reliance on truly fresh cider, not processed apple juice, and homemade spiced rum created from fresh ingredients not found in common bottled brands.
Banjo Bill’s Anticipation
From Garland’s Oak Creek Lodge
If you want to serve this piping-hot spiked cider for the winter holidays, you should get started now — even if it only means assembling a few ingredients and hiding them away to steep until it’s time to bring out this rich, warm holiday grog.
Serves 1
Ingredients
1¼ ounce spiced rum (see below)
6 ounces fresh apple cider
Directions
1. Mix ingredients.
2. Serve hot, in a mug with a cinnamon stick garnish, or over ice with a garnish of lime or a sprig of mint in warmer weather.
Captain Vacation’s Spiced Rum
Ingredients
2 750-ml bottles of light rum
1 lemon
1 orange
2 fingers of fresh ginger, peeled and julienned (about 2 ounces)
4-5 sticks cinnamon
2 tablespoons whole cloves
1 tablespoon whole cardamom pods
1 tablespoon black peppercorns
Directions
1. Wash and dry lemon and orange, removing any residue from the surface.
2. Peel the fruit, avoiding the white pith under the peel. Place the peels into a large, clean glass container.
3. Add the remaining spices and the rum, making sure that it completely covers the peels, ginger and spices. Stir the mixture and cover the container tightly. Place the container away from heat or sunlight and let the mixture steep for up to 3 to 4 weeks.
4. After steeping, place a colander lined with cheesecloth inside of a large bowl. Pour the rum mixture into the colander and drain, using a wooden spoon to press out any excess liquid from the peels. Discard the peels.
Photo: Banjo Bill’s Anticipation. Credit: Caroline J. Beck

Apple butter might not seem like a traditional holiday food, but it holds a place of honor at my family’s Thanksgiving and Christmas table in Virginia. Stored in mason jars in the cellar or pantry until opened, then kept in the fridge, the apple butter gets its own special serving dish at my family’s holiday meals. Every few years we forget to put out the apple butter, but as soon as we start passing the homemade rolls, someone (usually my father) inevitably asks for it.
Because apple butter is traditionally made in the fall after apples are harvested, it also makes a great holiday gift.
In the Shenandoah Valley of Virginia, where I grew up, gallons and gallons of apple butter are made by groups of people who gather for an “apple butter boiling.” The results are then canned and sold as fundraisers for local churches, fire halls and civic organizations.
Not a hurried process
Making apple butter this way is a two-day process. It takes 15 to 18 bushels of apples to make a large kettle of apple butter, so preparing the apples is an event in itself. On the evening before the apple butter boiling, people gather to peel and core the apples and cut them into slices called “snits.”
The next day is devoted to cooking down the apples in a large copper kettle over an open fire. It takes hours to boil down the apples in a bath of apple cider and the pot must be stirred the entire time. It’s traditional to add 10 to 12 pennies to the bottom of the kettle as you start to boil the apples in the kettle. Nobody really knows why, but some people think it keeps the apples from sticking to the bottom and burning. There’s even a special way to stir the kettle and a rhyme to help remember how to do it.
Once around the side and twice through the middle,
Don’t you burn that apple butter ‘kittle.’
People in the community buy apple-butter from the communal “boiling” for themselves and to give as holiday gifts. I grew up in Winchester, the apple capitol of Virginia, so my perspective on apple butter may be slightly skewed, but it’s been my experience that you can find apple butter anywhere people grow apples, at least in this country.
However, if you don’t have a local civic group that takes two days to make apple butter for you, you’ll probably have to do it yourself. I don’t mean to imply that you can’t buy apple butter at the grocery store. You can. But it’s not the same. So this year I embarked on a quest to create the kind of apple butter I grew up with.
A new generation
My husband and I took our daughters to pick apples in our local apple country at a place called Oak Glen, Calif., about an hour and a half east of Los Angeles. When I told my dad what we were planning, he said, “I always wondered who went to those places. Seems smarter to have someone else do the hard work and pick out the good apples for you.”
Clearly, he is a man who grew up picking his own apples from his family’s small orchard. I was embarrassed at first, but also defensive when I said, “So you WANT your granddaughters to grow up not knowing how to pick apples? The phone line was silent for a minute before he replied, “Yeah, I guess you’re right.” Point made.
My family happily harvested apples at Riley’s Farm (and enjoyed the hay ride and other “old-timey” events). A few days later we began to make our own apple butter. My father happened to be visiting when we made the second batch. I’m pleased to report that he sat at my stove dutifully stirring the pot of apple butter for an hour and a half one evening. Such is my father’s love of apple butter and family.
The apple butter we made is so thick that it will pile up on a spoon and melt in your mouth. It is dark brown in color, generously spiced with cinnamon and cloves and never gritty. My recipe makes about nine half-pint jars so if you go to the trouble of making it, you’ll have plenty to share. That is, unless you’re a part of my family, in which case you’ll have to make at least two batches of the stuff for your own family’s use. That’s what I did this year and I think I might make another batch or two before the holidays roll around so I have some to give away as presents.
Country-Style Apple Butter
Yield: 9 to 10 half-pints
I am grateful to Phyllis Shenk and Betty Sheetz for sharing their apple butter recipe with me and allowing me to attend their family’s joint apple butter boiling about 10 years ago.
Both of these amazing women have since passed away, and I often think of them as I stir my apple butter “kettle.” Although they’d probably get a good chuckle at the “tiny” quantity of apple butter this recipe makes, I think they’d like it. I’m sure it would please them both to know that I’m teaching my daughters to love apple butter and to learn their traditional apple butter stirring-rhyme.
Note: This is not the fastest or easiest way to make apple butter. It’s still a two-day process, even without the open fire and copper kettle.
My recipe calls for using a combination of a slow-cooker and stirring a pot on the stove for several hours. Using the slow-cooker allows me to cut down on stirring time by about 1½ hours, while still getting the rich, dark color I like.
Ingredients
8 pounds of apples (Phyllis and Betty recommend using Ben Davis or Rome apples. They say never use Staymen because they cook up “stringy.” I’ve used a combination of Jonathans and Senshus with great success. Avoid overripe, mealy apples of all varieties.)
2 cups apple cider vinegar (5% acidity)
1½ tablespoons whole cloves
1 cinnamon stick
½ teaspoon ground cinnamon (optional)
1 spice bag (or a piece of cheese cloth with a string to tie it shut)
4½ to 5 cups white sugar (The total amount of sugar used depends on sweetness of the apples. You can also substitute light brown sugar for white sugar.)
½ teaspoon ground cinnamon (optional)
2 cups apple cider or water (Sometimes I need to add a little extra water to the pot during the second cooking phase on the stove-top if I turn the heat up too high during the cooking process.)
Directions
1. Wash, peel, core, and slice apples into at least 8 pieces about ¼ to ½ inch thick. You should end up with approximately 6 to 6½ pounds of sliced apples from 8 pounds of whole apples.
2. Warm the apple cider vinegar and 1 cup of water or apple cider in a medium sauce pan.
3. Place apples, spice bag containing the cloves and cinnamon stick, and warmed liquid mixture in a slow cooker. Cook on high, with covered lid, for 8 hours. Don’t do this overnight because you want to watch the cooking process to make sure the apples don’t scorch. The cooking time will depend on the heat of your slow cooker. If you have a high-powered slow cooker, cook on low heat.
If all the apples won’t fit into your slow cooker, you can place the extra apples in a medium sauce pan with at least 1 cup of the original liquid mixture. Heat the pot of apples and liquid mixture slowly on the stove and keep the pot covered. When apples in the slow cooker have cooked down a bit, add the softened apples from the pot into the slow cooker.
4. After 5 hours, open the lid and taste the liquid. Remove the spice bag if you like the flavor. For a stronger flavor, leave the spice bag in the mixture until you achieve the desired spiciness. Continue cooking for a total of at least 8 hours.
5. After 8 hours, the apples should be very soft. They will also have produced a large quantity of liquid. Cool the apple mixture and put it into the refrigerator overnight.
6. The next day, put the apple and liquid mixture into a large non-reactive pot and heat slowly, stirring constantly. If you don’t like slightly lumpy apple butter (as I do), you can run the apple mixture through a food mill or use an immersion blender to get rid of some of the lumps before you begin heating it.
7. Cook on medium-low heat, stirring constantly, for approximately 1½ to 2 hours until the apples are dark brown in color and have the consistency of slightly lumpy applesauce. Add 1 cup of additional water (or apple cider) if the pot starts to get dry before the apples have thoroughly cooked. Be careful to keep heat low enough that the mixture does not bubble up and burn you while you’re stirring the pot.
8. When the apple butter has thickened, add 4 ½ cups sugar, continuing to stir the pot.
Taste for flavor. Add up to ½ cup of additional sugar and ½ teaspoon of ground cinnamon if needed.
9. Continue to cook, stirring constantly, until mixture reaches desired consistency. To test for doneness, remove a spoonful and see if it mounds on the spoon. You can also put a small spoonful of apple butter onto a plate and watch to see if a rim of liquid forms around the mound. If it does, continue cooking until a spoonful of apple butter mounds on the plate without creating a puddle of liquid around it.
10. While apple butter is cooking, sterilize half-pint jars.
When apple butter is done, pour it into hot half-pint jars, leaving ¼-inch headspace. Wipe the rims of the jars and put on lids and screw rings. Process for 5 minutes in a boiling water bath following USDA recommendations.
Photo: Apple butter. Credit: Susan Lutz
Thanksgiving was not my favorite holiday when I was a child. First of all, no presents: Who needs a holiday with no presents? And then, the food: so boring, so mind-numbingly uniform in texture — dry turkey, mashed boiled squash, mashed boiled turnips, mashed boiled potatoes, boiled white onions in cream sauce, cranberry sauce from a can, Jell-O salad. This was not my idea of feasting. My mother was an excellent cook but somehow Thanksgiving seemed to try her skills — possibly she didn’t like that food any more than I did, but felt she had to prepare it, for tradition’s sake.
Turkey and Chex Mix
Every now and then, something delightfully different would happen, like the year she decided on a succulent pork roast instead of turkey, or the time we all voted for lobster and no cranberry sauce for the feast. But when I think back, the best part was in the cut-glass relish dish handed down from Grandmother Hathorne. One side held celery sticks filled with a mix of blue cheese and cream cheese and the other had pimento-stuffed olives.
Later another innovation, served in an equally time-honored heirloom, was a curious salty – savory mix of mini pretzels, peanuts and cereal bits that I thought for a long time my clever mother had invented. But no, just now, while surfing the blessed Internet, I discovered it has a name, this mix, moreover a “registered” name: it’s called Chex Party Mix (check it out at Chex.com). The original was developed by the mythical Betty Crocker, doyenne of General Mills, back in 1955. That original has since mutated and you can now find recipes for Gluten-Free Tropical Island Chex Mix and Kentucky Bourbon Bacon Chex Mix along with a host of others. But I like to think the original, with its elusive flavors of Worcestershire, seasoned salt, and garlic and onion powder, is the true classic of American Thanksgivings.
Squash was the most problematic part of the meal, the unpleasant pablum texture of that boiled mash so integral to the Thanksgiving table. And don’t try to tempt me with pumpkin pie, similarly mashed to a sticky texture and ineptly disguised with an overlay of sugar and spice. To misquote that old New Yorker cartoon about spinach, I say it’s squash and I say the hell with it!
Squash, it turns out, is just another name, a Narragansett name in fact, for Olde English pumpkin, and it has an ancient, even venerable, history on these shores. For John Jocelyn, writing “New-England’s Rareties” back in 1671, squash or pumpkin was already “The Ancient New England standing dish.” Sliced diced squash or Pompion, he said was put in a pot on a gentle fire all day until it had sunk into a pottage, after which New England housewives “put to it Butter and a little Vinegar (with some Spice as Ginger . . . ) . . . and serve it up. . . with Fish or Flesh.” “It provokes Urin extremely and is very windy,” Jocelyn said. I rest my case.
Squash (aka pumpkin) redeems itself
It has taken me the best part of my life to learn to appreciate this vegetable of the unfortunate name. I’ve discovered only recently that great things could indeed be done with squash. Cut into French-fry sized fingers, rolled in a little seasoned flour, and deep-fried in olive oil, it reveals a whole new dimension of flavor. Sliced a little thicker and layered with onions in a baking dish, sprinkled with garlic, salt and pepper, plenty of olive oil and a thick dusting of grated parmigiano and bread crumbs, it bakes into a gorgeous gratin. Made into a pumpkin risotto (recipe below) or pumpkin-filled ravioli served with melted butter and sage, it brings glamour to the table.
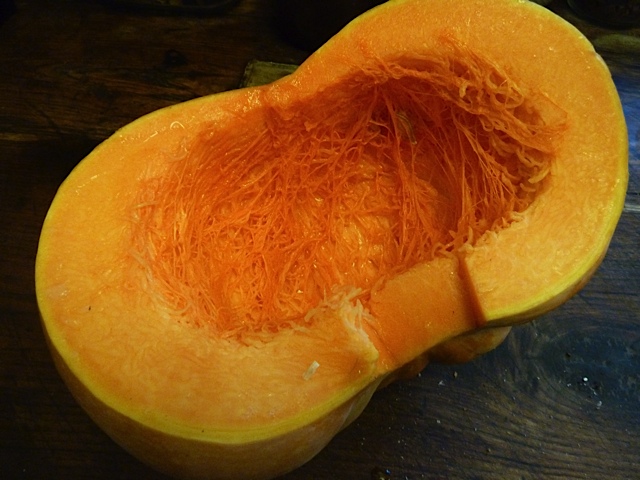
Which squash is which? This is a question for your local Ag Extension Service. Because we’re talking about November, we’re talking specifically about winter squashes, which includes an enormous variety from small thin-skinned Delicata to pale blue and warty Hubbards to so-called Cheese Pumpkins, a paler version of the Halloween treat. Acorns, Butternuts and Buttercups are probably the most familiar varieties in supermarket produce sections, but farmers’ markets will provide a much greater spread, including some Asian varieties, such as Kabocha (Japanese for pumpkin), that are delicious. Just steer clear of “pie pumpkins” or “sugar pumpkins” which have sweet flesh and are intended strictly for dessert.
My Thanksgiving table this year will be graced with this beautiful pumpkin (or squash, if you insist) risotto as a starter (after, of course, the platter of cheese-filled celery sticks and pimento-stuffed olives, plus the obligatory Chex Party Mix). My favorite cucurbit for this is a pumpkin called rouge vif d’Etampes, a French variety that is widely available in farmers markets. But butternut, acorn, Hubbard or other types of dark-yellow winter squashes will be fine too.
Pumpkin Risotto
Makes 6 to 8 servings
Ingredients
6 cups of chicken stock
¼ to ⅓ cup extra virgin olive oil
2 medium yellow onions, halved and very thinly sliced
1 small pumpkin or squash, peeled and coarsely chopped to make 2 to 3 cups chopped squash
2 or 3 sprigs fresh sage, slivered (optional)
2 cups arborio or similar rice for risotto
¾ cup freshly grated parmigiano reggiano cheese
1 or 2 tablespoons unsalted butter, or more if you wish
Sea salt and freshly ground black pepper
Directions
1. Heat the stock to a bare simmer and keep simmering very gently while you prepare the risotto.
2. In a heavy kettle or saucepan large enough to hold all the rice when cooked, gently sauté the onions in oil over medium-low heat until they are thoroughly softened but not browned. Add the pumpkin and stir well to coat the pieces with the oil. Cover and cook gently for about 5 to 10 minutes, until the pumpkin is soft enough to break it up with a spoon. If it starts to scorch, add a little water or stock. The pumpkin should be very soft, almost a purée.
3. Add the sage and stir into the squash.
4. Add the rice and stir to mix well while the rice starts to change color and become almost translucent. Now add a ladle or two of simmering stock and stir. As soon as the rice has absorbed the liquid, add more, and continue adding simmering liquid, ladle by ladle, stirring as you add. There should always be liquid visible in the pan. Do not add all the liquid at once; this will produce boiled rice instead of risotto. The rice is done when it is al dente, with a bit of a bite in the center. Each grain should be well coated with brilliant yellow sauce, which should be dense and rather syrupy looking. When it is done, the risotto should be thick enough to eat with a fork and not at all soupy. (You may not need to use all the stock.) Total cooking time varies from 20 to 30 minutes, depending on the degree of doneness that you’re looking for.
5. When the rice is cooked, remove the pan from the heat and immediately stir in about ¼ cup grated cheese and the butter. Add salt and pepper, cover the pan, and let it sit for 5 minutes to settle the flavors. Serve immediately, passing the rest of the cheese at the table.
For a holiday garnish take some fresh sage leaves and fry them in extra virgin olive oil, making sure the leaves are thoroughly dry before slipping them into the 360 F oil. Fry till crisp and drain on paper towels. Add a couple of fried sage leaves to each serving of risotto.
Photo: Halved Tuscan pumpkin. Credit: Nancy Harmon Jenkins

Like most Americans, I grew up equating Thanksgiving with turkey and pumpkin pie. To cap off the meal with any other dessert would have seemed un-American. Yet, after more than 30 years of eating pumpkin at the holidays, I started craving a new fruit. Enter the persimmon.
The Algonquin Indians called this squat, smooth-skinned, red-orange fruit putchamin. Found throughout eastern North America, the sweet persimmon was a favorite of Native Americans as well as European colonists who had learned from local tribes how to pick and consume it. In the 17th century, Virginia’s Capt. John Smith even boasted that, when ripe, this unique produce was as sweet and delicious as apricots.
By 1709, settlers had phonetically altered the fruit’s spelling to persimmon. They did not, though, radically change how they used it.
From the Native Americans the settlers learned to wait until a persimmon had ripened and fallen from the tree to eat it. Along with consuming it straight from the ground, they featured it in puddings, breads, preserves, cakes and pies. They turned it into “simmon” beer and wine, beverages that were particularly popular during Colonial times. They likewise dried it for later usage.
Ripe persimmons have sweet flavor

Hachiya persimmons. Credit: Kathy Hunt
What the settlers had understood is that, when green, a persimmon is more or less inedible. Its custardy flesh contains tannins that, unless the fruit has fully matured, make it pungently bitter. When ripe, though, it’s a creamy, honeyed treat.
My husband learned the ripeness rule firsthand when he plucked a hard, cherry-sized, yellowish-orange persimmon from a friend’s backyard tree. He bit into and immediately spat out the acrid flesh. It was, in a word, “horrible.” Only time and some culinary trickery could convince him to give persimmons another chance.
Although some gardeners insist it’s a myth, most believe that the fruit hits its prime after a good frost. Wives’ tale or not, I have popped immature, whole persimmons into the freezer overnight and then thawed them at room temperature. Defrosted, they became soft and delicious.
Persimmon season runs from September through December. Look for soft, deep reddish-orange fruit with all four papery leaves intact. Store at room temperature and consume within two days.
Before eating a persimmon, remove the leaves and seeds; I usually cut them out with a paring knife. You can then either scoop out the jellied flesh or slice the fruit and dig in.
While our ancestors enjoyed the petite American persimmon, today we mostly consume one of two larger, Japanese varieties, Hachiya or Fuyu. Similar to the American persimmon, the oblong Hachiya tastes best when fully ripened. The plump, tomato-shaped Fuyu can be eaten straight from the tree. No collecting of fallen fruit is necessary.
Fuyu and Hachiya possess a sweet, mildly pumpkin-like flavor. That’s why I consider persimmons a good substitute for the usual pumpkin pie. Similar to pumpkin, they go well with cinnamon, cream, ice cream and nutmeg. They also pair nicely with such common holiday ingredients as apples, cloves, ginger, pears, pecans, raisins, vanilla, walnuts, brandy and wine.
The beauty of persimmons is that they don’t require much effort to shine. After scooping out or slicing up the flesh, you can pulse it in a food processor or blender with a little vanilla, cinnamon and/or rum. Spoon the purée into dainty bowls and refrigerate until ready to serve.
In parts of the Southeast and Midwest, baked persimmon pudding remains a Thanksgiving favorite. Featuring puréed persimmons, buttermilk and spices, it’s a warm, tasty treat.
Puddings and purées may be nice, but I tend to prefer a more substantial dessert, such as a pie or tart. Easy to make, persimmon tart requires only four ingredients: puff pastry, sliced persimmons, butter and sugar. It’s a simple, sweet and delightful alternative to the old standby, pumpkin pie.
Persimmon Tart
Serves 6
Ingredients
4 tablespoons unsalted butter
⅔ cup sugar
½ teaspoon cinnamon
¼ teaspoon nutmeg
⅛ teaspoon ground ginger
3 to 4 ripe persimmons, trimmed, seeded and sliced (Use four if you are using smaller American persimmons or three if you use the larger Fuyu or Hachiya persimmons.)
1 sheet frozen puff pastry, defrosted
Directions
1. Preheat the oven to 400 F.
2. In a 9-inch, oven-safe pan melt the butter, sugar, cinnamon, nutmeg and ginger over medium heat, stirring to combine.
3. Once the sauce has thickened slightly and turned a light caramel color, place the persimmon slices in the pan. Overlap them slightly and neatly. Reduce the heat to medium-low and simmer for 3 to 5 minutes, until the persimmons begin to meld with the sauce.
4. Place the puff pastry over the persimmons and tuck in the edges of the dough. Poke a few holes in the top of the pastry and then bake until the tart is golden and puffed up, about 20 minutes.
5. Remove the tart from the oven and cool slightly. Invert the tart onto a serving platter.
6. Serve warm with an optional side of vanilla or cinnamon ice cream.
Photo: American persimmons. Credit: Kathy Hunt
The first time I spotted a highbush cranberry bush (Viburnum opulus), I was riding my bike along a ditch in early December. Nestled up against the Rocky Mountains, it had been freezing hard for months by that time, and it was rare to see anything left to forage, let alone finding bright red berries. I had to stop my bike and investigate the fruit that had caught my eye.
There’s an old wives’ tale that if a bird won’t eat a fruit, it’s poisonous. It turns out that isn’t true for many fruits, including highbush cranberries. But nature has its own wisdom. While these cranberries are indeed edible, most creatures avoid them because they possess sourness and a scent verging on funk. As a forager desperate for material with which to play, I picked those highbush cranberries and have every year since.
Due to their musky scent, in my house, highbush cranberries have earned the nickname, “stinky sock berries.” The smell of them is so strong that I even go to the trouble to cook them outside, so that I don’t need to air out my home after making highbush cranberry sauce.
In North America, V. trilobum and V. edulis, are the preferred species because they are less bitter. The ones I have access to are the ones forager Sam Thayer has dubbed “bad” highbush cranberries, V. opulus. They are native to Europe, but here they are merely escaped ornamental plants.
Look for berries during frost season
True cranberries are a member of the Heath family. Highbush cranberries are in the Honeysuckle family, and are related to elderberries, which can also have a characteristic musk. Highbush cranberry fruit, or drupes, grow on a deciduous shrub that grows to about 12 feet to 15 feet hight. Its opposite, serrated, tri-lobed leaves resemble those of a maple tree.

Highbush cranberries. Credit: Wendy Petty
Historically, the bark of the highbush cranberry has been used for menstrual cramps, accounting for one of its common names, crampbark. In the spring, the shrub blossoms with fireworks-like bursts of white flowers, somewhat resembling hydrangeas with smaller flowers in the center, and larger sterile flowers bordering them in a ring. Highbush cranberry shrubs fruit in late summer, at first green then turning red. Each individual red berry contains a single flat disk-shaped seed.
There is some conflict as to whether to harvest highbush cranberries before or after the frost. To my palate, the V. opulus taste about the same before and after a frost, although they are softer and easier to run through a food mill after a freeze. The good news is that highbush cranberries are relatively easy to pick. The drupes can quite easily be pulled from the shrubs without a mess.
Some good food comes with a little funk
Despite their detractors, stinky-sour “bad” highbush cranberries have their uses. Some of the world’s most sought-after foods have a distinctive funk. Can you imagine haute cuisine without pungent foods like cheese and truffles?
Long cold winters with few plants to forage force quite a bit of creativity. Highbush cranberries possess a strong flavor, to be sure. But used with a deft hand, they are a great pair with game meats, offal and other strong flavors. One of my favorite ways to serve highbush cranberry sauce is with liver.
Needless to say, highbush cranberries are a food for adventurous palates. However, for those who dare to walk on the wild side, they can bring an unusual new flavor to the Thanksgiving table. Highbush cranberries marry particularly well with the darker, gamier meat of heritage breed and wild turkeys.
Highbush Cranberry Sauce
Ingredients
3 cups highbush cranberries, stripped from stems
1 cup sugar
2 teaspoons orange zest
Juice of 1 orange
Pinch of salt
Directions
1. Pass the raw highbush cranberries through a food mill. Their disk-shaped seeds and skins should easily be left behind. You will be left with a pulpy red juice.
2. Pour the raw highbush cranberry juice into a heavy-bottomed pan and add the remaining ingredients.
3. Over medium heat, bring the ingredients to a low boil, so that large bubbles rise around the edge of the pot. Turn the heat down to medium-low so that the mixture remains at a low boil.
4. Continue to cook, skimming off and discarding any scum that rises to the top of the pan, for 20 to 30 minutes, or until the highbush cranberry sauce resembles the texture of jam. Test this by dropping 4 to 5 drops onto a metal spoon and placing the spoon in the freeze for a minute. If the sauce is ready, it will resemble the texture of jam after being in the freezer. If not, it will still be runny, and will need to be cooked down further and retested until it has become jam-like in consistency.
5. Pour the hot highbush cranberry sauce into a sterilized jar. Let cool to room temperature.
6. Refrigerate the highbush cranberry sauce until you are ready to use it. It may be eaten cold, or warmed.
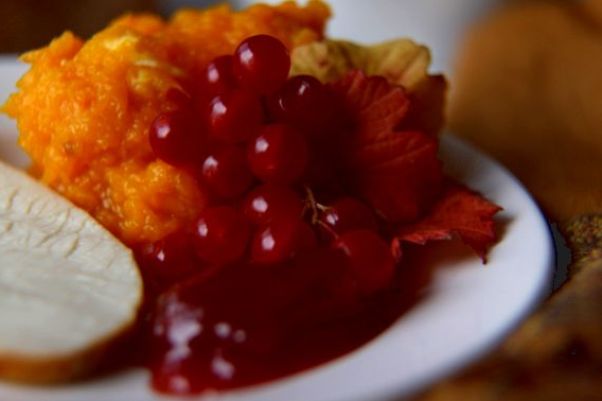
Photo: Highbush cranberry sauce. Credit: Wendy Petty

Turkey conversation season is upon us again, with our annual quest for a crisp, moist, perfect bird. Some swear by brining the turkey (or any poultry) in a bucket with spices and salt to improve flavor and texture. I’m a skeptic with a standard home kitchen. Our family is big, and so are the birds we roast to feed them. Do I really need to give my 18-pound turkey an overnight beauty bath? Is the mess worth the work?
I asked Chef Tony Maws, chef owner of the award-winning bistro Craigie on Main in Cambridge, Mass. Maws, a recent James Beard Best Chef Northeast winner, is known around town as a perfectionist. One of the pioneers of the locavore movement and nose-to-tail cooking, in his early days Maws was known as a chef whose standards were so high that local suppliers wept during deliveries to his restaurant as he inspected and refused their local bounty. Maws has mellowed a bit. But he’s still a stickler known for serving perfect poultry. He seemed like a good person to ask about brining.
It turns out that although he has a great brining recipe (see below), he doesn’t think it’s a make-or-break step for a turkey. He gets dozens of frantic calls from his regular diners around Thanksgiving, he says. “Foil, not foil? High temp, low temp? Turn the bird midway, or roast it standing up? Almost none of it matters since there is so much variability in cooking a turkey. But a lot of people do ask me about brining.”
Brining a turkey is
just one way to cook a quality bird
Maws thinks brining is just one of the things you can do to turn out a terrific bird. Brining, he explains, is an attempt to put two things into equilibrium by osmosis: the natural salinity of the fresh bird and the higher salt of the brine. The idea is that you can equalize the saline content in the bird and keep it moist and juicy and add a flavor kick to a pretty, plain protein without adding more salt. “The hard thing is that you can’t taste what is happening to the raw bird as it as brining, so you sort have to take it on faith.”
Maws says it never hurts a turkey — or any poultry — to be brined for six to eight hours or overnight, and it helps even more if you can rest the bird for another day out of the brine before serving, but he doubts it is practical for most households to add two more steps to a busy holiday ritual. “Brining is an effective tool, but sort of a hassle for a standard home kitchen. Very few people have the space to refrigerate a big turkey in a bucket of water overnight. Not everyone has a restaurant-scale walk-in.”

Tony Maws. Credit: Michael Piazza
“Look,” he says, rubbing his beard stubble with a faintly piratical smile, “I know it’s sacrilegious, but the idea of cooking a whole turkey in a standard stove and having it come out perfectly done is ridiculous. Breasts and legs need different amounts of time for optimal doneness. Even if you set your oven to 350 degrees Fahrenheit the temperature even in a fancy home oven fluctuates between 325 degrees and 425 degrees Fahrenheit. Between the corners of the oven and the contours of the bird, it’s always a different temperature at any given moment.”
Maws says when the breast is done, the legs still need some time. If you use the internal temperature of the legs as a guide, you dry out the breast. He’s given up on roasting a whole turkey and prefers to buy a good bird, break it down and roast it in pieces, removing the breast from the oven and letting the legs spend more time in the heat. According to Maws, the ideal interior temperature for a turkey breast is 143 F (62 C) and for the legs it is 150 F (66 C). As you can tell, he’s a pretty precise guy.
His suggestion for diehards married to the ooh-aah public presentation of a pristine golden bird: “Bring it out, show it around, take it back to the kitchen and put the legs back in the oven for 10 more minutes. That’s what the French do.”
Maws’ inflexible turkey rule: “Buy a good turkey. I’m not trying to be hippy-dippy, but all the things you read about free-range and natural birds are true. Turkeys are large, lean birds, much leaner than a plump, fat chicken, so you want to pay special attention to how the turkeys are raised and fed. The better and healthier the bird, the better the texture and flavor.”
Tony Maws’ Poultry Brine
Ingredients
5 liters of water, or less if you are using a brining bag for a 12- to 14-pound turkey
60 grams kosher salt
11 grams Kombu
1 teaspoon dried thyme
2 teaspoons coriander seeds
2 teaspoons fennel seeds
2 allspice berries
2 juniper berries
1 teaspoon chili flakes
2 cloves
Directions
Mix all the ingredients together in a bucket or container large enough to accommodate the turkey. Add the bird once thoroughly mixed.
Photo: A Thanksgiving turkey. Credit: iStockPhoto

There’s a lot of waiting on Thanksgiving Day. There’s waiting for family and friends to arrive, waiting for the turkey to roast, waiting for the potatoes to cook. All that waiting makes you work up an appetite, especially, and inevitably, when things run late.
Forget the sad bowl of nuts on the coffee table. Something warm and lovely is in order on Thanksgiving Day. Feed your guests a small bite to hold them over until the main event. These savory, autumn-inspired puffs are just the thing. They’re creamy, crunchy, and bite-sized and perfect with a glass of Champagne. They look fussy but are actually a breeze to pull together.
Pre-baked phyllo cups are found in virtually every supermarket and you can make the filling the night before. Now just don’t keep your guests waiting too long.
Pumpkin Sage Puffs
Makes 30 pieces
Ingredients
2 packages miniature pre-baked phyllo cups
2 tablespoons olive oil
½ small onion, minced
1 15-ounce can pumpkin purée
½ cup ricotta cheese
1 large egg
2 tablespoons chopped fresh sage
3 slices cooked bacon, chopped fine
Salt and freshly ground pepper
Directions
1. Place the phyllo cups on two baking sheets. Preheat the oven to 350 F.
2. Heat the olive oil on medium-high heat and add the onions and a good pinch of salt. Sauté the onions until soft and slightly golden, about 5 minutes.
3. To make the filling, whisk the pumpkin, ricotta, and egg together until smooth. Add the sage and bacon, and season with salt and pepper; stir to combine.
4. Fill each cup just to the top with the filling. (You can make the filling one day ahead and keep it in the refrigerator.)
5. Bake for 15 minutes and serve.
Photo: Pumpkin sage puffs. Credit: Laura Holmes Haddad

“It’s the end of an era,” I said to my close friend, Joyce, who was letting me know that this year her family would be having Thanksgiving in Vermont, where one of her married daughters now lives. For many years, Joyce’s family has spent the holiday with mine, and part of the pleasure in our being together was marking the progress of our children.
I am happy to say, all turned out pretty well, but one of the consequences of this success is that Joyce’s daughter now wants to cook her family’s Thanksgiving meal, so we will have to find other times of the year for both families to get together.
What is it about Thanksgiving that urges one particular family member to take on the responsibility of producing this traditional and very American meal? I can only speak for myself by pointing out the importance for me of storing up holiday food memories and reproducing the dishes I grew up with, remembering loved ones now gone but who I feel are with me at this time of year.
I think about them as I stuff the turkey, clean the vegetables, and bake the apple, pumpkin and pecan pies. So important to me are my family’s recipes that one year when I accepted an outside invitation I wound up cooking my own Thanksgiving dinner the next day. It seems another family’s traditional dishes just do not cut it with me.

Candied sweet potatoes. Credit: Barbara Haber
For instance, I do not like mashed sweet potatoes, especially if they have been baked with marshmallows on top. More welcome are the candied sweet potatoes my mother taught me how to make, always a hit at my table. One time a guest surprised me with a bowlful of creamed onions, prized by many but hated by me. That’s because I dislike creamed dishes, particularly if a thick white sauce enrobes something that is also white.
Everyone has a turkey technique
Clearly, I have strong feelings about what I cook, and I should mention that I take pride in how I roast a turkey. This is a problem for many, judging from the popularity of turkey holiday hotlines that serve the country every year.
My technique is to stuff the bird at the last minute, season it, then turn it on its stomach on a flat roasting rack for the first half of the cooking time. The turkey’s juices land in its breast and seem to guarantee a moist and tasty bird. There is nothing original about this method because I have seen it in print numerous times, but I don’t know anyone else who does it. Others make aluminum foil tents or do tricks with cheese cloth, but often still wind up with a turkey that is dry.
I pour boiling water into the pan, baste the bird with butter every half hour or so, then flip it over at half-time. That’s the hard part, considering that I am handling a stuffed 23-pound turkey. I have a special pair of oven mitts reserved for this purpose that always wind up incredibly greasy, so I launder them immediately and put them away for the next year.
Food, friends, family
We like to maintain our Thanksgiving traditions, and this desire is especially true for Americans abroad who yearn for a Thanksgiving meal. They search in vain for large raw turkeys, often settling for a bird that is scrawny and expensive or more likely a chicken. Cranberries, a quintessential American food, are also difficult to find in foreign stores.
Ex-pats sometimes find themselves in restaurants supposedly offering an American Thanksgiving dinner, but from all reports these dinners are disappointing, largely, I suspect, because family and friends are absent. Some Americans abroad stare forlornly at the Macy’s Thanksgiving Day parade on cable television they find somewhere. Being out of the country at Christmas is not as hard on people because other western cultures observe that holiday, and the American traveler will easily find a way to celebrate.
When it comes right down to it, the strongest appeal of Thanksgiving is that it’s all about food, friends and family, and, for the cook, the pleasure of offering a memorable meal to people who matter the most. I am going to miss Joyce and her family this year, though I understand why her daughter, Lauren, wants to start her own tradition and orchestrate her own meal, perhaps restoring dishes from her childhood that resonate for her.
I will be thinking of her at the start of my Thanksgiving meal, for she long ago pointed out something I was unaware that I said each year. She would wait for me to take my seat at the table after having masterminded the procession of serving dishes going into the dining room. As she tells it, I tuck in my napkin, take a forkful of food, then close my eyes and croon “Mmm. This is so good.” She claims I always say this and I believe her. For, as I already indicated, I like my own Thanksgiving dinner.
Candied Sweet Potatoes
lngredients
4 good-sized (not huge) sweet potatoes
4 tablespoons of butter
½ cup of dark brown sugar
4 tablespoons of water
Directions
1. Boil unpeeled sweet potatoes in water (to cover) until just done — not mushy. Let them cool, and then peel and cut into quarters.
2. Melt butter in frying pan 12-inch or larger. Add brown sugar and stir into the butter until sugar melts. Add water and stir until the syrup thickens.
3. Place quartered sweet potatoes into the pan and cook at a low heat, all the while spooning syrup over the potatoes, and turning them over. Keep on turning the potatoes and spooning over the syrup until the potatoes take on a coating and are candied. This takes about 10 minutes.
4. This dish can be made early in the day and then reheated and served with the rest of the Thanksgiving meal.
Photo: Sweet potatoes ready to be candied for Thanksgiving dinner. Credit: Barbara Haber